When our fearless leader, Kristen of We Are THAT Family, deemed this Works For Me Wednesday "Summer Recipes Edition," I knew just what I would make!
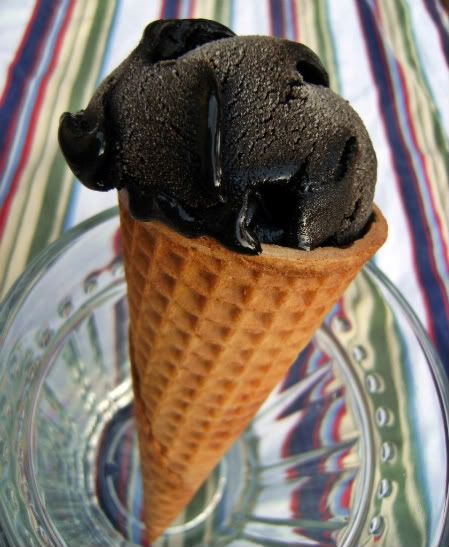
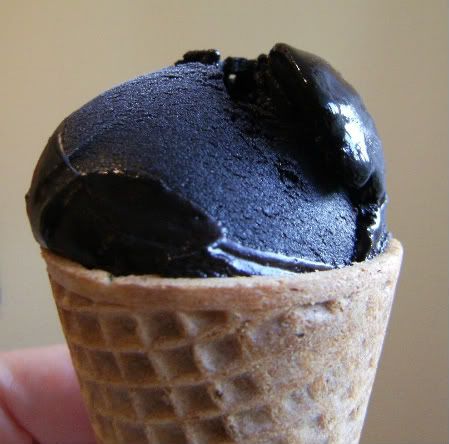
This Chocolate Sorbet comes from The Ultimate Ice Cream Book by Bruce Weinstein (great book). It's so simple and so decadent tasting, I don't know why I don't make it ALL THE TIME!!!
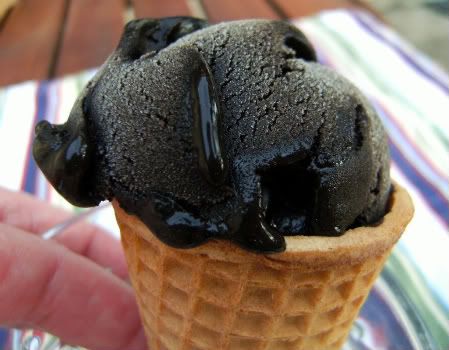
3 ingredients...that's it. It's dairy-free, gluten-free, fat-free, but more importantly....IT'S GOOD!!!
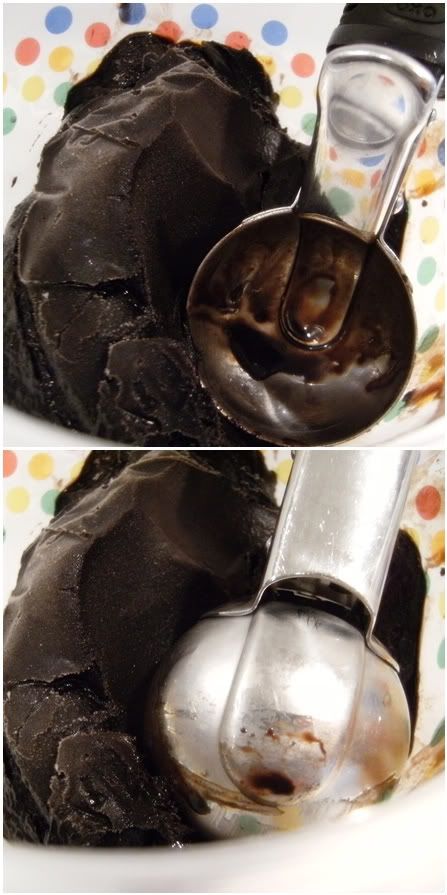
Chocolate Sorbet
(adapted from The Ultimate Ice Cream Book)
2 c. water
1 c. sugar
1 c. dutch-process cocoa powder
Combine the water and sugar in a saucepan over medium heat. Stir until the sugar dissolves. Whisk in the cocoa and continue whisking until the mixture comes to a simmer. Simmer for 3 minutes, whisking constantly.
Remove from heat and strain into a bowl. Let cool several minutes on the counter, then transfer to the refrigerator to chill at least 2 hours or overnight.
Stir the mixture and add to your ice cream machine, following the manufacturer's instructions. Remove and place in a freezer safe container; press plastic wrap down onto the top to prevent freezer-burn. Let harden a few hours. ENJOY! :)
A few more ice cream recipes to cool you off this summer:
Tuesday, June 30, 2009
Monday, June 29, 2009
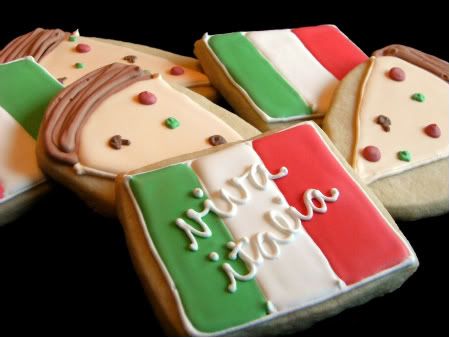
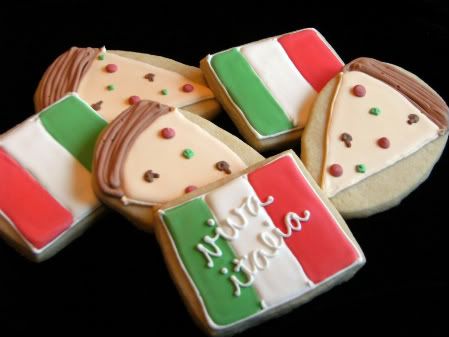
Viva Italia!
One of my favorite customers (ok....it was my sister) ordered these cookies for her father-in-law for Father's Day. He loves his Italian heritage...and when you come from the land of prosciutto, parmesan and amaretto, what's not to love?!?
We put our heads together trying to come up with "Italian" cookies. What did we came up with? Flags and pizza. :)
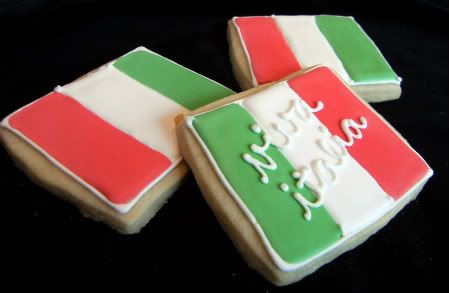
If you have an Italy lover in your life, you might want to consider making these flag cookies. They are really cute and a great cookie if you're just starting with flooding cookies:
We put our heads together trying to come up with "Italian" cookies. What did we came up with? Flags and pizza. :)
If you have an Italy lover in your life, you might want to consider making these flag cookies. They are really cute and a great cookie if you're just starting with flooding cookies:
- Using a #2 tip, outline the flag in white royal icing and divide into 3 sections. Reserve some of this icing for detail.
- Thin red, white and green icings with water until they reach the consistency of a thick syrup. Cover with a damp dish towel. Let sit several minutes.
- Run a rubber spatula through the icings and transfer to squeeze bottles.
- Fill in the sections of the flag, using a toothpick to guide into corners.
- Let dry at least one hour.
- If desired, switch the tip on the un-thinned white icing to a #1 and write "viva italia" across the flags.
Ciao Bella! ;)
Remember to enter the patriotic pancake pan giveaway!!! The winner will be chosen tomorrow (Tuesday)!
Saturday, June 27, 2009
Patriotic pancakes. . . .a recipe and a GIVEAWAY!!!
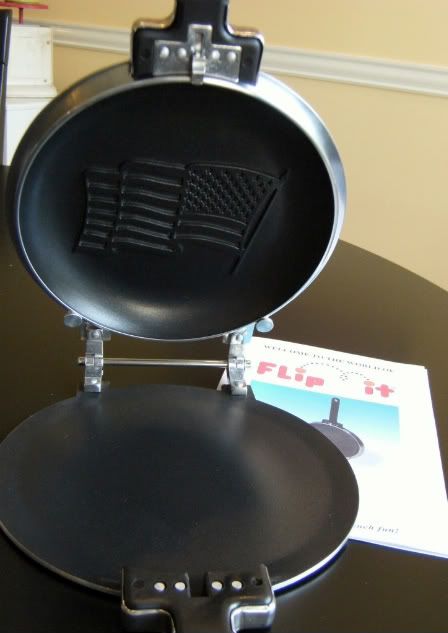
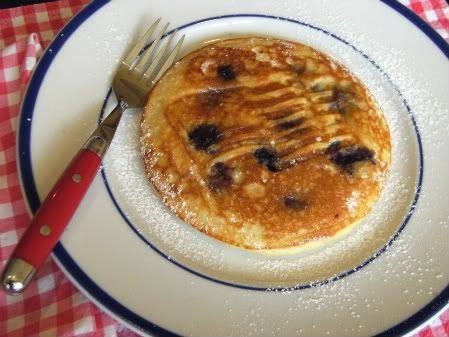
Yes, that's an American flag on my pancake!
***{Update: we now have a winner...Michelle of Lionden Landing. Congrats, Michelle! Have fun!}***
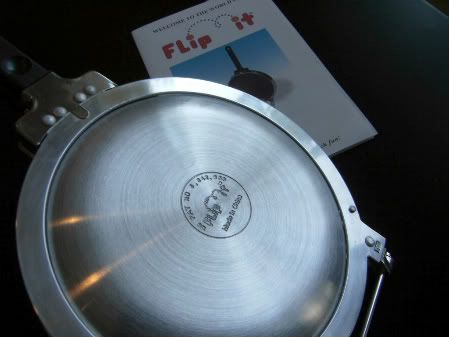
When the folks at Teflon.com contacted me and asked if I'd like to try their Flip It pancake pan and give one away....I said, "OF COURSE!"
The pan is pretty neat. It has a removable dish that imprints a pattern onto the food. Apparently, there are several patterns...even one that says,"Good Morning!" Wouldn't that be fun?!?
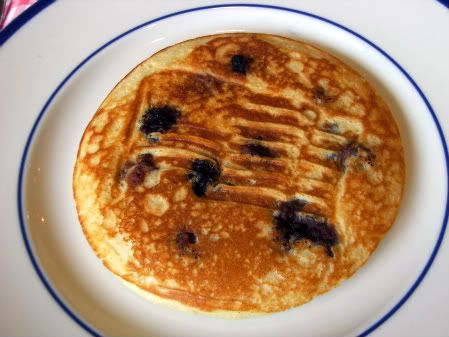
We gave it a try this morning for our Lemon Blueberry Pancakes and it worked great. My son said, "Oh, COOL!" upon seeing his pancake and didn't complain that his pancake was filled with blueberries instead of his usual chocolate chips! {Hey...I think we're onto something here.}
I can't wait to try this with grilled cheese sandwiches!
Here are a few tips I found helpful when using the Flip It.
1 large egg
1 c unbleached, all-purpose flour
3/4 c milk
1 TBSP sugar
3 tsp baking powder
1/4 tsp salt
1/2 tsp vanilla bean paste (or vanilla extract)
2 TBSP vegetable oil
zest from one lemon
a couple handfuls of blueberries
2 TBSP butter, melted for the pan
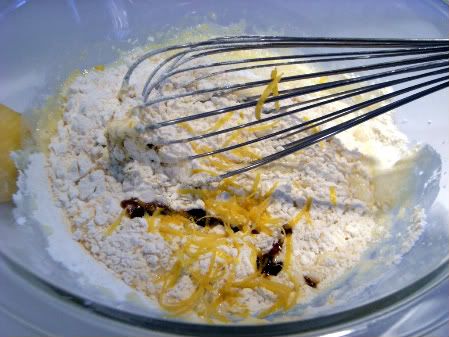
Whisk the egg in a bowl until fluffy. Add flour through lemon zest and whisk until smooth.
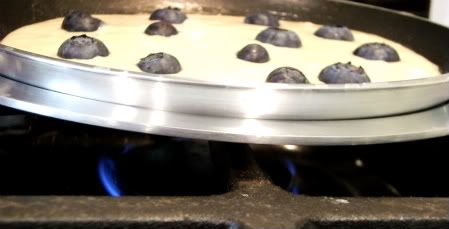
If using the Flip It pan, brush both sides with melted butter and follow the instructions for heating the pan. Add 1/2 c batter to the dish side and drop in blueberries. Cook until sides are dry and middle is covered with large bubbles. Flip and cook on remaining side, 3 minutes.
If using a regular griddle, pour 1/4 c batter on to preheated griddle. Drop on blueberries. Cook until sides are dry and middles are bubbly. Flip and cook until other side is golden brown.
Serve with butter and sifted powdered sugar.
Want one of your own? Just leave a comment and a winner will be chosen Tuesday, June 30th at 8am CST. PLEASE be sure your comment links to a blog or add your email in your comment so I can find you! :)
Good luck! Thank you, Teflon.com! :)
***{Update: we now have a winner...Michelle of Lionden Landing. Congrats, Michelle! Have fun!}***
When the folks at Teflon.com contacted me and asked if I'd like to try their Flip It pancake pan and give one away....I said, "OF COURSE!"
The pan is pretty neat. It has a removable dish that imprints a pattern onto the food. Apparently, there are several patterns...even one that says,"Good Morning!" Wouldn't that be fun?!?
We gave it a try this morning for our Lemon Blueberry Pancakes and it worked great. My son said, "Oh, COOL!" upon seeing his pancake and didn't complain that his pancake was filled with blueberries instead of his usual chocolate chips! {Hey...I think we're onto something here.}
I can't wait to try this with grilled cheese sandwiches!
Here are a few tips I found helpful when using the Flip It.
- Ignore the instructions that a gas stove must be set on the lowest setting. After waiting, and waiting and waiting for the first pancake to cook through, I cranked up the heat to 3 on the next one. The pancake cooked quicker, more golden brown and was actually a bit fluffier.
- Close the lid as the first side cooks. The pancake cooks up a lot faster than leaving it open.
- Don't flip until the top is covered with lots of large bubbles and the edges look dry. (Just peek under the lid every so often.)
1 large egg
1 c unbleached, all-purpose flour
3/4 c milk
1 TBSP sugar
3 tsp baking powder
1/4 tsp salt
1/2 tsp vanilla bean paste (or vanilla extract)
2 TBSP vegetable oil
zest from one lemon
a couple handfuls of blueberries
2 TBSP butter, melted for the pan
Whisk the egg in a bowl until fluffy. Add flour through lemon zest and whisk until smooth.
If using the Flip It pan, brush both sides with melted butter and follow the instructions for heating the pan. Add 1/2 c batter to the dish side and drop in blueberries. Cook until sides are dry and middle is covered with large bubbles. Flip and cook on remaining side, 3 minutes.
If using a regular griddle, pour 1/4 c batter on to preheated griddle. Drop on blueberries. Cook until sides are dry and middles are bubbly. Flip and cook until other side is golden brown.
Serve with butter and sifted powdered sugar.
Want one of your own? Just leave a comment and a winner will be chosen Tuesday, June 30th at 8am CST. PLEASE be sure your comment links to a blog or add your email in your comment so I can find you! :)
Good luck! Thank you, Teflon.com! :)
Wednesday, June 24, 2009
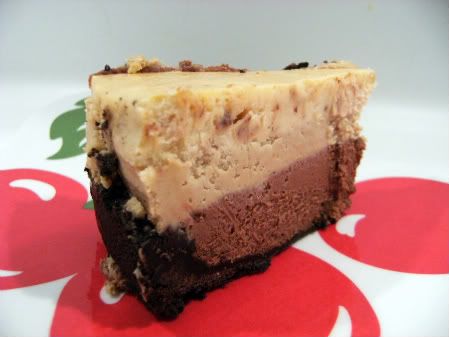
Julia's Triple-Decker Cheesecake
Please tell me you've visited Julia over at Dozen Flours. Her blog is full of the most beautiful, mouth-watering concoctions. She makes a lot for her co-workers and I'm pretty sure there's a LONG, LONG waiting list to work at that place.
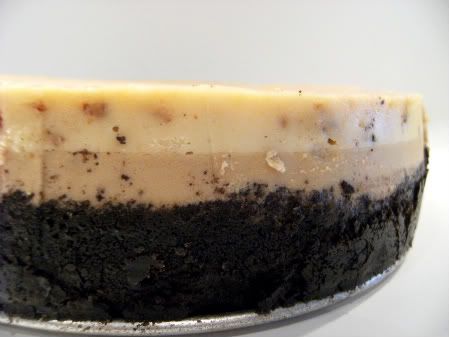
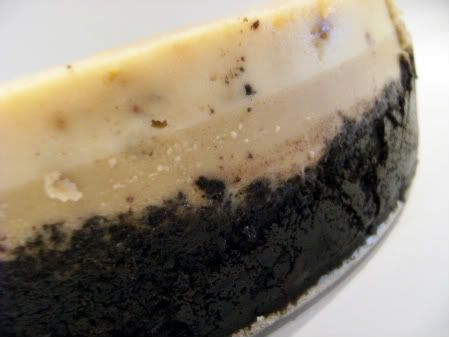
A few months ago, Julia posted a Triple-Decker Chocolate, Toffee, Coffee Cheesecake. I knew it would be the perfect dessert to make for my husband. So, this was our/his Father's Day dessert.
Please forgive my not-so-great pictures. They don't do the cheesecake justice. It was wonderful...creamy and decadent. I followed Julia's instructions to the letter with 2 small exceptions:
- I didn't have instant coffee on hand, so I used instant espresso and cut the amount in half.
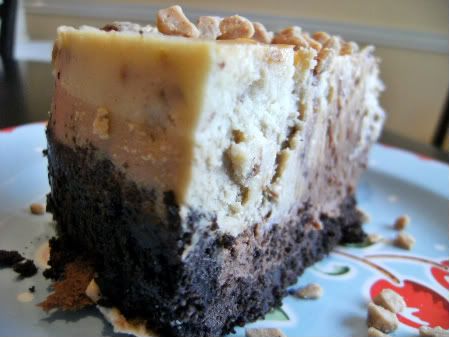
- I topped our slices with toffee pieces because I was too lazy to whip the cream and make chocolate shavings. :)
{Here's a picture from day 2, I managed to cut it a little bit cleaner...still, Julia's pictures are better. }
It was a hit. If you like this flavor combination, you'll love this cheesecake! Thank you, Julia!!!Tuesday, June 23, 2009
A podcast for foodies...Works For Me Wednesday
This month I officially joined the 21st century. No, I didn't join Facebook. No, I still don't tweet. I bought one of these...
...an iPod Shuffle. Yes, I feel quite cool. Actually, I'm not cool. There's no music on it.
Here's what I discovered...podcasts of The Splendid Table. I've never actually heard The Splendid Table on NPR, but I am so, so happy to have found the podcasts.
They are a food lovers' dream radio show. If I had my way there would be a talk radio station devoted to this 24/7. The Splendid Table's topics are so interesting...I know you'll love them!
The host, Lynne Rossetto Kasper, is just the person you'd want to have over for dinner. She obviously has a wealth of knowledge about food, but she's unpretentious about it. Lynne's funny, smart and brings food to life through the radio. She keeps me walking and riding my bike longer and that's saying something. If I'm going to be making (and eating) these and this and this, I NEED all the extra exercise minutes I can get. :)
The Splendid Table podcasts Work For Me. How about you? Any podcasts on your iPod?
For this week's roundup of Works For Me Wednesday ideas, go to We Are THAT Family. Some of my previous WFMW posts include:
Wednesday, June 17, 2009
A good man . . . um, realtor . . . is hard to find
Is it just me, or is finding a good realtor almost as difficult as finding a good man? After 12 years of marriage, 5 houses, 1 apartment and 1 duplex, we've been through a few.
Keep reading because if you live in the Houston or Dallas area, I have 2 realtor recommendations for you. :)
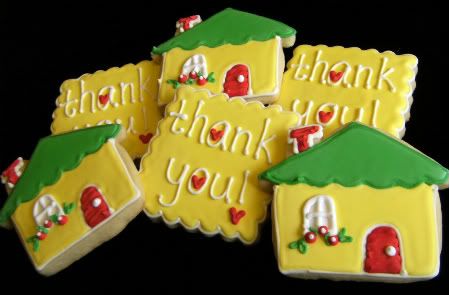
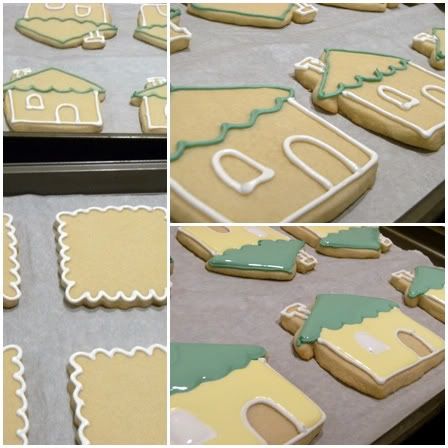
The realtor who sold us our house just ordered these cookies for another client. I first made the cottage/house cookie years ago and I think it's still my husband's favorite.
Here are my realtor recommendations...(they are unsolicited and unpaid; these are just darn good people...and agents!):
In Houston: Jessica Rushing with Zip Realty. Jessica is a doll; level-headed, genuine and thoughtful. While I was walking through, picturing houses with painted cabinets and wood floors instead of carpet, she would say something like, did you notice this house backs to a busy street? Yeah...I needed her. :) She helped us find just the right place and it was smooth sailing. She's just a pleasure to work with.
In Dallas: Paul Bush with Keller Williams. We've worked with Paul twice, once to buy, once to sell. He is one of the first people I would call if we were moving back to Dallas....my dad, my sister, 2 Dallas girlfriends, then Paul Bush. (Honestly, I might call him first.) He LISTENS! He could look at a house for me and tell me if I would like it (or not). He's a great guy, amazingly good at what he does. I can't recommend him highly enough.
Tuesday, June 16, 2009
HOMEMADE, Whole-Grain Pancake Mix. . .Works For Me Wednesday
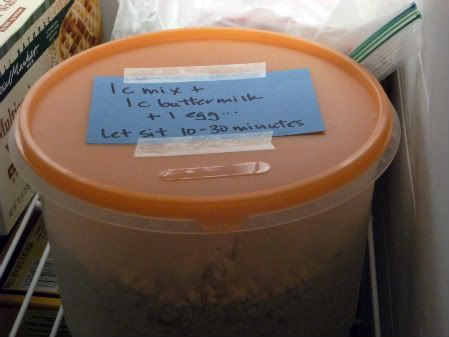
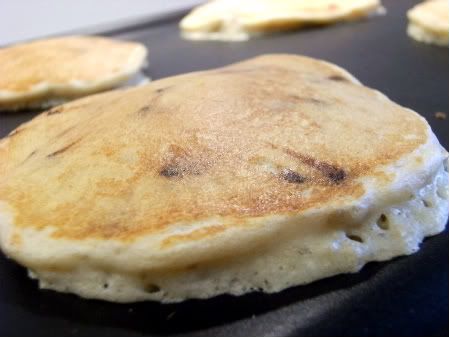
Remember last week when I said I would give you a recipe to go with that buttermilk? Here it is! It's Homemade Whole-Grain Pancake Mix from, say it with me now, King Arthur Flour. :)
I love having this mix on hand. Why?
Just follow the instructions by clicking the recipe link above and fresh, good-for-you, homemade pancakes are just minutes away!
This definitely Works For Our Family! Visit We Are THAT Family to see what's working for everyone else.
Previous WFMW posts:
I love having this mix on hand. Why?
- It makes a big batch (about 80 pancakes worth!) and stores in the freezer.
- My son is not a big breakfast eater, but pancakes, he will devour.
- The mix is chock full of whole grains and oatmeal, so I don't feel too guilty adding chocolate chips! :) Blueberries would be delicious, too!
Just follow the instructions by clicking the recipe link above and fresh, good-for-you, homemade pancakes are just minutes away!
This definitely Works For Our Family! Visit We Are THAT Family to see what's working for everyone else.
Previous WFMW posts:
Friday, June 12, 2009
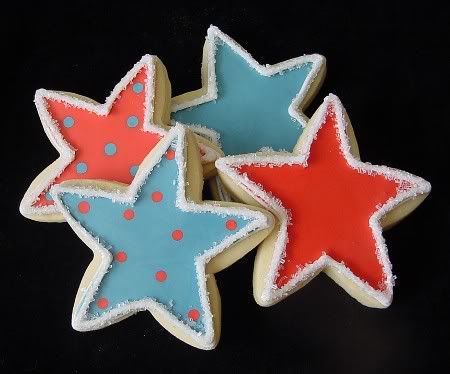
Gearing up for the 4th…get your STARS on!
It's an age old dilemma….what to bring to the 4th of July cookout or any summer get-together?
{For the rest of the story, please visit my post over at Blissfully Delish! See you there!}
Thursday, June 11, 2009
A is for....
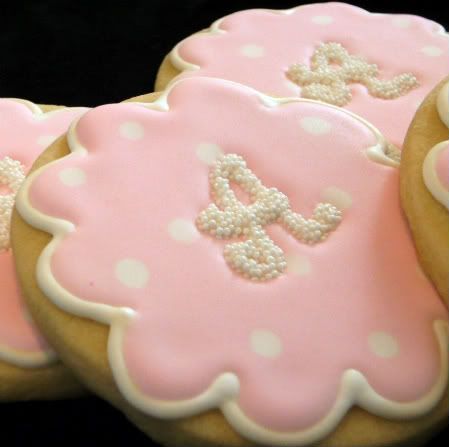
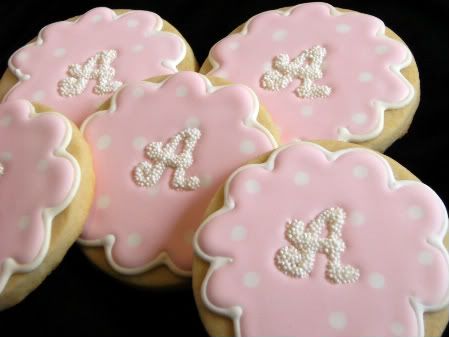
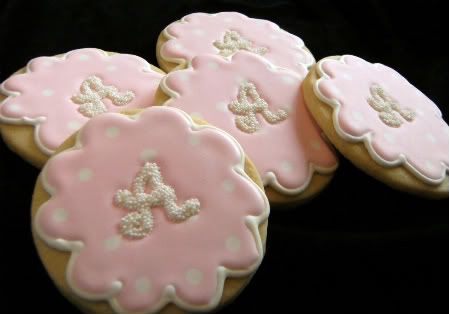
I was so excited to get to make these dotty monogram cookies again...this time with an A monogram.
They are going to be for a baby shower. I hope the mommy-to-be likes them!!!
For instructions on how to make the dotty monograms, click here.
For more on making flat dots in icing, click here.
Tuesday, June 9, 2009
Freezing Buttermilk...Works For Me Wednesday
It used to be that I would buy buttermilk for a recipe and 3 months later find the container curdling in the back of the refrigerator.
No more! Do you know that buttermilk can be frozen?
Here's how I do it:
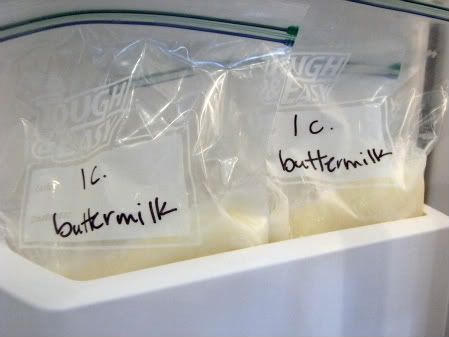
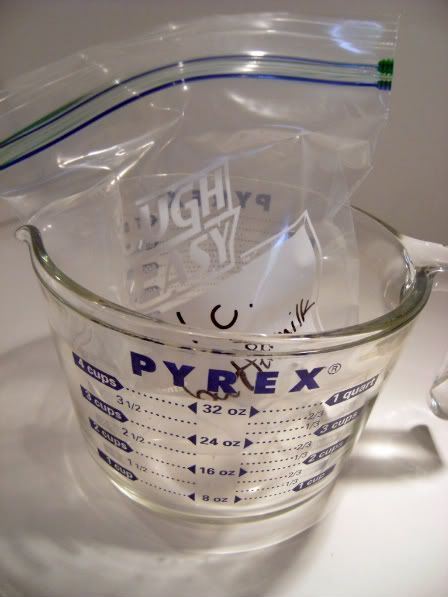
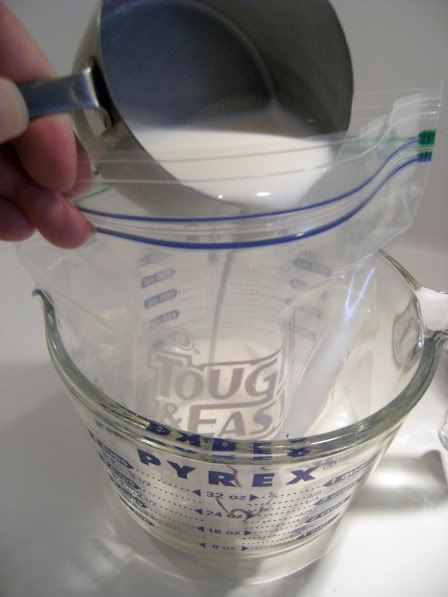
Put a freezer baggie in a large measuring cup so it doesn't fall over. Add 1 cup of buttermilk per bag and freeze.
To thaw, place in the refrigerator overnight (if you're thinking ahead), or place in a bowl of water in the fridge, or under running water, and "massage" it every so often (the quick way).
{Just a side note...notice the store brand of baggies is called "Tough & Easy?" Hmmm. I really wish they'd change that. Seriously, who thought that name sounded like a winner?}
Now I'm heading to We Are THAT Family to check out the other WFMW tips...you should, too!. :)
No more! Do you know that buttermilk can be frozen?
Here's how I do it:
Put a freezer baggie in a large measuring cup so it doesn't fall over. Add 1 cup of buttermilk per bag and freeze.
To thaw, place in the refrigerator overnight (if you're thinking ahead), or place in a bowl of water in the fridge, or under running water, and "massage" it every so often (the quick way).
{Just a side note...notice the store brand of baggies is called "Tough & Easy?" Hmmm. I really wish they'd change that. Seriously, who thought that name sounded like a winner?}
NEXT WEEK....a recipe to go along with that buttermilk.
Now I'm heading to We Are THAT Family to check out the other WFMW tips...you should, too!. :)
Sunday, June 7, 2009
Beautiful Silhouettes: Cookie Exchange!
Ladies, it's time for another Cookie Exchange.....
These gorgeous cookies were made by Melissa of The Good Apple. (Go take a minute...or more likely, an hour...to look at her amazingly beautiful cakes and cupcakes!)
Aren't these silhouette cookies the cutest idea?!?
I absolutely love them! Wouldn't these be great for a wedding or Mother's Day or....?
Thank you, Melissa for being a part of Cookie Exchange!
Be sure to check out all of the former cookie exchange participants, including:
Thursday, June 4, 2009
Diet Killers...
I know, I really hate to do this to you the first weekend of June...the beginning of bikini tankini skirtini (in my case) season.
It has to be done, though. If you're hosting a brunch or a shower, you really need this recipe...and yes, it will kill your diet. Resisting is futile.
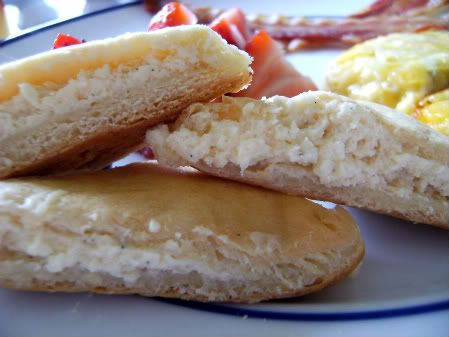
What are they? Cream Cheese Triangles. Very glamorous name. (Recipe at the end of this post.)
My mom used to make these and the recipe is written out in her handwriting with a boy's name out to the side. Why? Because my high school homecoming date loved these.
Homecoming was a big deal with after parties, trips to the beach, etc. But, I'll be honest, I was a nerd. I wasn't interested in after parties (and most likely wasn't invited anyway). So, my mom made "breakfast" for my friend Natalie & I and our dates.
These were the hit with my date. I'm so glad she made that little note on the recipe card. I'm sure I would have forgotten it by now. My date was a really sweet guy....we went to church and school together. {He took me to my first opera....I still remember what I wore....a pale pink knit sweater and long skirt ensemble, pale pink pantyhose, pale pink flats (he was shorter than me) and a pale pink grosgrain bow in my hair. Yes, I was a fashion plate!}
Anyway...it all comes back just seeing the recipe.
It's easy, it's a make-ahead and it's one for which I always get asked the recipe. I think you'll like it. :)
Cream Cheese Triangles
2 pkg. Pillsbury Crescent Rolls
2 (8 oz) pkg. cream cheese, softened
2 tsp. vanilla (I used vanilla bean paste to jazz it up a bit) :)
2 egg yolks
8 TBSP sugar
Preheat oven to 350.
Place one pkg of rolls on a cookie sheet lined with parchment. Push seams together.
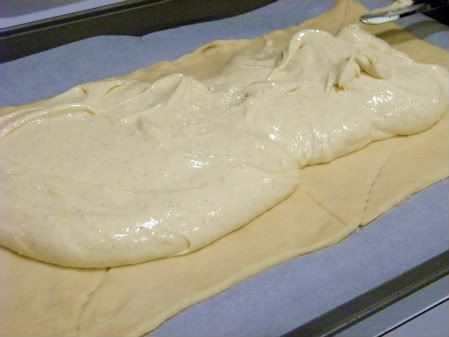
Beat other ingredients until smooth. Spread on top of crescent rolls on sheet. (An off-set spreader works great for this.)
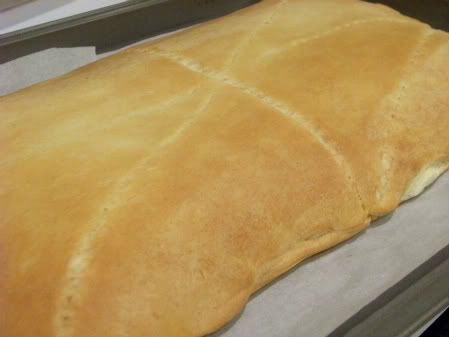
Place second pkg of rolls on top. Pinch together to seal sides. Bake for 25 - 30 minutes.
Let cool, then cut into triangles (I use a pizza cutter). Wrap in foil and chill in the refrigerator. Serve cold. DO NOT test before your guests arrive...there may not be any left! :)
Looking for more breakfast recipes? Try these:
It has to be done, though. If you're hosting a brunch or a shower, you really need this recipe...and yes, it will kill your diet. Resisting is futile.
What are they? Cream Cheese Triangles. Very glamorous name. (Recipe at the end of this post.)
My mom used to make these and the recipe is written out in her handwriting with a boy's name out to the side. Why? Because my high school homecoming date loved these.
{Here we are....pre-cream cheese triangles! Yes, it was the 80's!}
Homecoming was a big deal with after parties, trips to the beach, etc. But, I'll be honest, I was a nerd. I wasn't interested in after parties (and most likely wasn't invited anyway). So, my mom made "breakfast" for my friend Natalie & I and our dates.
These were the hit with my date. I'm so glad she made that little note on the recipe card. I'm sure I would have forgotten it by now. My date was a really sweet guy....we went to church and school together. {He took me to my first opera....I still remember what I wore....a pale pink knit sweater and long skirt ensemble, pale pink pantyhose, pale pink flats (he was shorter than me) and a pale pink grosgrain bow in my hair. Yes, I was a fashion plate!}
Anyway...it all comes back just seeing the recipe.
It's easy, it's a make-ahead and it's one for which I always get asked the recipe. I think you'll like it. :)
Cream Cheese Triangles
2 pkg. Pillsbury Crescent Rolls
2 (8 oz) pkg. cream cheese, softened
2 tsp. vanilla (I used vanilla bean paste to jazz it up a bit) :)
2 egg yolks
8 TBSP sugar
Preheat oven to 350.
Place one pkg of rolls on a cookie sheet lined with parchment. Push seams together.
Beat other ingredients until smooth. Spread on top of crescent rolls on sheet. (An off-set spreader works great for this.)
Place second pkg of rolls on top. Pinch together to seal sides. Bake for 25 - 30 minutes.
Let cool, then cut into triangles (I use a pizza cutter). Wrap in foil and chill in the refrigerator. Serve cold. DO NOT test before your guests arrive...there may not be any left! :)
Looking for more breakfast recipes? Try these:
Ack! Really?!?
Oh, this is so cool! I just found out that I was nominated in the Tastiest Blog category in BlogLuxe awards! :) How neat is that?!?
Thank you to the sweet person who nominated me...you made my day!!! :)
While you're here, remember to enter the Coffee Cake Cookbook giveaway!
Tuesday, June 2, 2009
Breakfast that tastes like vacation....a giveaway!
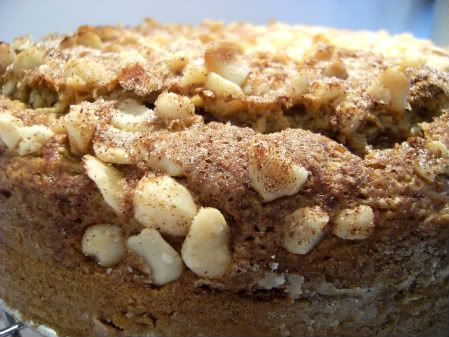
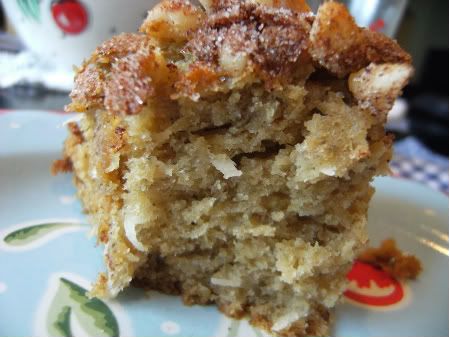
Bananas....
Macadamia Nuts.....
Coconut....
...sounds like a tropical vacation, doesn't it?
Yum! I just bought (TWO COPIES!) of this book: Coffee Cakes: Simple, Sweet, and Savory by Lou Seibert Pappas. I've been feeling like I need a few more coffee cakes in my repertoire. Then last week, I stumbled upon this book.
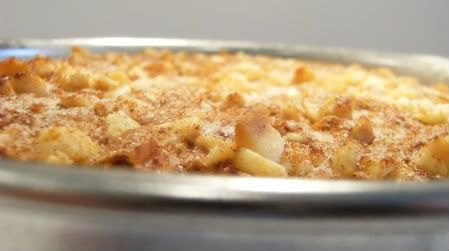
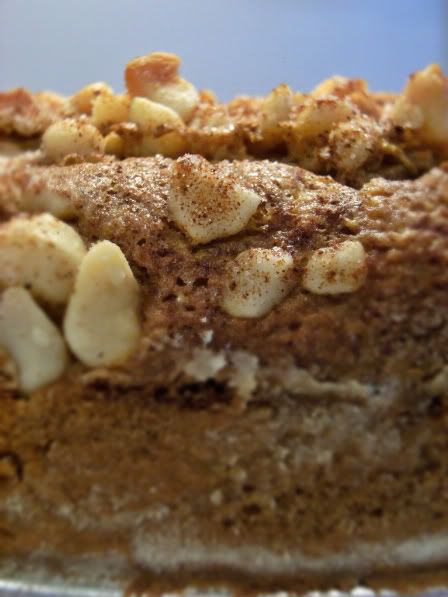
It was hard to decide where to begin, but I chose Banana, Macadamia Nut, and Coconut Coffee Cake. It's almost tropical tasting with the macadamia nuts and coconut and it's really, really moist!
Here's a link to the recipe. I followed it to the letter, except I had to bake mine about 15 minutes more that the recipe states.
Would you like my other, brand-new copy?
Leave a comment telling me your favorite coffee cake flavor. PLEASE make sure your entry links to a blog or leave an email in your comment...unless I know where to find you already. :)
The random generator will pick a lucky number on Sunday evening.
Good luck!
Subscribe to:
Posts (Atom)