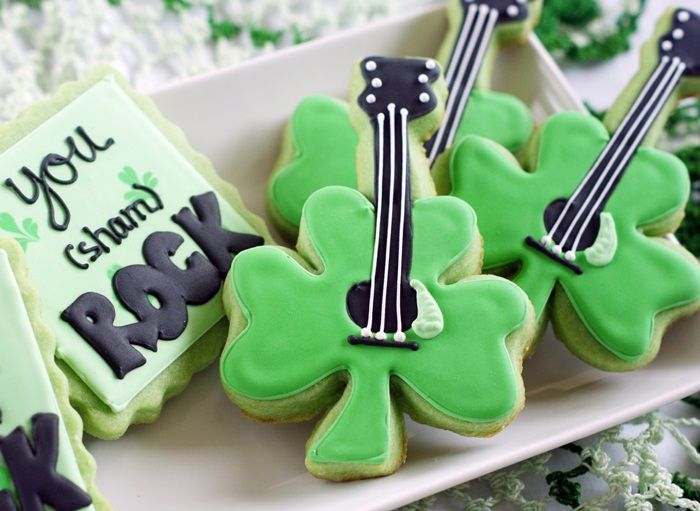
Again with the cheesiness. I know, I know...I can't help myself.
You DO (sham) rock, though, you know.
A couple of notes about these cookies...
ONE. The dough was tinted green just to make it a little more festive for St. Patrick's Day. To do this, you make your dough, then just knead in the color, kind of like you would do for fondant. Easy.
TWO. The little shamrock guitars are parts of two shapes put together. A shamrock (you knew that), and since I don't seem to have a guitar cutter, a cut off broom handle.
THREE. I'll show you the tutorial for the guitars below. For the other cookies, I had this "great" idea to make shamrocks from dots. In reality, they look more like flat leaf parsley or cilantro. On the bright side, if you ever need to make cilantro cookies, you'll know how.
To make the Shamrock Guitars, you will need:
sugar cookies put together to make a shamrock guitar, such as a shamrock and a broom handle,
royal icing tinted with AmeriColor Super Black, dark & light green using Leaf Green, and Bright White,
couplers and icing tips (#2 & #1)
disposable icing bags
squeeze bottles
toothpicks
With a #2 tip, outline the guitar center and neck in black icing. Reserve a bit of black piping consistency icing.
With another #2 tip, outline the shamrock shape in the darker green icing.
Thin the black and green icings with water a bit at a time, stirring gently with a silicone spatula, until it is the consistency of a thick syrup. Cover with a damp dish towel and let sit for several minutes.
Stir the icings gently with a silicone spatula, popping any large air bubbles that may have formed on the surface. Transfer to squeeze bottles.
Fill in (or flood) the black outline with the thinned icing, using a toothpick to guide to edges and pop large air bubbles.
Fill in the green outline with the thinned green icing.
Let the cookies dry for at least 1 hour.
With a #2 tip, add the bar below the center of the guitar in black.
With a #1 tip, add the strings and detail in white. If you find your strings are "breaking" as you pipe them, squeeze all of the icing out of the bag and into a bowl, stir in 1-2 DROPS of water, then put back in the pastry bag.
With a #2 tip, add the detailing to the guitar in light green.
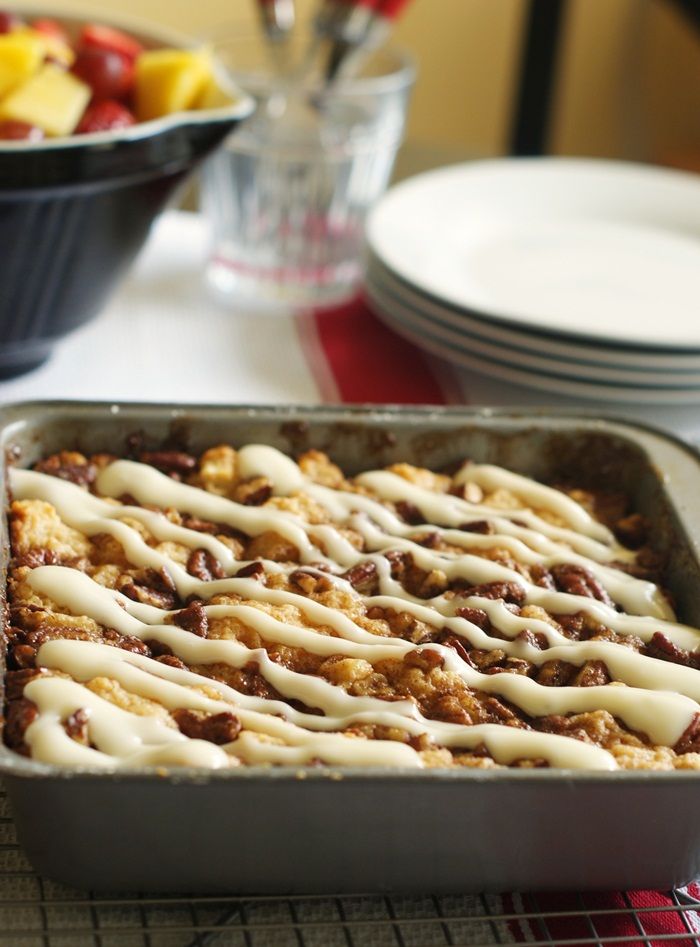
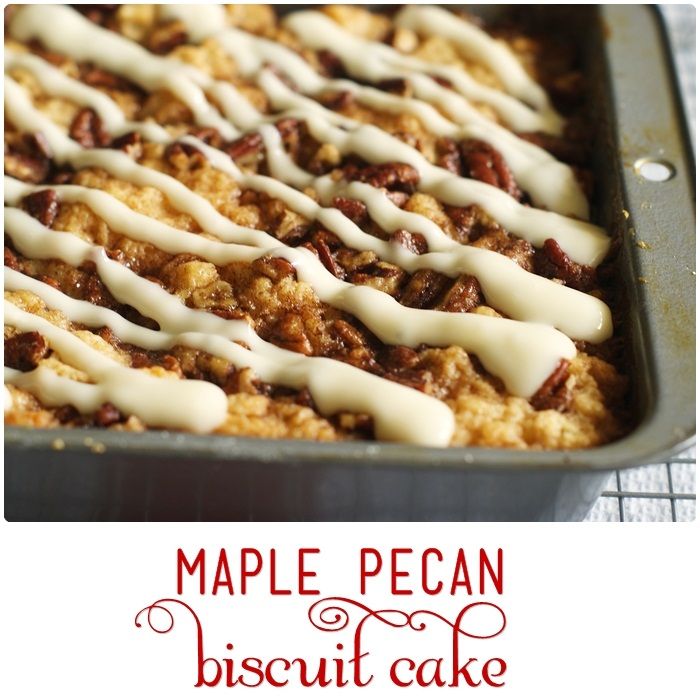
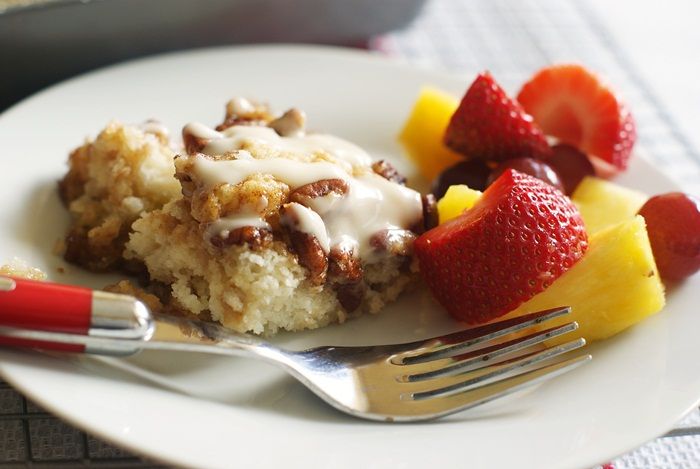
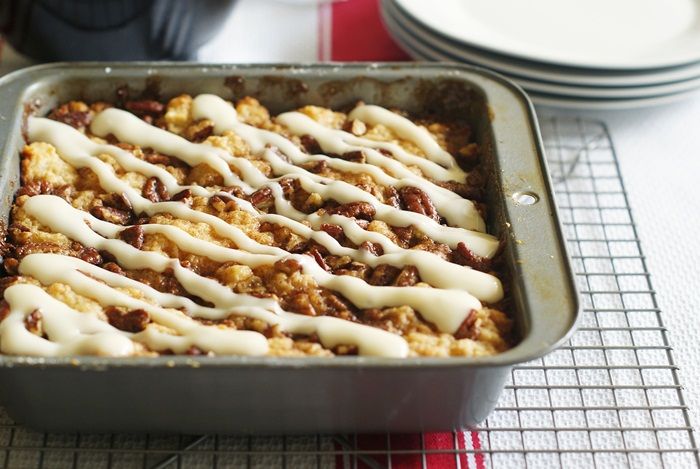
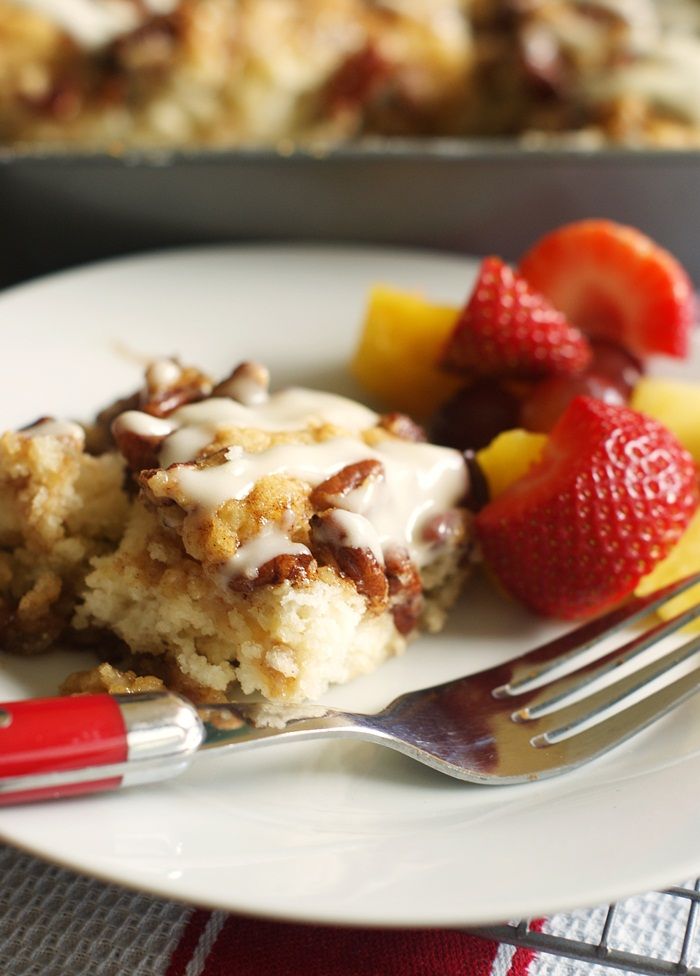
Do you like cake for breakfast? Me, too. In case you're one of those people who feels guilty about eating cake for breakfast (are there people like that?), this cake is 100% guilt-free. It's a BISCUIT cake! See, totally breakfast food.
White Lily Flour is new to me, although I know I have heard of it. My grocery store doesn't carry it, but I was more than happy to do a little baking and test it out. {PS...I've also never owned a Mercedes and would be more that happy to test one of those out as well.}
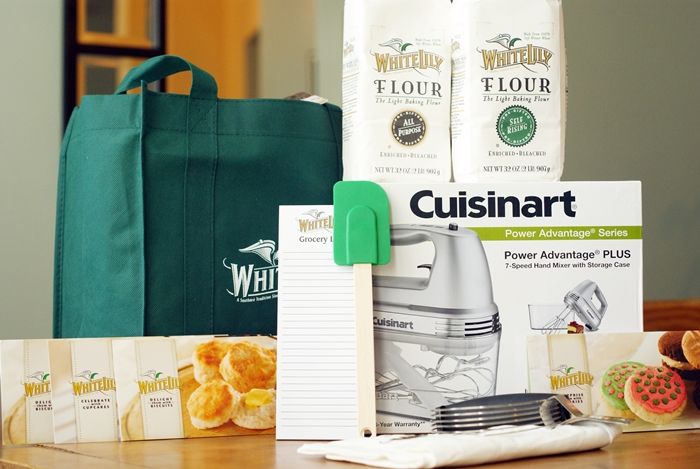
Back to baking...White Lily sent me a few recipe booklets, some flour, a Cuisinart mixer (!), and a few other goodies that you'll see in a minute ('cause you might win them). I was totally inspired by one of their recipes, changed it up a bit here and there, and made this Maple Pecan Biscuit Cake.
Let me tell you, this little cake is going in my regular rotation for breakfast to serve when we have company. It serves 9, but once our little family of 3 was finished with it, there was less than half a pan left. Weird.
Would you like to try some White Lily flour for yourself? And maybe a few goodies to go with it?
Yes? Here's what one lucky person will win: 2 bags of White Lily flour, spatula, grocery list, grocery bag, 3 recipe booklets, pastry blender, dish towel, and a Cuisinart hand mixer...perfect when you don't want to use your countertop mixer.
for the cake: 1/2 cup salted butter, melted 1/2 cup real maple syrup 1/2 cup packed light brown sugar 1/2 cup chopped pecans 1 & 1/2 tsp. cinnamon 2 cups self-rising flour (I used White Lily) 1/4 cup Crisco, chilled 2/3 cup buttermilk
for the cream cheese drizzle: 3 oz. cream cheese 1 tsp. vanilla extract 1 cup powdered sugar 1 TBSP milk
Preheat oven to 400 degrees. Grease an 8x8" baking pan.
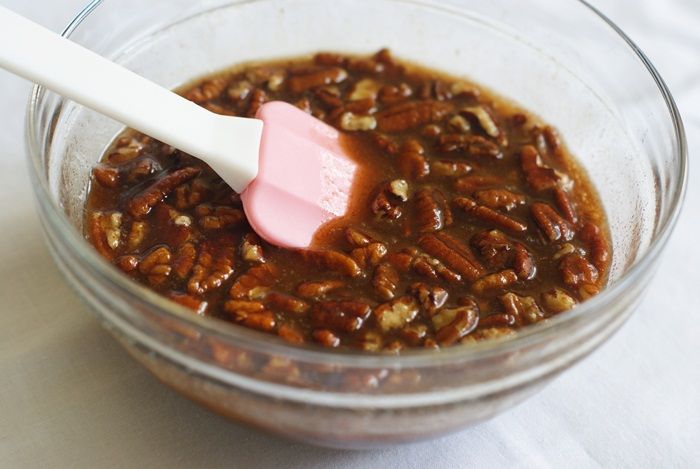
Stir together the melted butter, maple syrup, brown sugar, pecans, and cinnamon. Set aside.
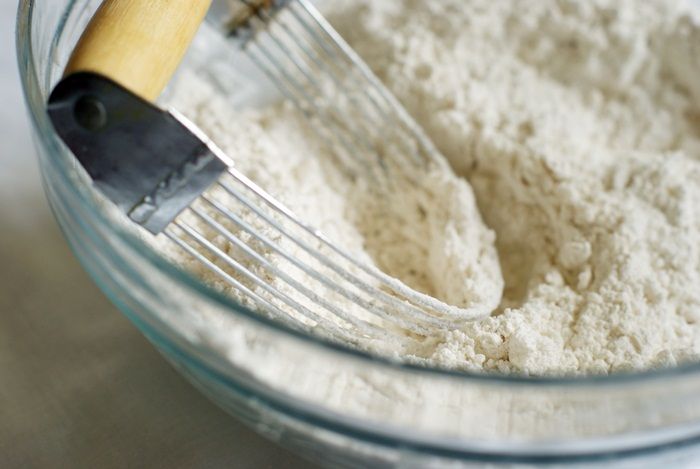
Place the flour in a medium bowl. Use a pastry blender to cut in the cold shortening until the mixture forms coarse crumbs. Stir in the buttermilk, just until the dough comes together.
Dump the dough into the prepared pan. With floured hands, press the dough evenly into the pan.
Pour the butter/pecan mixture over the dough.
Bake for 16-18 minutes, or until the dough has risen and is done. Remove to a cooling rack and let sit 10 minutes.
Meanwhile, make the cream cheese drizzle. Beat the cream cheese until soft. Beat in the sugar and vanilla. Add the milk and beat until smooth. Transfer to a piping bag or a baggie, cut off the tip and drizzle onto the warm cake. Serve warm.
{{psst...if you like cake for breakfast, you must also see this shirt...thanks, Meg!}}
If you did, may I suggest putting this on your list to make AS SOON AS Lent is over?!?
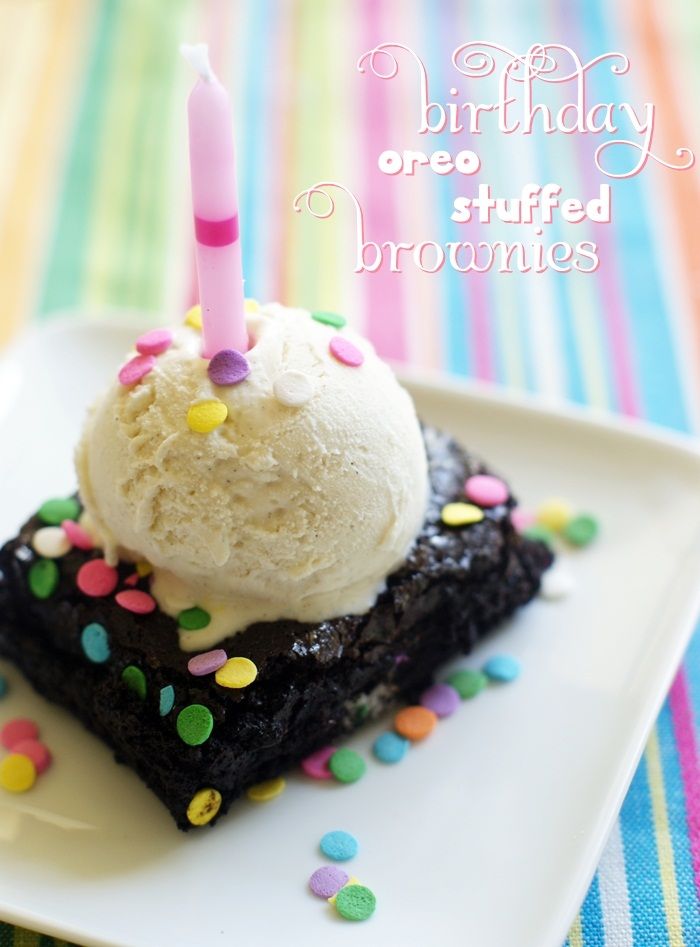
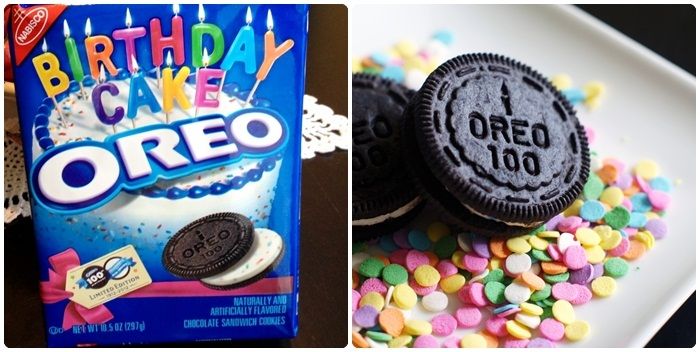
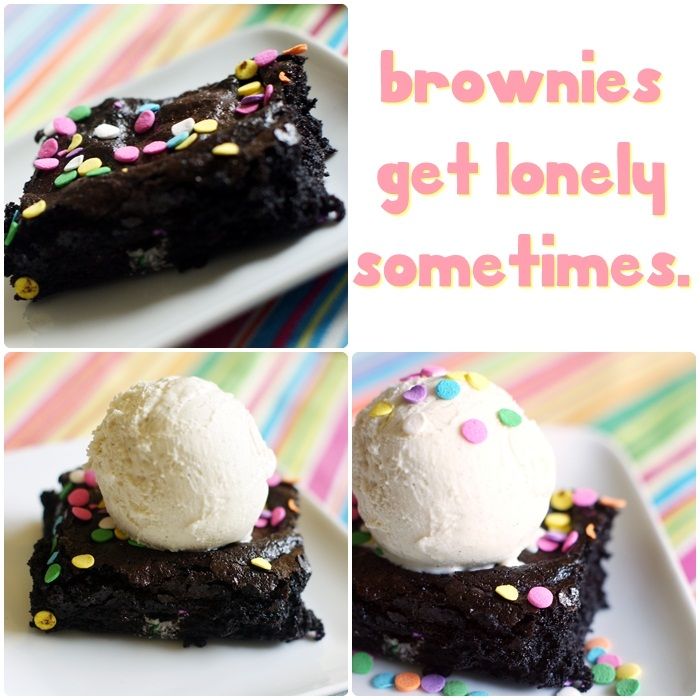
Did you know that Oreo is turning 100 years old? Did you know that to celebrate, Oreo is making Birthday Cake OREOS?!? Really. The filling looks like a funfetti cake and they taste like, well, Oreo mixed with cake. How can that be bad I ask you?
So, of course, we can't just EAT the Birthday Cake Oreos, we must BAKE with them.
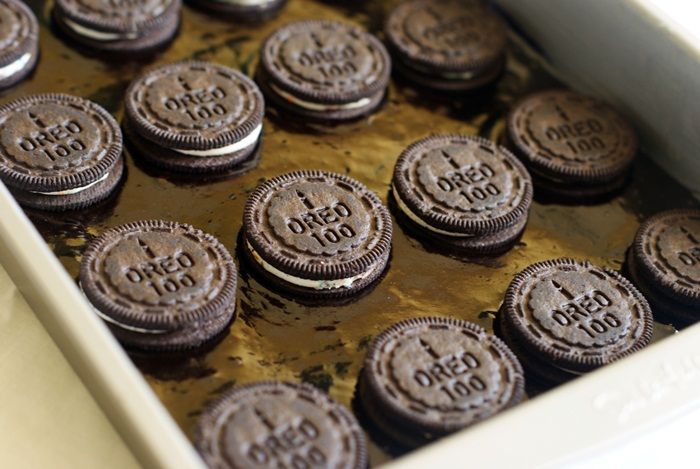
If you can't find Birthday Cake Oreos (I found them at Target), feel free to use regular Oreos. I bet these will still be some of the best brownies you've ever eaten.
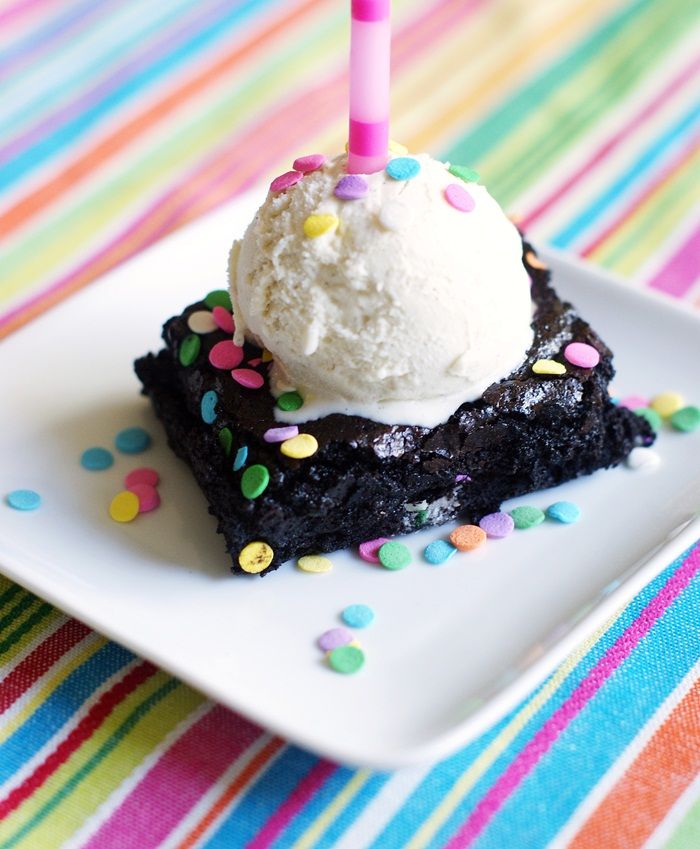
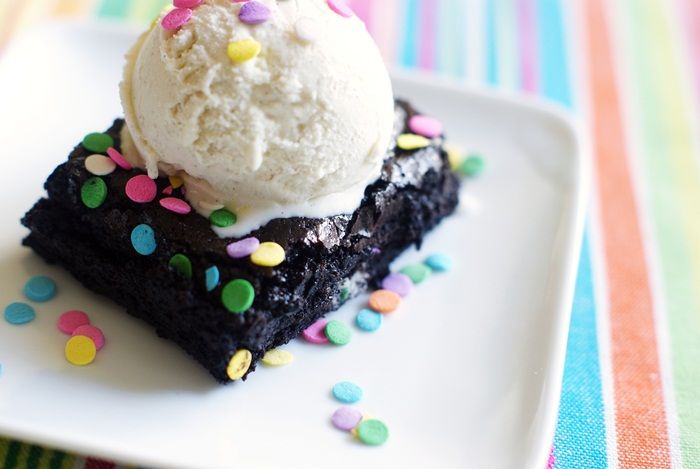
And, oh...don't feel obligated to top yours with Haagen-Dazs 5-Ingredient Vanilla Bean ice cream. But if you do, you won't be sorry. And hey...you still have months until bathing suit season.
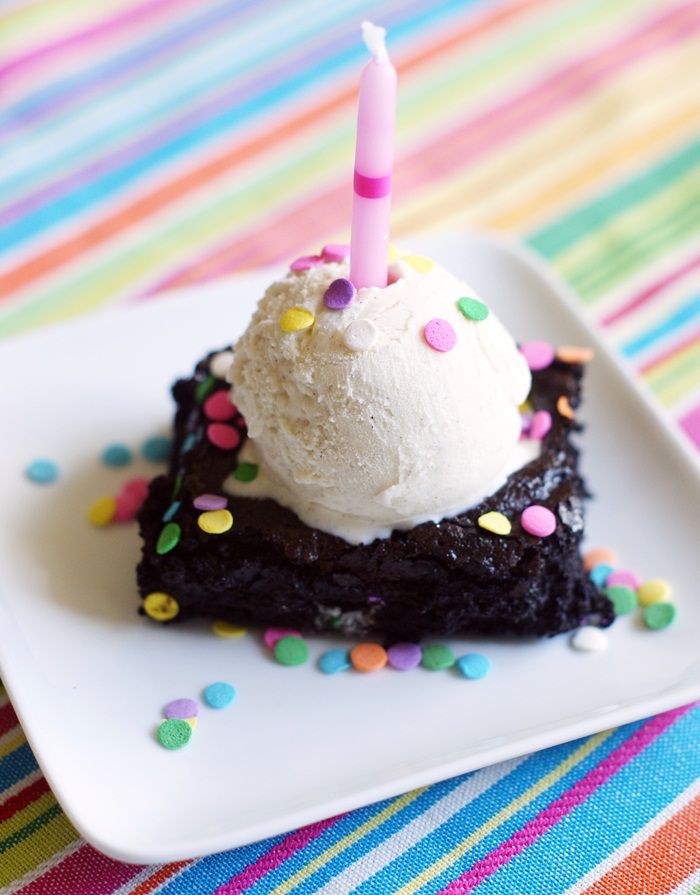
Birthday Cake Oreo-Stuffed Brownies
1 cup dutch-process cocoa (such as Hershey's Dark) 1 tsp. coarse salt 1/2 tsp. baking powder 3/4 c. unsalted butter 2 cups sugar 1 TBSP vanilla 3 eggs, lightly beaten with a fork 1 cup unbleached, all-purpose flour 20 Birthday Cake Oreos (or regular Oreos) 1 tsp. corn syrup 1 tsp. water sprinkles
Preheat oven to 325. Grease a 9x13" baking pan.
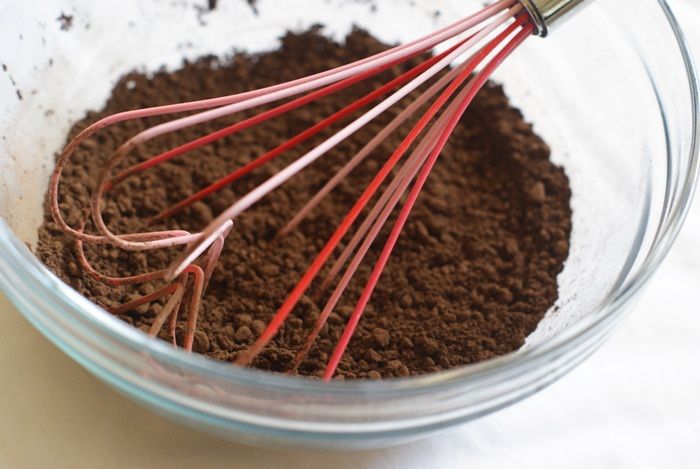
In a medium bowl, whisk together the cocoa powder, salt, and baking powder. Set aside.
In a medium saucepan, heat the butter over medium-low, until melted. Add the sugar and stir to combine. Continue heating about 1-2 minutes, until hot.
Remove the pan from the heat and add the cocoa mixture, stirring until combined. Add the eggs and vanilla; stir until totally combined.
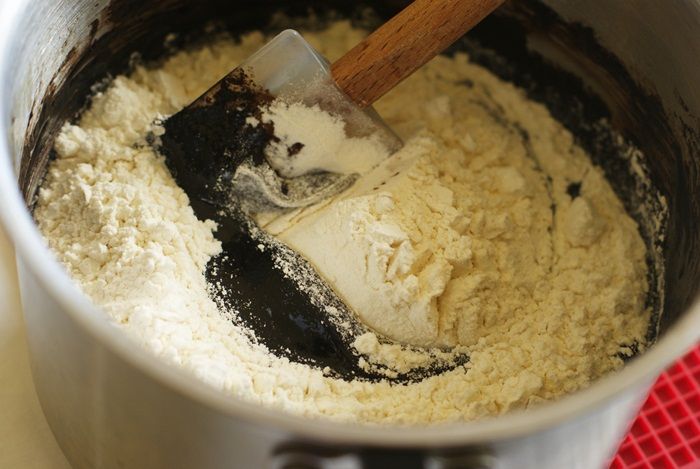
Add the flour and stir again until smooth.
Spread half of the batter into the prepared pan. Top with 20 Oreos. Cover with the remaining batter; spread gently with an offset spatula.
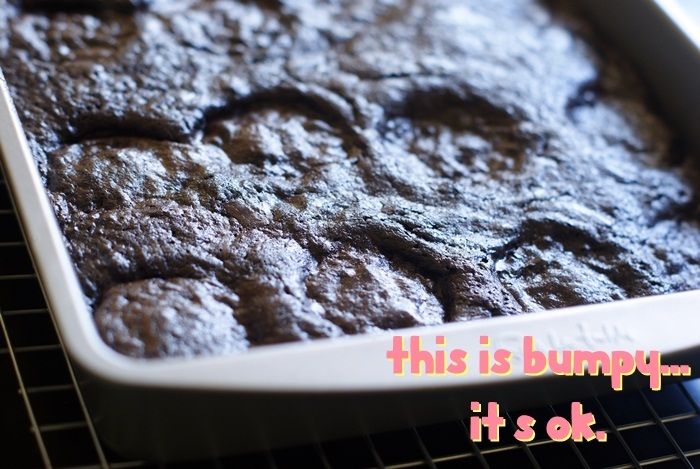
Bake for about 30 minutes, until the brownies are done, but the center still looks soft.
{The Oreos will make the brownies a little bumpy....that's ok.}
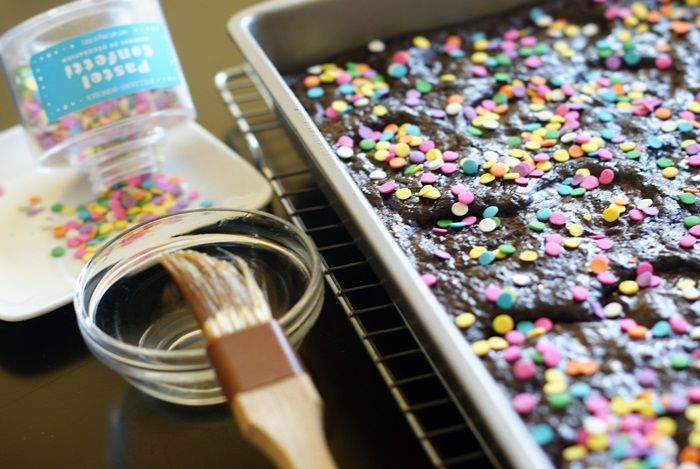
Set the pan on a wire cooling rack and let cool 10 minutes. Meanwhile, stir together the corn syrup and water.
After 10 minutes, lightly brush the corn syrup mixture onto the cooled brownies. Scatter on the sprinkles. (Adding them before baking will cause the sprinkles to discolor and become misshapen.)
Let the brownies cool completely before cutting. (A bench scraper is the perfect tool for cutting brownies.)
I *almost* wish I would have taken a picture of the way I used to store my icing tips and couplers. *Almost.*
It wasn't pretty...I had the tips sorted by size and in snack-sized baggies. Then I had those and all of the couplers in a quart-size baggie. You know how baggies get ugly after they've been used (and opened and closed, and opened and closed, and shoved in a drawer) again and again? It's not pretty. And let's face it...cookie decorating should be cute.
The boxes are called Amac boxes...and they come in the prettiest colors, but I went with clear. I labeled the tops with a sharpie...I know, so fancy, right?
For the tips, I bought the size: 1-3/16" sq. x 2-7/16" h. For the couplers, I bought the 2-5/16" sq. x 6-3/16" h.
Now, when I reach for an icing tip, seeing these cute little boxes lined up in the drawer makes me happy.
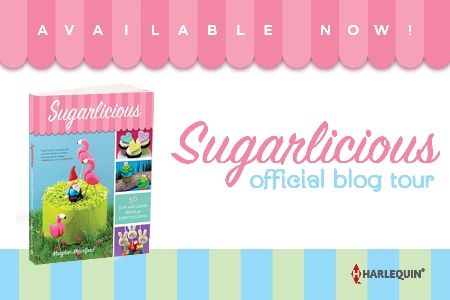
First, let me tell you about Meaghan. Not only is she incredibly talented and creative, she's one of the most generous and kind bloggers around. In addition to running her blog, she is the edible crafts editor over at Craft Gossip. Meaghan has been so supportive to all of us who play with our food. Despite never having actually met her, I consider her a true friend.
Now, to Sugarlicious! I received my copy from Amazon last week and immediately dove right in! It's full of all sort of adorable and colorful projects for birthdays, holidays...you name it. Decorated cookies? Check. Cake pops? Check. Decorated Marshmallows? Check. Edible Gnomes? Check.
I volunteered to bring dessert for the teachers at my son's school yesterday, so I tried my hand at the painted petits fours...
...Meaghan baked her petits fours, I used Oreo Cakesters. That's just our little secret, right?
{I can use a little more practice with my fondant smoothing...and should have evened up those Cakester edges with a round cookie cutter, but STILL. Aren't they adorable?!?}
I can think of a million places to take these...baby showers, bridal showers, birthday parties...I love them.
You'll find the petits fours and many, many other projects in the book (over 200 pages!), all explained in detail with lots of darling illustrations. The "Techniques" section is pretty much a must for anyone wanting to have some fun playing with cookie, cake and marshmallow decorating. I think what I love most about the book is that the projects are ADORABLE and actually DOABLE! They're not intimidating, and they don't require you to have attended pastry school. Meaghan walks you through each and every step clearly and with lots of helpful hints.
OK...so you want a copy of Sugarlicious, right? Well, one reader is not only going to win a copy of the book, but all of this...
Since Sugarlicious is so bright, happy & colorful... To Enter: leave a comment on this post telling me your favorite color! (If you are reading this in your email, click over and leave a comment in the comments section.)
{Open to residents of US & Canada. Drawing to be held Tuesday, February 21st at 8pm CST.}
Giveaway closed! Congrats to Cristin!!!
Good luck!
Congratulations, Meaghan on a beautiful, fun, and inspiring book!!!
Every year before kiddo's birthday, I bring out the computer and cookbooks and let him decide what cake he'd like for his birthday cake. {Last year he chose this.}
This year, I started by showing him one cake on a certain little blog that I love, Bakerella. He took one look and said, "that's it." He wouldn't look at another blog, wouldn't crack open a cookbook...that was HIS cake.
For the cake, I used a Martha Stewart Devil's Food Cake recipe that we've been using for years. You know what else? It makes the cake THREE layers! (More cake!)
I've always wanted to try Shelly's (Cookies and Cups) buttercream frosting and thought this was the perfect opportunity. Y'all...it is the most delicious buttercream I've ever eaten...and I ate a LOT of it. ;)
For putting the cake together, I used tips from Melissa over at My Cake School. Now, my cake is nowhere near as smooth as Melissa can get them, but MUCH improved over any other cake I've ever made.
I mean, can you IMAGINE living in a village with Angie, Shelly, Martha, and Melissa?!?
{That is MY kind of village!}
First, you're going to want to bring your cake ingredients to room temperature.
Next, make Martha's cake and let it cool completely. With a serrated knife, level the layers as best as possible. Eat scraps.
Make Shelly's buttercream. Scoop out about 1/3 cup, set aside. Divide the rest of the frosting in half. Per Bakerella, add 2/3 cup mini chocolate chips to one half.
Now, add sifted powdered sugar to that 1/3 cup frosting that was set aside to make it very stiff. Place in a piping bag, cut off the tip and "outline" the cake layer. Melissa says this will keep the filling from oozing out the sides.
Once the layer has a piped edge, add half of the frosting with the chocolate chips in the center. Use an offset spatula to spread.
Top with another layer.
Add another piped edge and fill with the rest of the chocolate chip frosting.
Top with the 3rd cake layer.
Apply a thin layer of the plain buttercream (to crumb coat) and place in the fridge for at least one hour.
Add the remaining buttercream and smooth. Melissa has videos of several smoothing methods on her website.