Friday, July 29, 2011

Mon Cheri

These are quite possibly the easiest decorated cookies ever. 
 

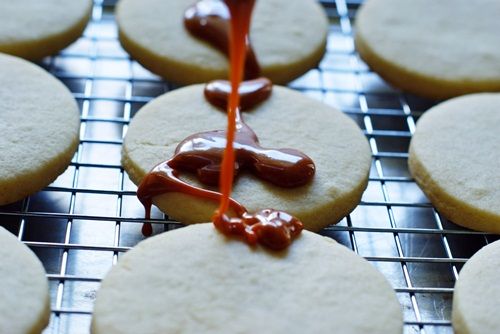
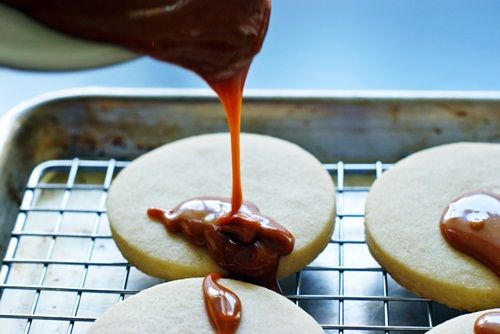
They start with these:

Do you know what they are?  I didn't.  I thought they were giant nonpareils.  They are actually "sixlets" and are CHOCOLATE!  Chocolate, people!

I kind of have a thing for cherries.  Maybe it's because I worked for Mary Engelbreit before kiddo came along.  Mary is the QUEEN of cherries, in case you didn't know. ;)

You might have seen the bowl of cherries looming in the background in, oh, almost all of my pictures.  

The cherries are fake....plastic, and I'll admit, dusty....but that doesn't stop people from trying to eat them when they sit at our kitchen table.

{Spike thinks just *maybe* he can reach them.}

Don't even get me started on the cherry sours from the Sample House in Dallas.
{If you live in Dallas, get in your car RIGHT NOW and go get some.  You need them.  Really.}


OK, back to the cherry cookies.  You will need:
  • chocolate square cookies (this chocolate cookie is actually for a super, secret, special project I'm working on...more on that later. Until then, use this one.)
  • royal icing, divided and tinted with AmeriColor Bright White and Leaf Green
  • disposable icing bags (2)
  • couplers
  • tips: #2 & #1
  • toothpicks
  • red sixlets 
 
Using a #2 tip, outline the cookies in white.

Thin the white icing to the consistency of a thick syrup. Cover with a damp dish towel and let sit for several minutes.  Stir gently with a silicone spatula and transfer to a squeeze bottle.


Flood the cookies with the thinned icing.  Use a toothpick to guide into corners.


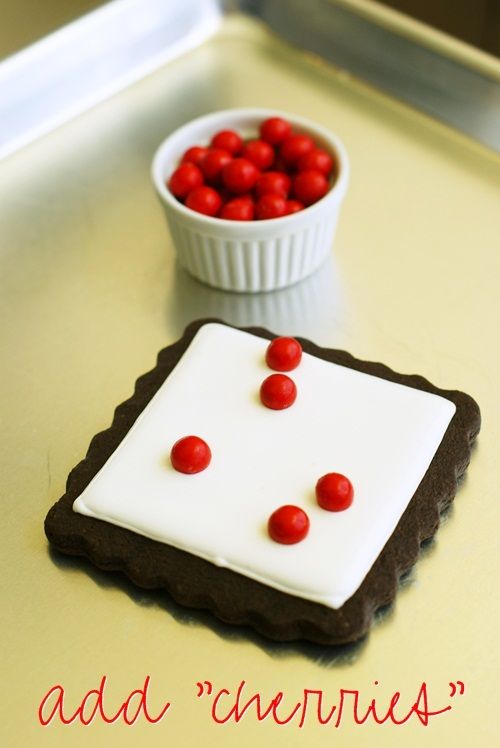
While the icing is still wet, add the sixlets.

Let the icing dry for at least 30 minutes, then add stems, leaves, and dots in green icing with a #1 tip.

Let the cookies dry 6-8 hours or overnight.


That's it! :) Now how about a cookie, mon cheri?

Wednesday, July 27, 2011

Team Rosie the Riveter . . . supporting Fisher House


Funny how life works sometimes.  A few weeks ago, I heard about his wonderful place called the Fisher House.  As soon as I got home, I told Mr. E that we needed to see what we could do to help this organization.

Fisher House is like a Ronald McDonald House for our soldiers and their families. 
From their website:
" Fisher House Foundation, providing a "home away from home" for military families to be close to a loved one during hospitalization for an illness, disease or injury."

Fast forward to last week, when Ann Marie, military wife, mom, blogger, baker, candlestick maker (do you make candlesticks, Ann Marie?) and my bloggy friend, tweeted about raising money for the Fisher House!

Ann Marie, who I first met through her INCREDIBLE Apple Rosette Pie, is participating in a 24-hour walkathon to benefit the Landstuhl Fisher House in Germany where their family is based.  


*The walkathon takes place July 29th; donations will be accepted until August 5th.*

Want to show our military families and blogger Ann Marie a little love?  Here's how; visit:
Go, Ann Marie!  Go Team Rosie!  We thank you, your husband, and all of our military families for their service and sacrifice! ♥

Monday, July 25, 2011

A Very, Merry Un-Birthday to You !


One of my very favorite traditions growing up was celebrating half-birthdays.  Not with presents or parties, but with HALF of a cake!


A very, merry UNbirthday, indeed!


Kiddo celebrated his half-birthday over the weekend with HALF of a sweet, tangy and delicious lemonade cake.

I was having tea over at my friend Amanda's (Amanda Carol at Home) house...which, oh, if you ever get a chance to have tea at Amanda's house, jump at it (you'll never want to leave)!  Anyway, she told me about a cake she spotted over at The Exchange.  I knew I NEEDED it. (I mean, kiddo needed it.)

If you love lemon, you are going to LOVE this cake...it's a triple-threat of lemon: cake, glaze and frosting.

I changed a few things from the recipe and am posting it here, but be sure to pop by the original on The Exchange.  Her cake is lovely and she gives the history of the cake and tracking down the recipe.

Lemonade Cake
{adapted from The Exchange}

For the cake:
1 (18.25 oz) yellow cake mix
1/3 cup vegetable oil
4 eggs
1 & 1/3  cup buttermilk
1 (4.3 oz) box of lemon pudding
zest of one lemon
3 TBSP lemonade concentrate, thawed

For the glaze:
2 cups powdered sugar
1/4 cup freshly squeezed lemon juice
2 TBSP lemonade concentrate, thawed

For the frosting:
1 stick unsalted butter, softened
1 (8 oz) pkg cream cheese, softened
1 tsp vanilla
1/4 cup freshly squeezed lemon juice
1 tsp lemonade concentrate, thawed
4 c. powdered sugar

Preheat oven to 350. Grease and flour 2 round 8" cake pans (or use a spray for baking). Line the bottoms with parchment.  Grease or spray the parchment.

On low speed, combine all of the cake ingredients until combined.  Turn up the speed to medium and beat for 2 minutes.  Pour into the prepared pans and bake for 30-35 minutes, or until a toothpick inserted in the middle comes out clean.

Meanwhile, make the glaze.  Whisk together the powdered sugar, juice and concentrate.  Set aside.

Once the cakes are done, let cool for 10 minutes in the pans on a cooling rack. Invert and remove from the pans.  Place the cake with the prettiest top right-side-up and the other cake upside down.  Place the cooling rack over a rimmed cookie sheet for pouring the glaze.


Poke holes in each of the cakes with a toothpick.


Pour the glaze over.


Oh, you liked that, did you?  I have more.


...and more....


....and more.

Let the cakes cool completely.

Make the frosting.  Cream the butter and cream cheese together until smooth.  Beat in the vanilla, lemon juice and concentrate until combined. Add in the sugar, beating at low speed. Increase the speed and beat until fully combined and smooth.

Now...here's where I messed up.  I bought that "1/3 less fat" cream cheese.  Why?  I have no idea. Maybe it was guilt over all of the chocolate peanut butter ice cream I ate last week.  Anyway, it made my frosting a bit too soft.


If your icing seems too soft to frost the cake, park it in the fridge for an hour or more. Don't get impatient like me and try after 30 minutes or your frosting for the middle will ooze out the sides.

Once frosted, refrigerate 1 hour to set.


If your cake is for a half-birthday, cut the cake in half.  (Give the other half away...preferably to the person who told you about the recipe. In my case, Amanda. In your case, well...me.) ;)


Half-birthday cakes are not meant to be fancy, so no decorations here.  Just good ol' cake.  And 6 more months until my baby is a teenager. {Hold me.}

Friday, July 22, 2011

Dark Chocolate Peanut Butter Ice Cream (you need it)


OK...I'm going to get all first-born-child-bossy on you now. If you like chocolate, and you like peanut butter, and you like chocolate WITH peanut butter, you MUST make this ice cream. (Yes, even if it means biting the bullet and buying that ice cream maker. I promise.)

This dark chocolate peanut butter ice cream is rich; it's creamy; it's dreamy.  It will change your life.  It will make you a happier person.

{Notice I said "happier," not "skinnier."}

The recipe is adapted from the Ben & Jerry's Ice Cream & Dessert Book 
You'll need this stuff:


Oh, and vanilla...


Dark Chocolate Peanut Butter Ice Cream 

2 oz. unsweetened chocolate ( I like Ghiradelli)
1/3 cup dutch-process cocoa powder (such as Hershey's Special Dark)
1 & 1/2 cups milk
2 eggs
1 cup sugar
1 cup heavy cream
1 tsp vanilla
1/2 cup smooth peanut butter

{This ice cream is made with uncooked eggs, so if you feel uneasy about that or are serving to someone with a compromised immune system, try using pasteurized eggs.}

Place a heatproof bowl over a pot of simmering (not boiling) water.  Melt the unsweetened chocolate. Gradually add the cocoa; the mixture may clump up in the whisk...that's ok.  Slowly pour in the milk, whisking with the chocolate mixture until combined and smooth.  Remove from heat and let cool several minutes.

Whisk the eggs in a large bowl until light and fluffy, 1-2 minutes.  Add the sugar, a little at a time, whisking constantly.  Once all the sugar has been added, whisk 1 minute more.

Add the cream and vanilla; whisk to combine.

Pour the chocolate mixture into the cream mixture and stir.  Cover and refrigerate a few hours or overnight.


Before transferring to an ice cream maker, remove 1 cup of the mixture into a separate bowl and whisk in the peanut butter until smooth.


{Normally, I'm a natural peanut butter girl, but for this, I go with Jif. It's smooth and creamy and luscious...perfect for this ice cream.}

Add this back into the main mixture and stir. Process in an ice cream maker.  Once the freezing cycle finishes, transfer to a freezer-safe container and freeze a few hours to firm up.


 Time to serve it up.


Ahh, there we go...

It's worth the calories, my friends. Go ahead, indulge. 

Wednesday, July 20, 2011

Making Cookie Decorating Easier (with color) . . . Works for Me Wednesday


*Let me tell you a little cookie decorating secret*

Making 48 cookies in a similar color scheme is easier than making 18 cookies in all different colors.

I love cookie assortments.  And Eleni's in NYC has the some of the most creative and beautiful assortments around.  Like this gorgeous one...

{source: birds & butterflies assortment, Eleni's}

Now, I count...eleven colors in that assortment of 24 cookies.  If you are making these cookies at home, you'd better have tips and couplers and squeeze bottles out the wazoo, or be prepared to do some washing.

Making and planning a million different colors for one batch of cookies can rattle even a seasoned cookie decorator. (OK...I haven't actually asked anyone else, but it rattles ME.)  You'll also end up making lots of extra icing, just to ensure you have enough of every color.

Want to streamline the process?  Pick just a few coordinating colors.  So, from the Eleni's example, maybe just the purple birds, butterflies and flowers.  Just as pretty and and it will save you time and headaches. TRUST ME.


I actually LOVE how cookies that are all in the same color scheme look on a dessert table or in a basket.


This assortment?  Three different cookie designs, but using the same 3 colors.

Color coordinating cookies....they work for me!

Monday, July 18, 2011

Emergency Dessert . . . Pie Edition

Yes, it's true...at Casa de la Bake at 350, we don't always have dessert.

I try to give away a lot of goodies that come out of the kitchen.  You would think getting the sweets out of the house would be a good thing.
{In reality, that just means I get desperate and eat half a bag of chocolate chips in one sitting.}

So, last week I was having a desperate housewife moment.  Meaning a housewife desperate for pie.  And not pie in 2 hours, pie NOW.

Enter, emergency pie.


Pour some frozen blueberries into a bowl.  Let them thaw for 10 minutes or so.
{Yes, frozen blueberries...for some reason, I like frozen blueberries, and baked blueberries, and dried blueberries, but not fresh blueberries. Anyone with me?}


Top with Cool Whip. (Call the foodie police, I *like* Cool Whip.)


Crumble one graham cracker on top.

Ta-da!  EMERGENCY Blueberry PIE!


{I've posted about emergency dessert before.  What do you do when you have a dessert emergency?}

Wednesday, July 13, 2011

Butterbeer Cookies . . . for the final Harry Potter movie !


*sigh* The last Harry Potter movie comes out on Friday...and I'm just not ready.

I've posted about my love of Harry and even made Harry Potter cookies before, but couldn't resist doing a little something to commemorate the last movie.

The cookies are a butterbeer sugar cookies with a butterbeer glaze.
 
The Hogwarts house crests are edible images applied to fondant.

But, not to fear if you don't want to make the edible images....the cookies with just the glaze?  "Bloody delicious" as I imagine Ron might say. (Is that a saying?)
 

 See what I mean?


My sign that I have something delicious on my hands?  Kiddo's nostrils flare.  What more evidence do you need?

If you are having a Harry Potter party, I beg, no, I INSIST that you make these cookies.
I'm a first-born and I'm very bossy like that.

Where would the sorting hat put you?
{OK...and don't you think sorority rush would be SO much nicer if there was just a sorting hat?!?} 


"You might belong in Gryffindor,
Where dwell the brave at heart,
Their daring, nerve, and chivalry
Set Gryffindors apart."


"You might belong in Hufflepuff,
Where they are just and loyal,
Those patient Hufflepuffs are true
And unafraid of toil."


"Or yet in wise old Ravenclaw,
If you've a ready mind,
Where those of wit and learning,
Will always find their kind."


"Or perhaps in Slytherin
You'll make your real friends,
Those cunning folk use any means
To achieve their ends."

{Source: Harry Potter and the Sorcerer's Stone}

Now, I know I wouldn't be brave enough for Gryffindor or cunning enough for Slytherin. There's no house that mentions eating sugar all day and avoiding exercise, so I'm not really sure where the hat would put me.

Butterbeer Sugar Cookies

3 cups unbleached, all-purpose flour
2 tsp baking powder
1/2 cup granulated sugar
1/2 cup light brown sugar (packed)
2 sticks butter
1 egg 

1 tsp butter flavoring
3/4 tsp pure vanilla extract

Preheat oven to 350.

Whisk the flour, baking powder, set aside.

Cream the sugar and butter. Add the egg, butter flavoring, and vanilla; mix until well-blended.

Gradually add the flour mixture and beat just until combined, scraping down the bowl, especially the bottom. (The dough will be quite thick...you may need to knead in stray bits of flour from the bottom of the bowl by hand.)

Roll on a floured surface to about 1/4" and cut into shapes. Place on parchment lined baking sheets and bake for 9-12 minutes, depending on the size of your cutter. Let sit a few minutes on the sheet, then transfer to a cooling rack.

Butterbeer Glaze
{This will cover 12 cookies...and I STRONGLY recommend doubling the recipe as you might want to put this in a shot glass and drink it straight.}

2/3 cup butterscotch chips (I used Guittard)
1/8 cup evaporated milk
1 TBSP light corn syrup
pinch coarse salt

Place all of the ingredients in a glass or metal bowl and heat over a pot of simmering water (or a double boiler).  Stir occasionally, until melted and smooth.

Put the cooled cookies on a wire rack on a baking sheet.  Pour the glaze over the cookies and spread with an offset spatula.  If using the fondant house crests, place these on the wet glaze to adhere.


So, here's to Harry, Ron, Hermione...and of course, JK Rowling.  Thank you for precious hours (and years!) spent reading aloud, snuggled under blankets with my kiddo.  Thank you for casting the *perfect* actors for the movies!  Thank you for amazing characters who will stay with us forever...Harry, Ron, Hermoine, Fred, George, Snape, The Dursleys, Professor McGonagall, Bellatrix and Mrs. Weasley (to name a few).

{I could go on....or maybe I already have?  I'd love to hear your favorites from Harry Potter!}