Tuesday, March 30, 2010

I have no idea what to call this, but I like it . . . Works For Me Wednesday

I'm thinking of just re-titling this..."Longest Blog Post Title in History."

Anyhoo...I wanted to show you guys this handy-dandy measuring cup that works for me.


{Photo Credit: pamperedchef.com}

Why? Fill one end and it's perfect for liquids. Flip it and the other side is perfect for measuring solid, semi-solid and sticky stuff.


You know that stuff that is hard to measure....shortening, peanut butter, honey. Just fill it to the amount you need and just push it right out. Voila!

See...


Mine is from Pampered Chef...no, I don't sell PC, but I have seen them other places. Sur La Table carries a mini version! I still really don't know what to call it. A flip-able, measuring cup pusher-outer thingy. There...that's it.


{On a side note, any recipe that has both butter AND Crisco is good in my book. I'll share this with you later.}


Go on and check out the other Works For Me Wednesday tips at We Are THAT Family.

You can find Bake at 350's WFMW archives here. Next week's edition is "greatest hits."

Monday, March 29, 2010

Easter Cookie Ideas . . . hop to it!

I'm working tonight on some *new* Easter cookies, but here are some blasts from the past for a little Easter cookie decorating inspiration. {Click the links for the full posts.}


Good Eggs...personalized or not, these are always a hit!


Basket Case...I made these for the first time last year. My favorite part? The Easter grass peeking out! :)


"Fluffy" chicks...so simple and so sweet! I *heart* these! This would be a good one for decorating with the kids.


{They look really cute with the baskets.}


And, finally, which to *you* eat first? The Ears or the Tails? These are really easy to make...click here and I'll show you how.

{Re-name these"Twilight bunnies" and make the bite out of the neck! ;)}


Are you making Easter cookies this year?

Sunday, March 28, 2010

Guest Post from Sweetopia : Marbling Cookies


I have *such* a treat for you guys today! This is the very first guest post on Bake at 350 and I am so, so happy to introduce you to Marian. Marian's blog is called Sweetopia and I'm not exaggerating when I say it is a cookie wonderland! I literally cried the first time I saw it. You'll love it, too! {Just WAIT until you see the little owl below!}

Thank you, Marian, for guest posting today! We are so lucky to have you here!


Hi! I'm Marian.


I'm really thrilled and honored to be here as a guest contributor for Bridget's website! Every time I visit I'm inspired by her eye-candy cookies and baked goods of all kinds! Hopefully you'll like the sweets I'm sharing today.


If you've tried cookies like these before you know how simple they are to make, and if you haven't, you're about to find out just how easy they are to create.

It's called marbling or swirling, which is basically when one or more colors of icing are applied to a base coat of icing, and then a toothpick, cake tester, pin or skewer is dragged through the icing to create a marbled or swirly effect.

Each combination of colors creates another look.


Just by changing the way you set up your lines and drag the toothpick, completely different designs emerge.

You can incorporate the swirled icing into your design, like these feathered cookie friends:


If you'd like to try the swirling effect, the most important thing for your success is the consistency of the icing. Bridget has some great points about that here, and my cookie decorating tutorial goes over some tips and the 10-second rule here.


Once you have your cookies baked and icing made, it's time to begin by piping your outline. I like to use a piping bag fitted with a coupler and #2 tip.

Fill or flood your cookie with royal icing right away. You could leave the outline to set to create a solid dam, but you'll be able to see the border when the icing dries.


Once you've filled the whole cookie in, shake it gently left to right on your work surface, to help smooth the icing out.


Add your second (or more), layers or colors of icing. Work as quickly as you can before the icing sets.


Take a toothpick, pin, skewer or dough tester (hey, whatever works!), and drag it through the icing. In this case I drew S-like shapes. The image below shows which direction I dragged the toothpick in.


Finish off the edges with dots or another design of your choice and you're done!


The hearts are made by piping dots and dragging the toothpick through the center of each dot.


Let your cookies dry, package and ribbon.


Simple, easy, fun and impressive!


If you have any questions or comments come visit me over at Sweetopia for more information or to contact me directly.


A big thanks to Bridget, cookie decorator extraordinaire, for having me as her guest blogger!


Happy marbling!

xo,

Marian

Thursday, March 25, 2010

Kiddo in the Kitchen : Chocolate Chip Cookie Dough Cheesecake Bars

KIK 1 mixer
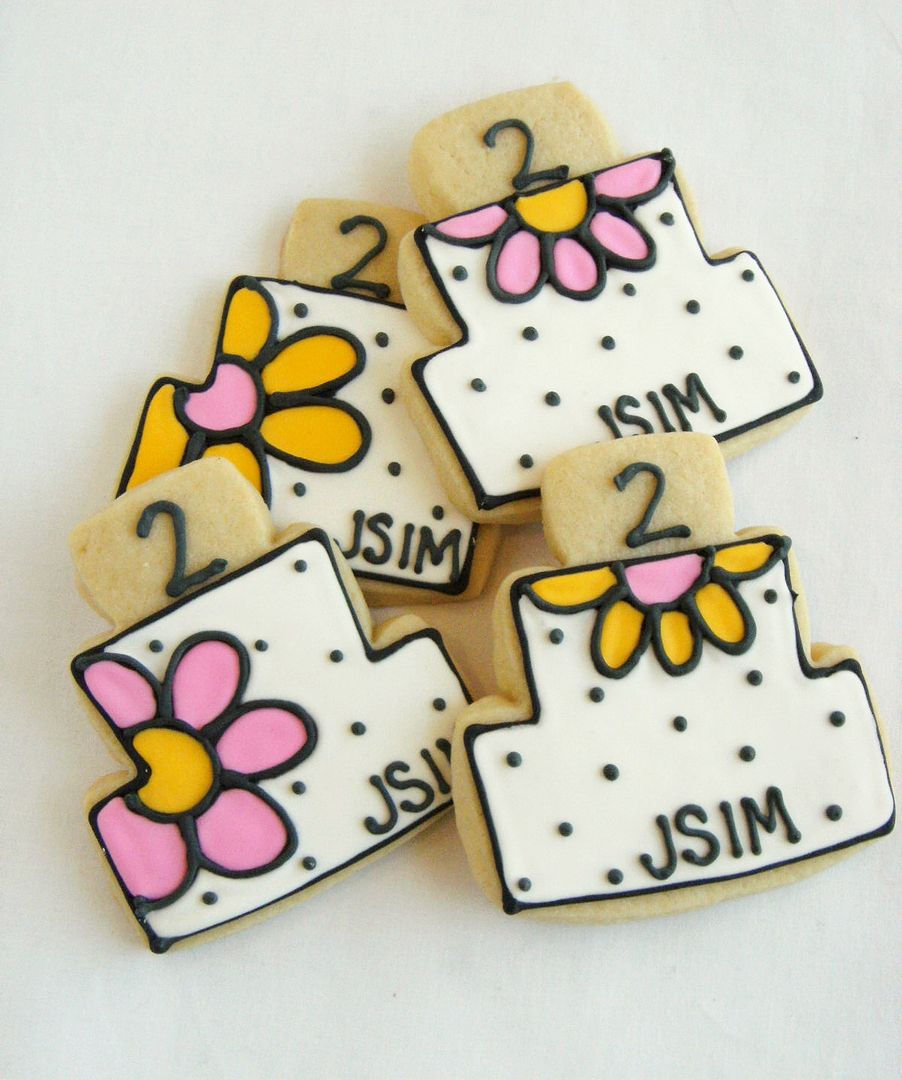
We're trying a little something new here at the blog. Once a month or so, kiddo is going to pick a recipe and I'll help him make it...or he'll help me...or something. I'm thinking once a month...but we all know I'm a quitter, so we'll see how it goes! ;)

KIK 1 collage
{I'm pretty sure there is a pile of laundry in the background on my dining room table. Ignore that.}

Kiddo spends a lot of time in the kitchen. Not necessarily cooking, but he knows it's where to find me. If I'm not baking, I'm normally in the pantry grabbing a handful (or two) of chocolate chips straight from bag.


The kitchen is also where kiddo learned the concept of trust. When he was about 4, I called him in to taste some chocolate sauce I had just made. He wouldn't try it.

"It's really yummy...you'll love it," I said.

Shakes head. "No...I don't want any."

This went on for about 5 minutes...I could.not.let.it.go. He was going to eat the chocolate.

"Sweetheart...Mommy will never tell you something is really yummy to trick you into eating it. Look, I'll never tell you broccoli is really yummy. I'll tell you that it tastes pretty good with some butter and salt, but it's never going to taste as good as a chocolate chip cookie. THIS, this chocolate sauce tastes as good as a chocolate chip cookie...trust me."

He tried it.

He trusts now.

Now you'll have to trust us.

KIK 1 CCCD bar
So, onto the recipe. I knew as soon as he peeked over my shoulder as I read cookies and cups, that this was going to be our first recipe... 
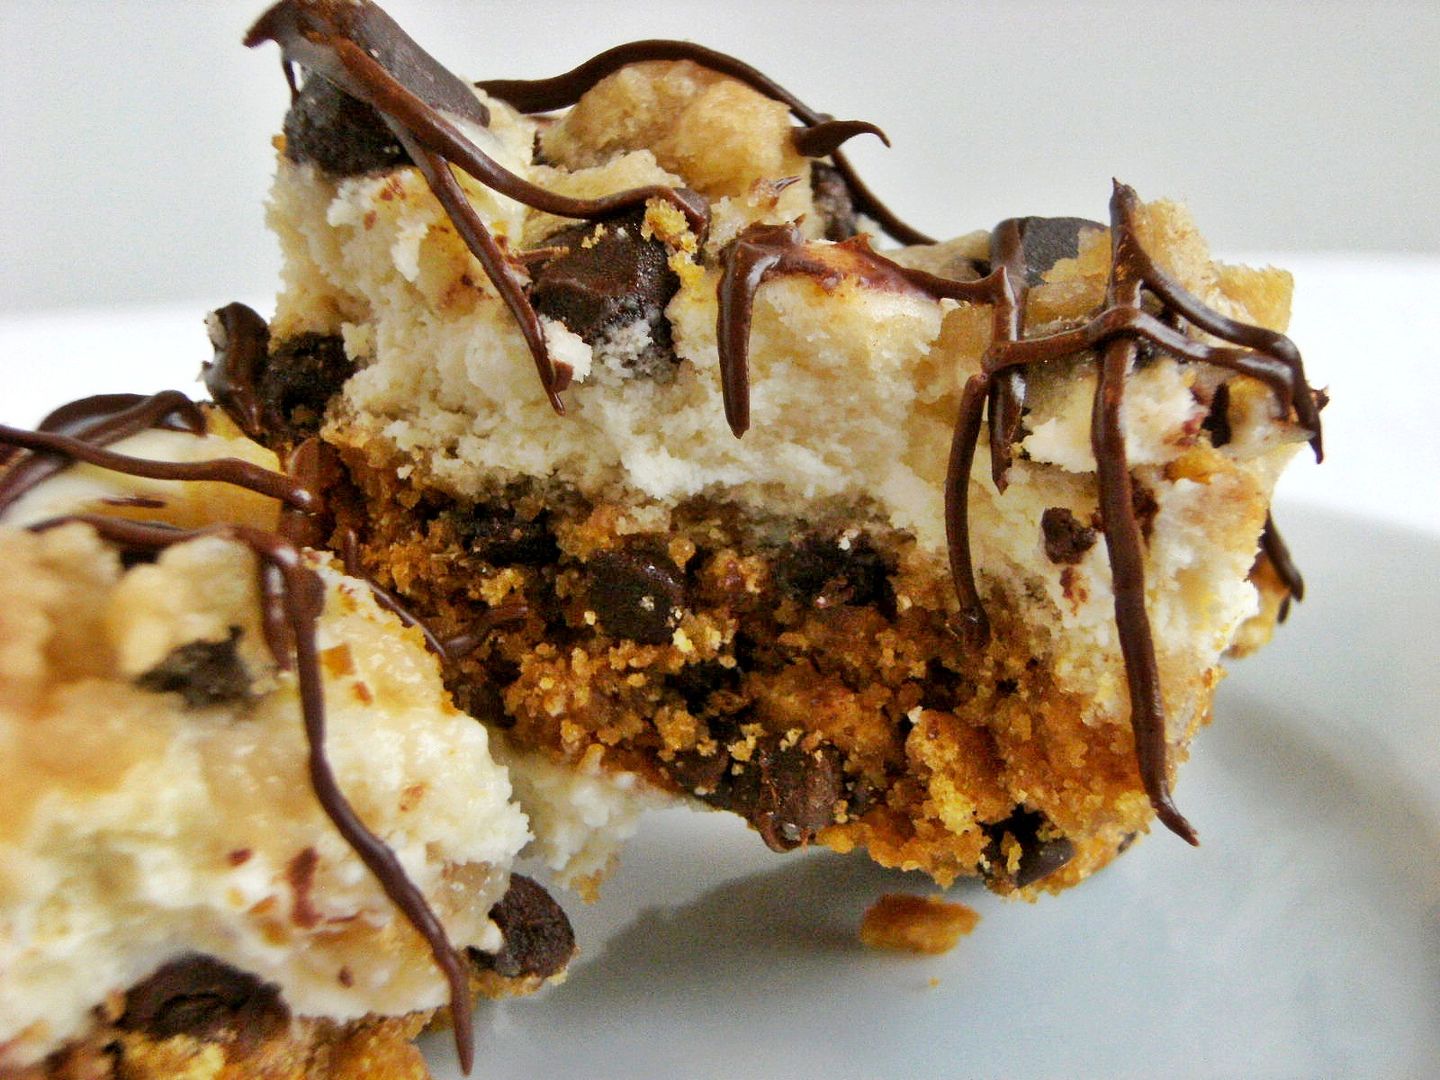
Chocolate Chip Cookie Dough Cheesecake Bars.

{If you haven't been to cookies and cups...GO! It is filled with all kinds of deliciousness...and is really funny to boot (that's an expression, right?)}

Here's how to make them:
Chocolate Chip Cookie Dough Cheesecake Bars
{adapted from cookies and cups & The Essential Chocolate Chips Cookbook}

Crust:
1 & 1/2 c. graham cracker crumbs
5 TBSP butter, melted
2/3 c. mini semi-sweet chocolate chips

Cookie Dough:
5 TBPS butter, room temp.
1/3 c. packed light brown sugar
3 TBSP sugar
1/4 tsp coarse salt
1 tsp. vanilla extract
3/4 c. flour
1 c. chocolate chips

Cheesecake Filling:
10 oz. cream cheese, room temp.
1/4 c. sugar
1 egg
1 tsp vanilla extract

Topping:
1/3 c. chocolate chips
1 tsp shortening

Preheat oven to 325.

For the crust:
Grease a 8x8 pan with butter, line pan with parchment paper and butter the paper, leaving enough to extend over the sides.

Crush graham crackers into crumbs to make 1 & 1/2 cups. Add to butter and stir until crumbs are moistened. Stir in chocolate chips.

Press crust mixture into bottom of pan. Bake for 6 minutes. Set pan on wire rack to cool.
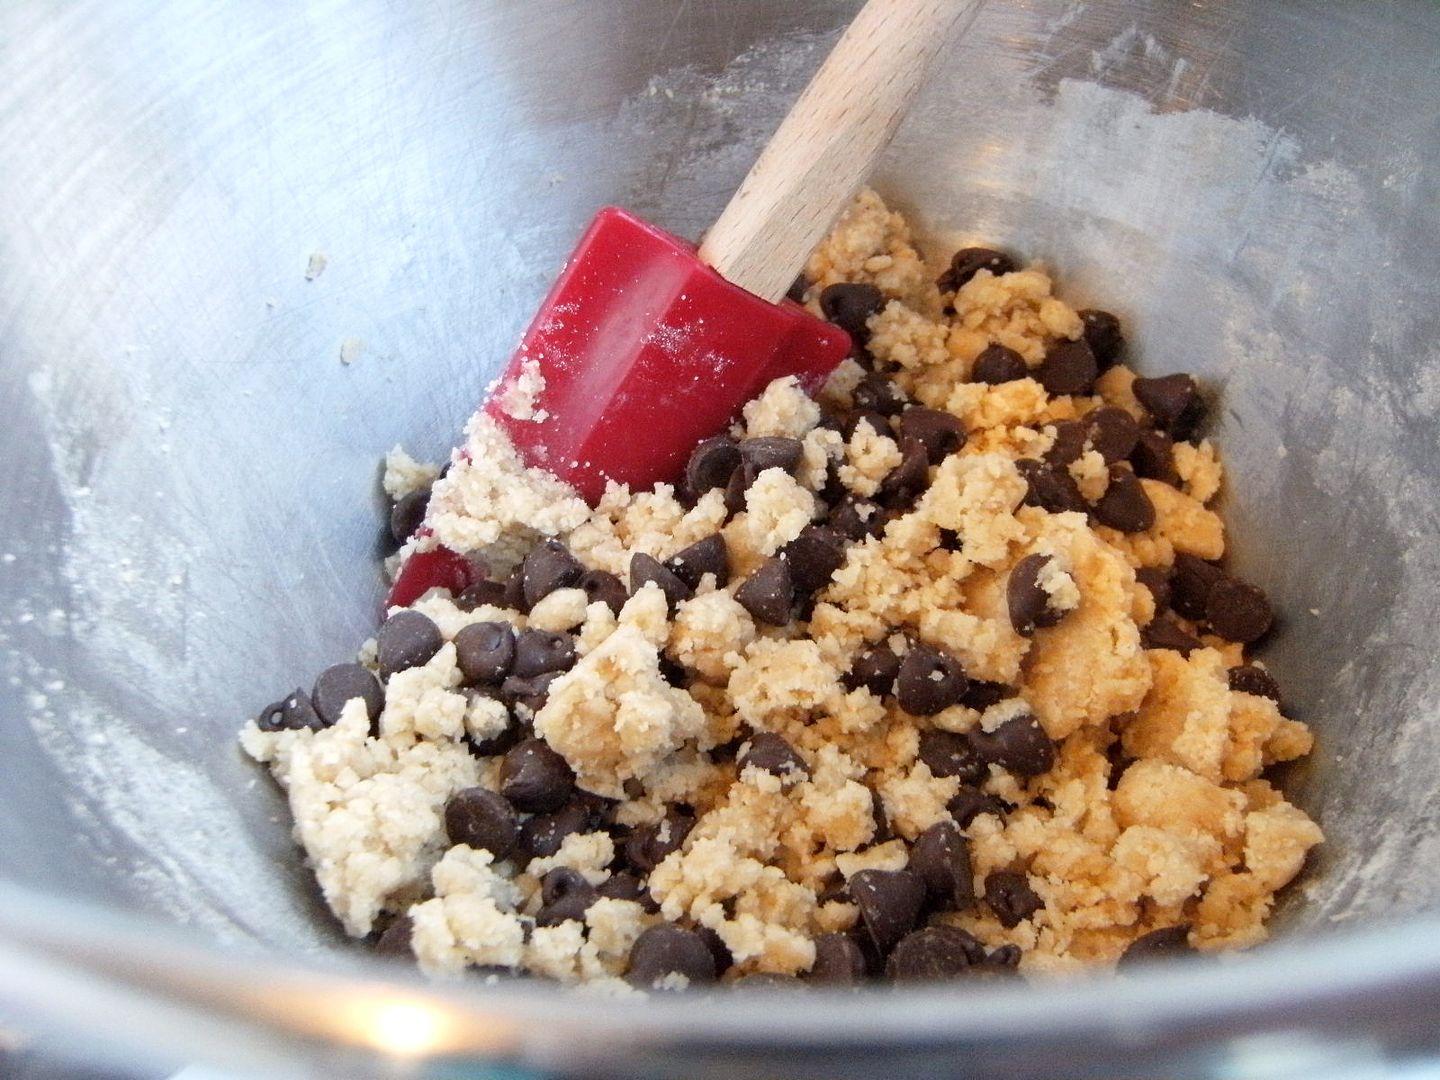
For cookie dough:
Using mixer and the paddle attachment, mix butter, brown sugar, sugar, salt, and vanilla extract at medium speed until smooth. Adjust mixer speed to low and add flour. Mix just until incorporated. Stir in chocolate chips. Set aside.
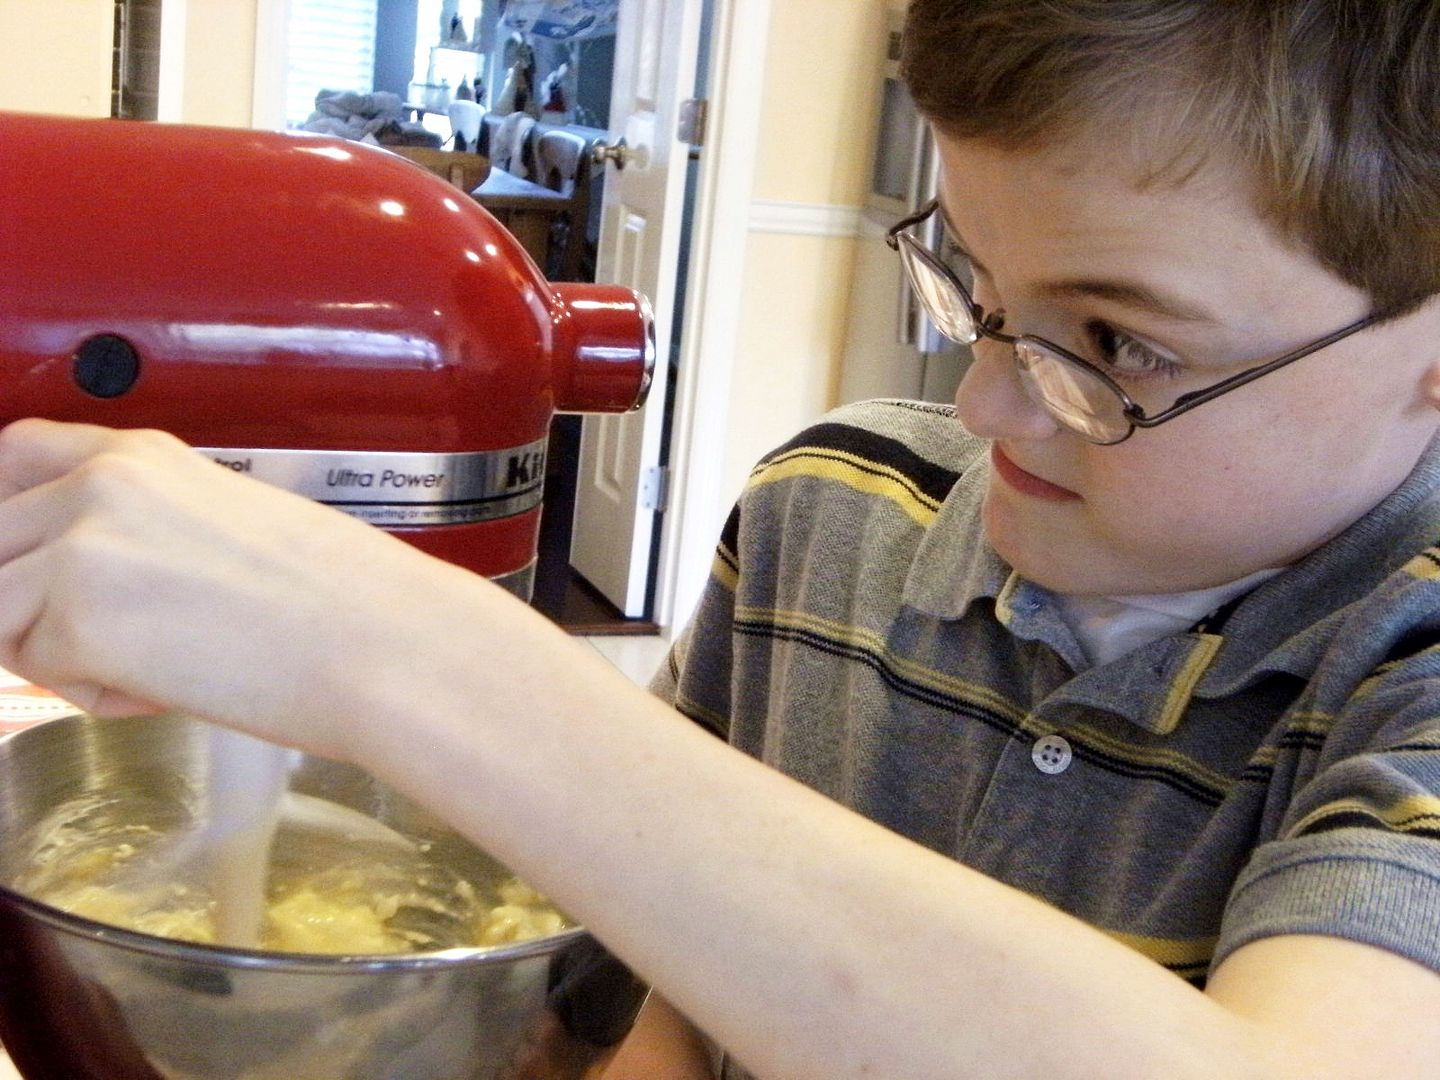
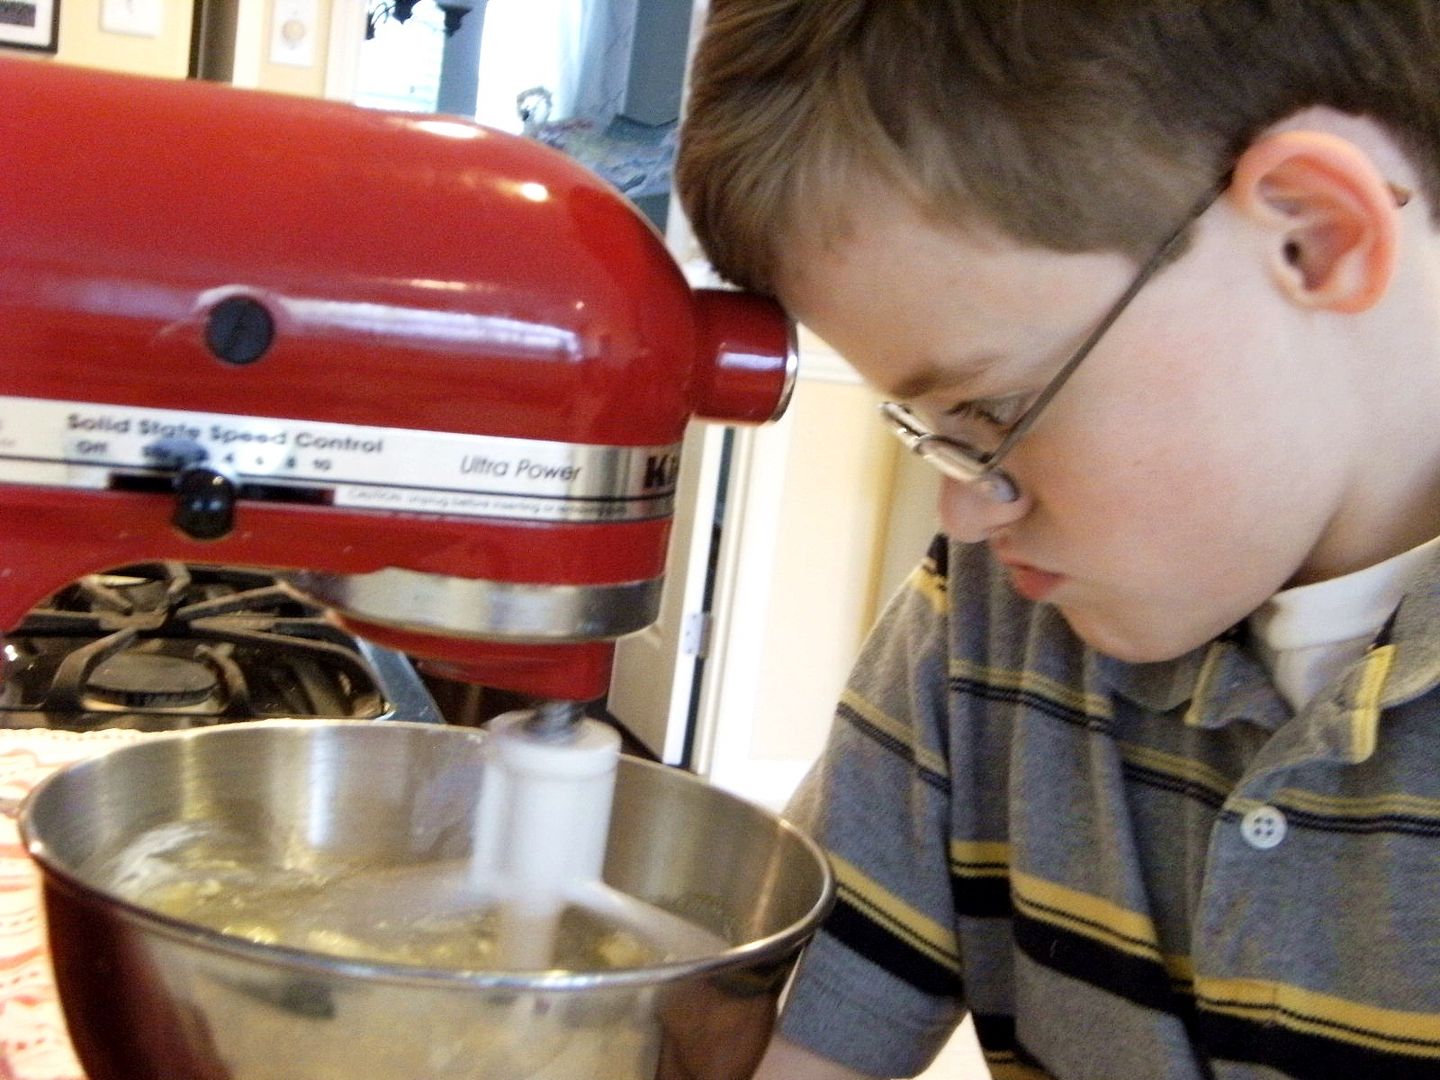
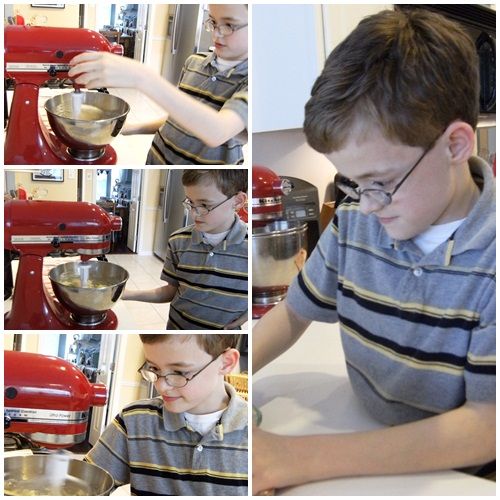
KIK 1 cookie dough

For cheesecake:
Using mixer, beat cream cheese and sugar until smooth. Add egg and vanilla extract, beating just until blended.
KIK 1 face
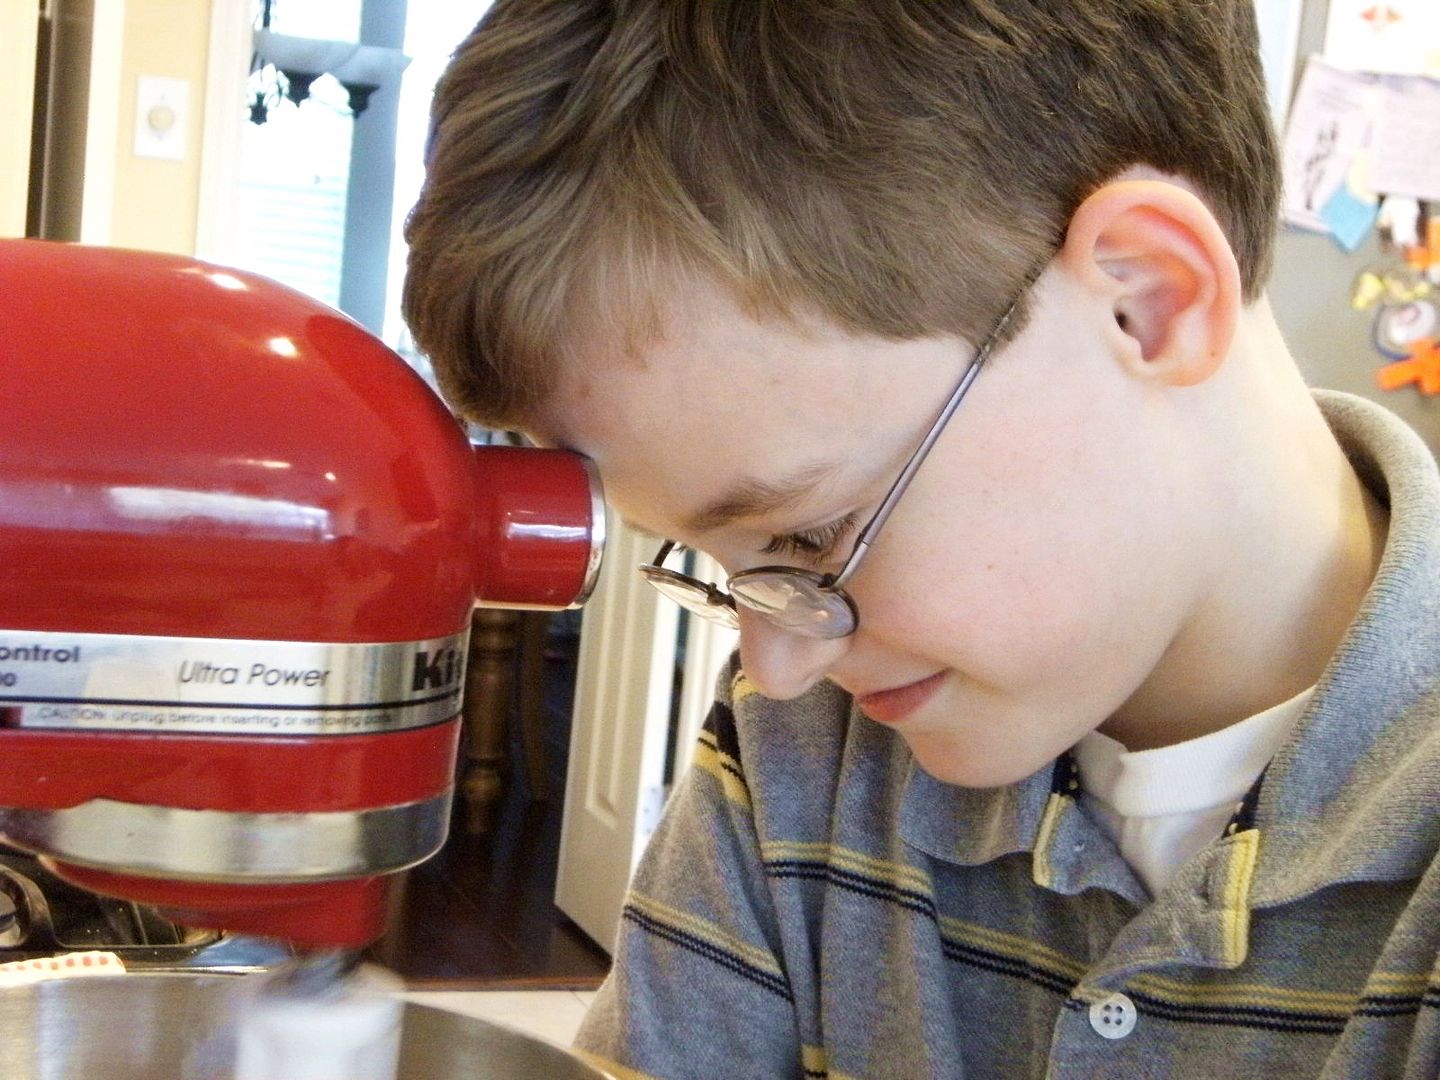
{It helps if you make a face!}

KIK 1 mixer watch
{Concentrate!}
KIK 1 drum collage
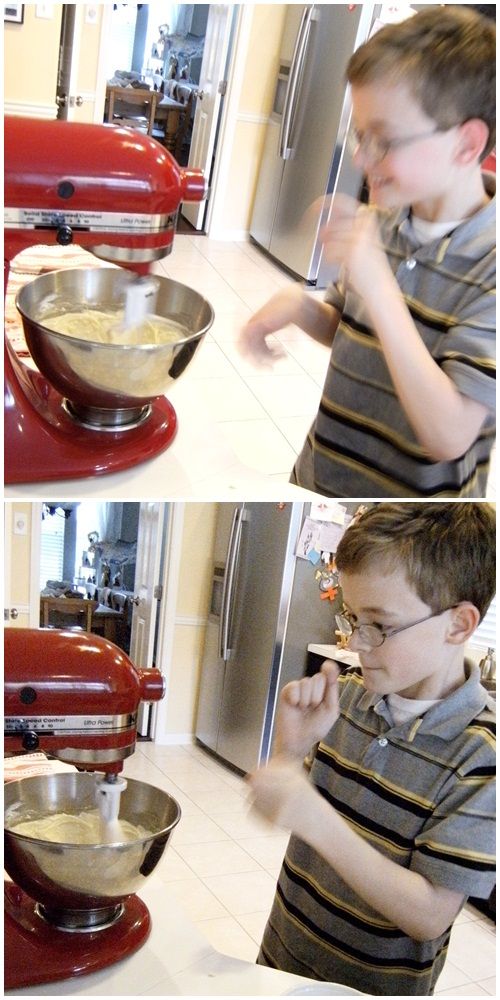
{And, have you ever noticed how your Kitchen Aid makes a little beat when mixing? Kiddo recommends drumming along. I may need to change the name of this segment to Kiddo & the Kitchen Aid!}

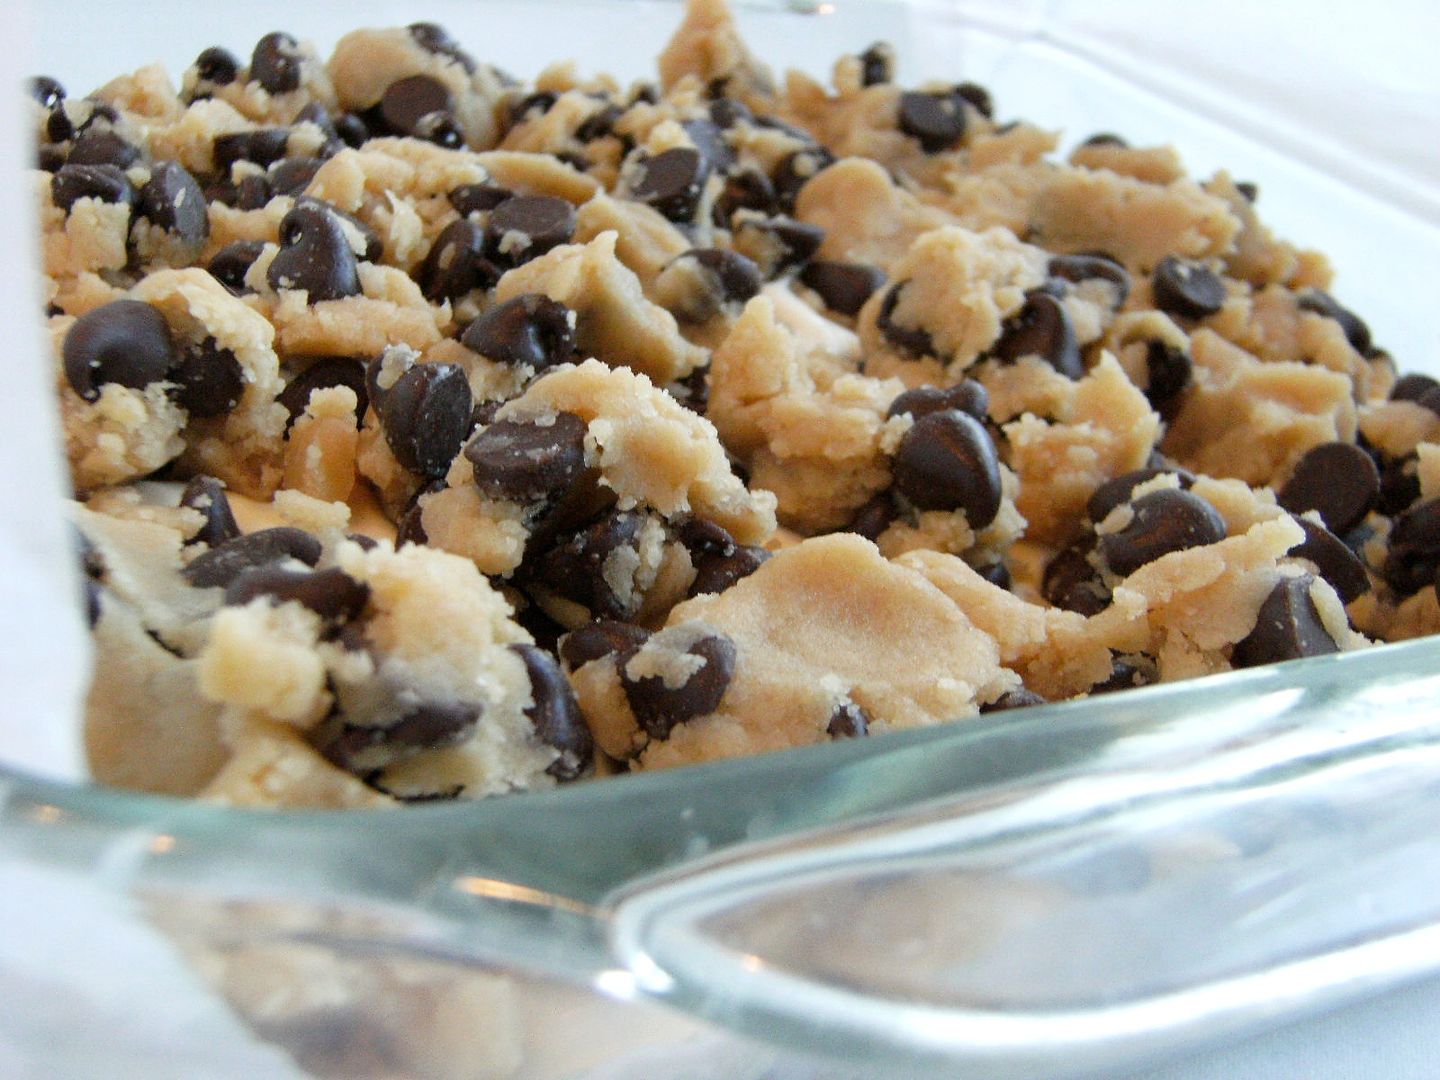
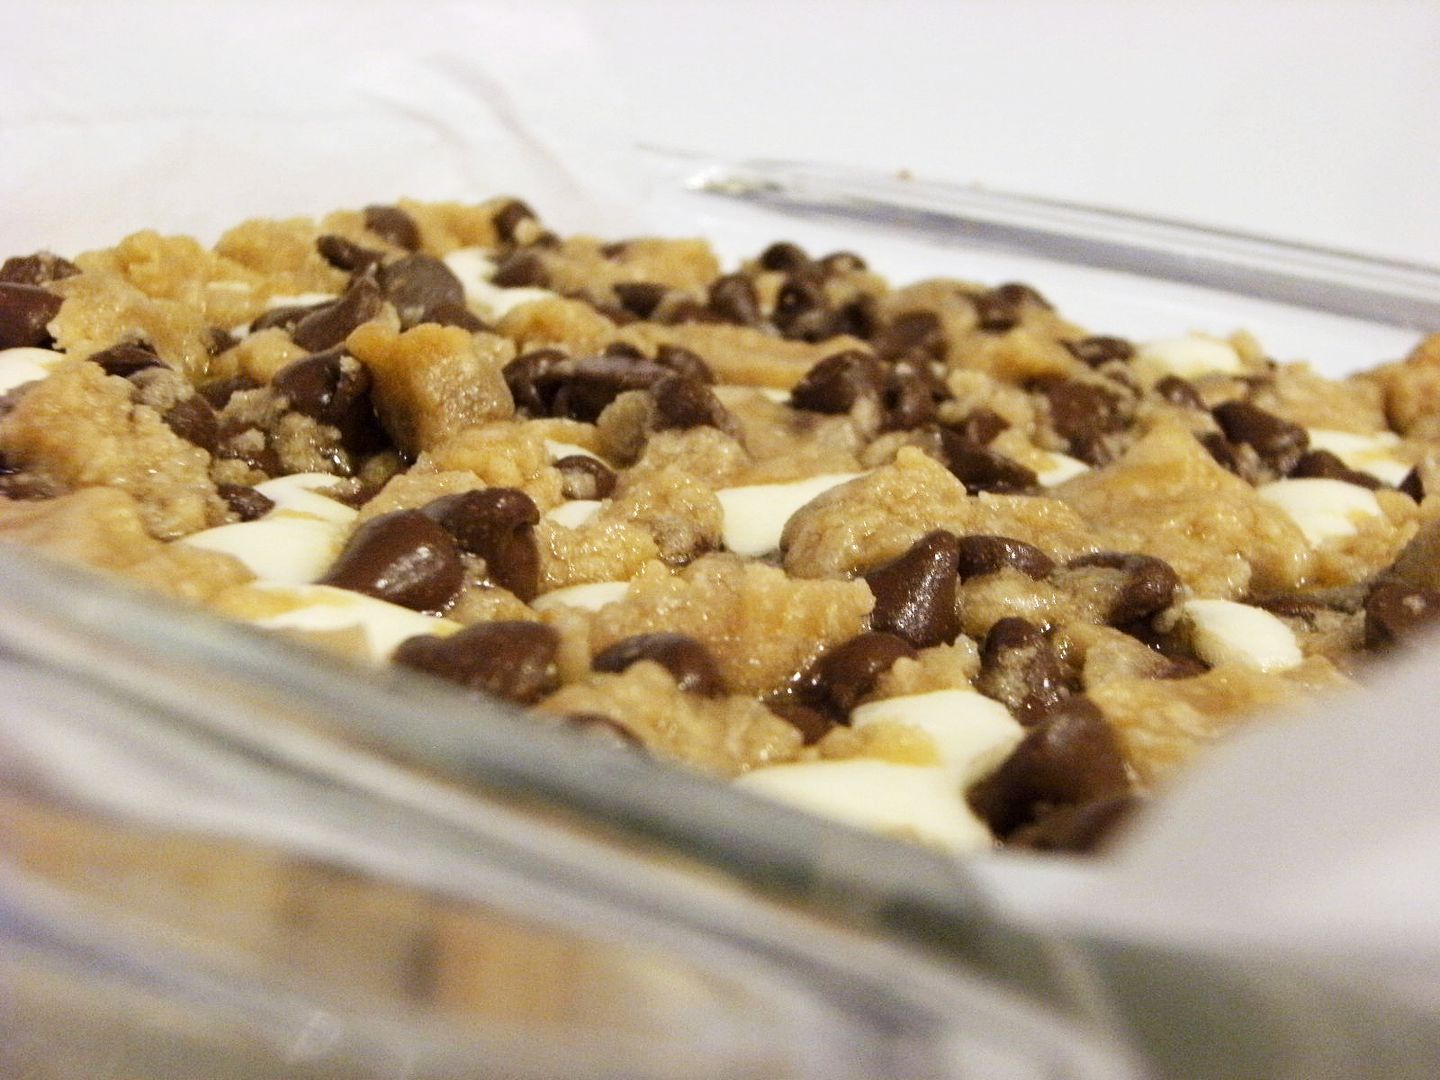
Pour batter into cooled, baked crust. Drop cookie dough by teaspoonfuls over the top of the filling.
KIK 1 prebake

Bake about 30 minutes, or until set. Transfer to wire rack to cool completely. Place in the refrigerator to chill several hours.
KIK 1 cooked

For the topping:
Combine the chocolate chips and shortening and melt in the microwave at 30 second intervals at 50% power. Stir after each interval; repeat until melted.

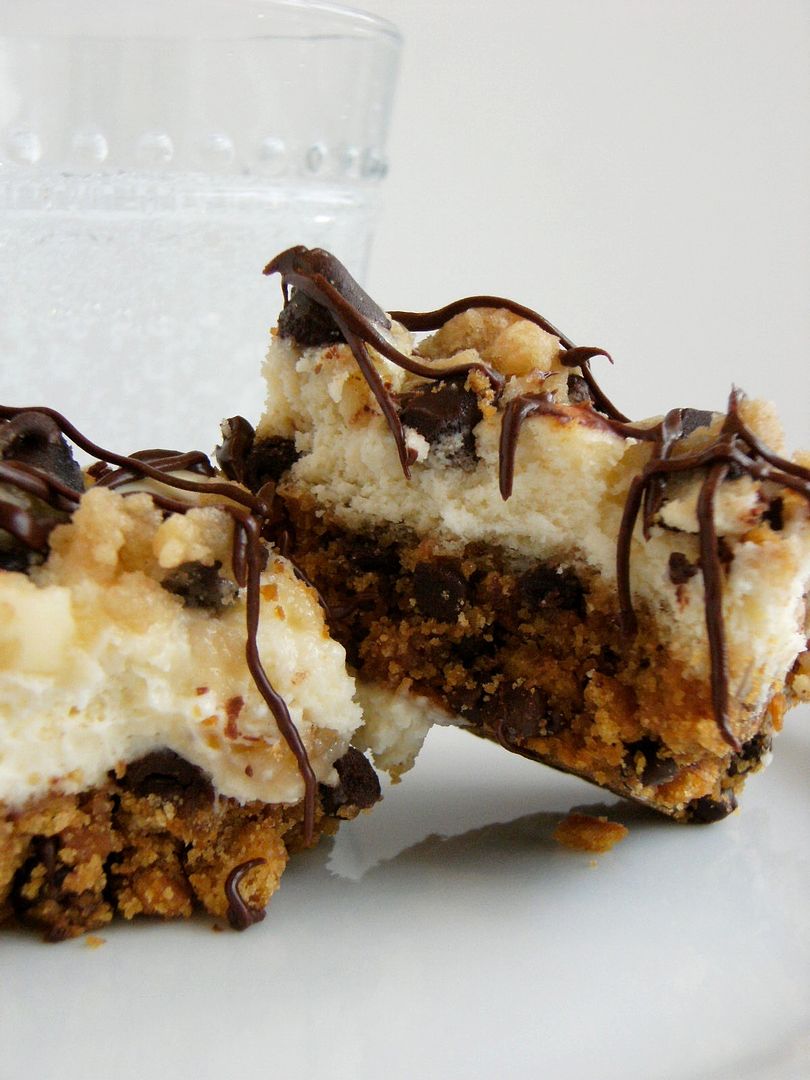
Drizzle over the bars before serving.
KIK 1 with water
They were rich and delicious; I highly recommend serving them with sparkling water to wash them down!

My only complaint, and I hate to complain about cookie dough and cheesecake, is that they are a little hard to cut into nice squares. These two in the pictures are the only pretty ones I got.

{My other complaint...I'm still seeing the effects of these on my thighs!}
KIK 1 text

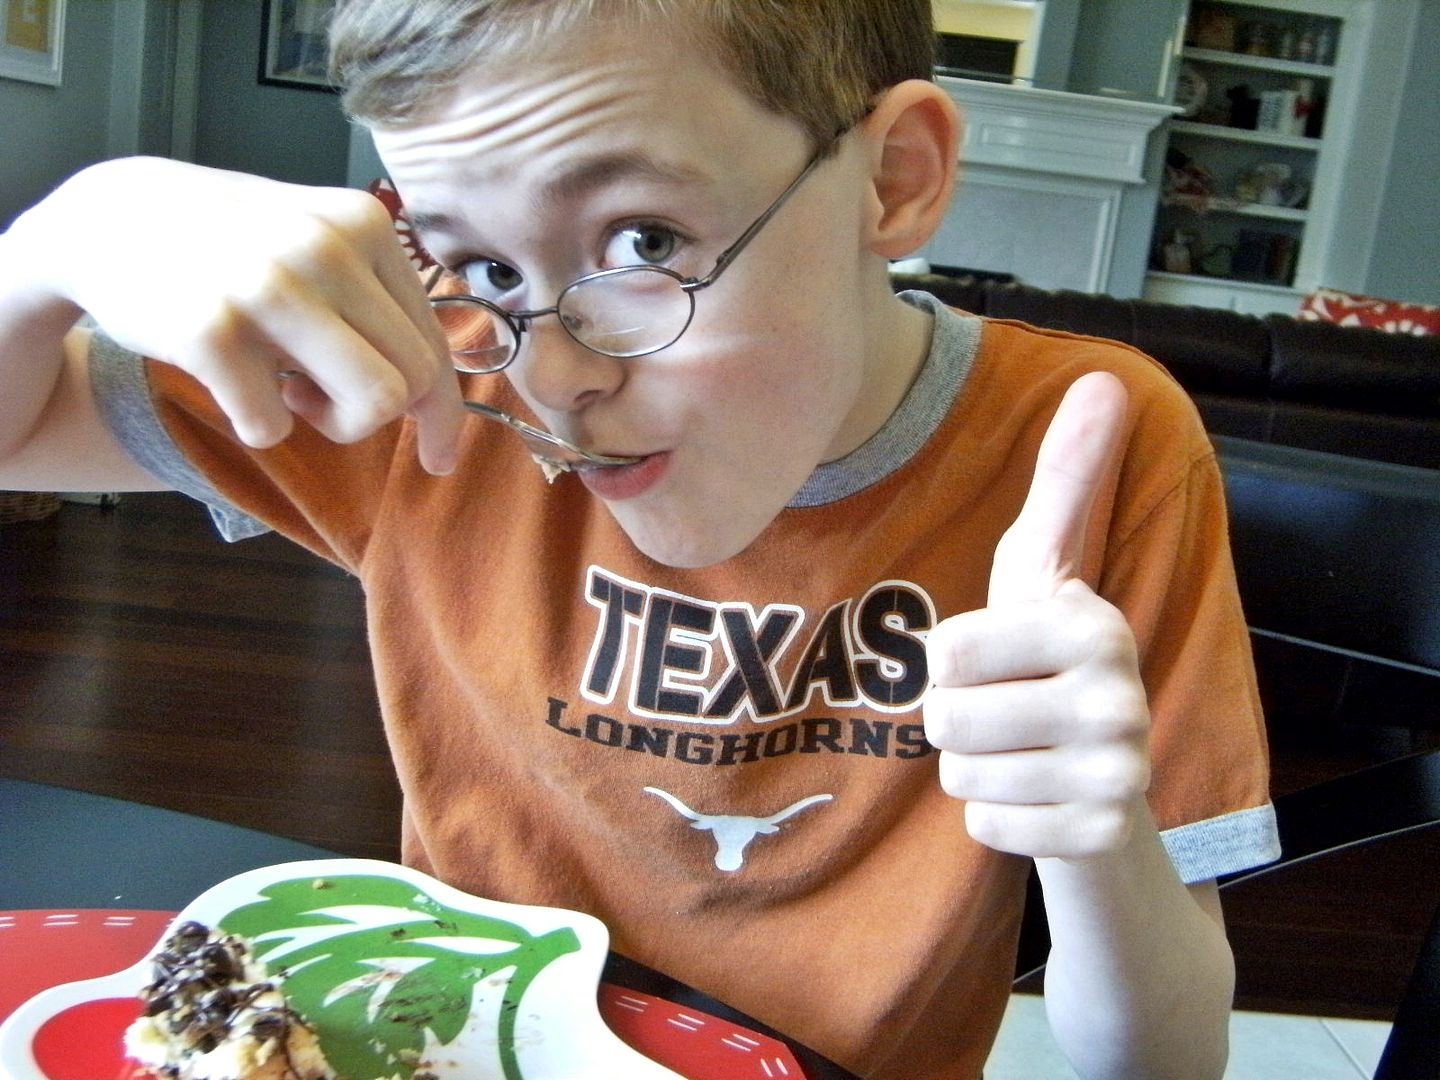
The verdict: Kiddo gives these bars a thumbs-up!
KIK 1 thumbs up

What do you love baking with your kids?


I'm linking this post up to I'm Lovin' It at TidyMom's place because I *do* love baking with my boy! :)

Tuesday, March 23, 2010

The Cookie Spatula . . . Works For Me Wednesday

Another one of the tools I can't live without for cookie making is my cookie spatula.


It's thin, flexible metal and slides right underneath my cookies without breaking them.


(photo courtesy of bakerstools.com)
Just try that with a thicker plastic one! ;) Not only do I use it for decorated cookies, but I use it for every cookie I make...I wouldn't be without it!

Do you have one?


We Are THAT Family hosts Works For Me Wednesday...click on over and see what's working for everyone else!

Related posts:

Thursday, March 18, 2010

Just Something I Made


Let me introduce you to a wonderful blogger and graphic designer, Cathe, of Just Something I Made. Cathe's blog is like nothing I've ever seen. Full of FREE downloads, art, and projects...inspiration on crafting, collecting...not to mention, it just looks really cool! I'm not doing it justice...you have to see for yourself!

Here are two recent entries from Just Something I Made:

{FREE labels for your jars of glitter. Hmmm....I'm thinking maybe labels for SPRINKLES should be next, Cathe!}

{And check out this idea for personalized pancakes!!!}

Well, this week is Just Something I Made's 2nd blogiversary and guess what Cathe is giving away?!? Bake at 350 Cookies!!!

{You may remember my camera hates pink, so these flowers are really a bright pink, not the purple-y pink you see here. Grrrr. }


Here's how to make them:
  • With black royal icing, use a #3 tip to pipe the outline of the cake (AmeriColor Super Black). {I really wanted the outline to stand out here...you can always use a #2 tip for a thinner line.}


  • Pipe the outline of the flowers with the same tip.
  • Thin white royal icing with water to the consistency of thick syrup, let sit several minutes (AmeriColor Bright White).
  • Stir with a rubber spatula to pop any air bubbles that have risen to the surface; transfer to a squeeze bottle.


  • Fill in the background of the cookie in white.
  • Thin the colors for the flowers (AmeriColor Egg Yellow and Deep Pink).


  • Fill in the flowers.
  • Let sit at least one hour.
  • Change the tip on the black icing to a #2 tip. Add the number on the cake, dots on the white icing and pipe over the outline of the flower for definition.


  • Let dry overnight.


So, pop on over to Just Something I Made...there may even be some cookies in it for you! ;)


Related posts:

I'll be linking this up to I'm Lovin' It Fridays over at TidyMom because I'm lovin' Just Something I Made...and I'll *always* love cookies!