Tuesday, July 31, 2012

Continuing on with the Cheerios Motif...

Salted caramel.  Have you tried it?  

Now, I'm a chocolate girl, through and through, but salted caramel has me a bit smitten. I had a salted caramel cupcake in Seattle that was absolute perfection.  Don't even get me started on Teresa's Salted Caramel Frosting.

After making the Peanut Butter Cup Cheerios Bars, these Dulce de Leche Cheerios started calling my name.

Caramel Cheerios are perfectly delicious in a bowl with milk, and would be perfectly delicious in a bar on their own.  But, BUT (!), with layers of salted caramel sauce and just a *sprinkling* of flaky sea salt to make SALTED CARAMEL CHEERIOS BARS?  Oh baby.

{Did you know that food bloggers are not supposed to use the word "delicious?"  I just used it twice in the same sentence.  I hope I don't get kicked out of the union.}
 

Salted Caramel Cheerios Bars


for the sauce:
1 (14 oz.) package Kraft caramels, unwrapped
1/3 cup evaporated milk
1/4 teaspoon fine sea salt

for the bars:
3 TBSP salted butter
1 (10 oz.) package marshmallows
1/2 teaspoon vanilla
6 cups Dulce de Leche Cheerios
flaky sea salt

Grease a 8" or 9" square pan and set aside.
In a medium saucepan, heat the caramels and evaporated milk over low heat, stirring frequently, until melted.  Stir in the salt.  Keep warm over very low heat and stir occasionally while making the bars.

In a large pot or a dutch-oven, heat the butter, marshmallows, and vanilla over low heat until melted.  Remove from heat and stir in the Cheerios.
Place your hand in a baggie, spray with cooking spray and use your covered hand to press 1/2 of the mixture into the pan.  Drizzle on a heaping 1/4 cup of the caramel sauce.
Add the remaining Cheerios mixture on top.  Drizzle on 1/3 cup of the caramel sauce.  Sprinkle on flaky sea salt.  Set aside to cool and set before serving. (A bench scraper is the best tool for cutting.)

One word of warning...you will have extra caramel sauce.  Use it as an ice cream topping, to drizzle on your morning latte, or. or. or....do like I did and grab a spoon.

Dear Cheerios, may I suggest your next flavor be birthday cake? ;)

Saturday, July 28, 2012

Where the Magic Happens

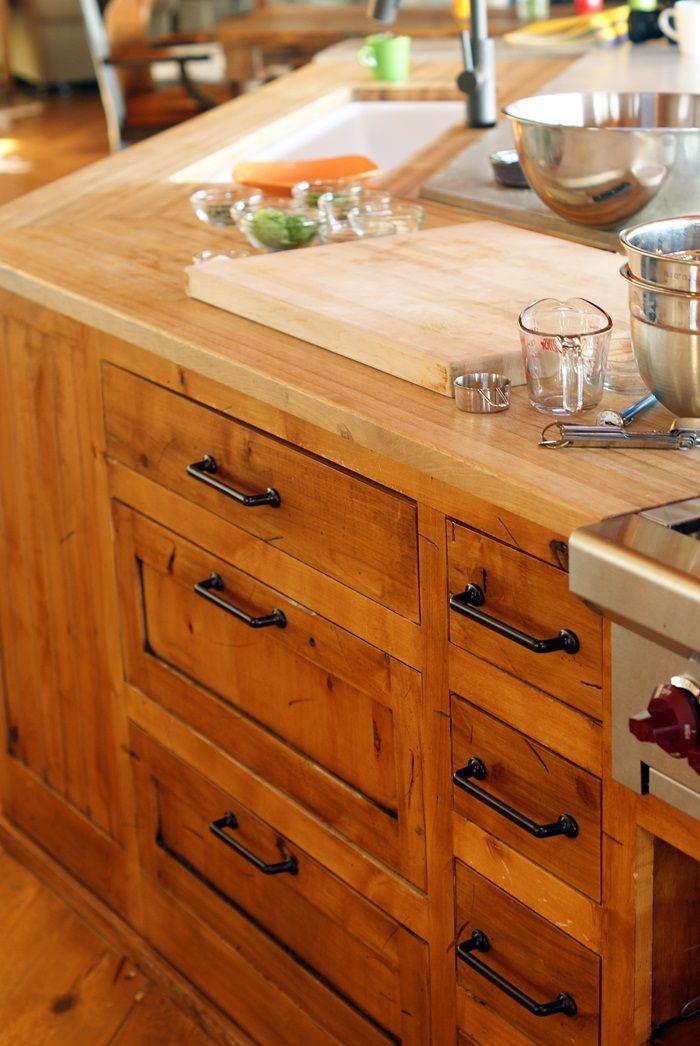
Sometimes you're lucky enough to be where the magic happens.

Last weekend, I was here...
Have a guess?
 

How about now?
Now?

Now?!?

So, a few of us were were at 
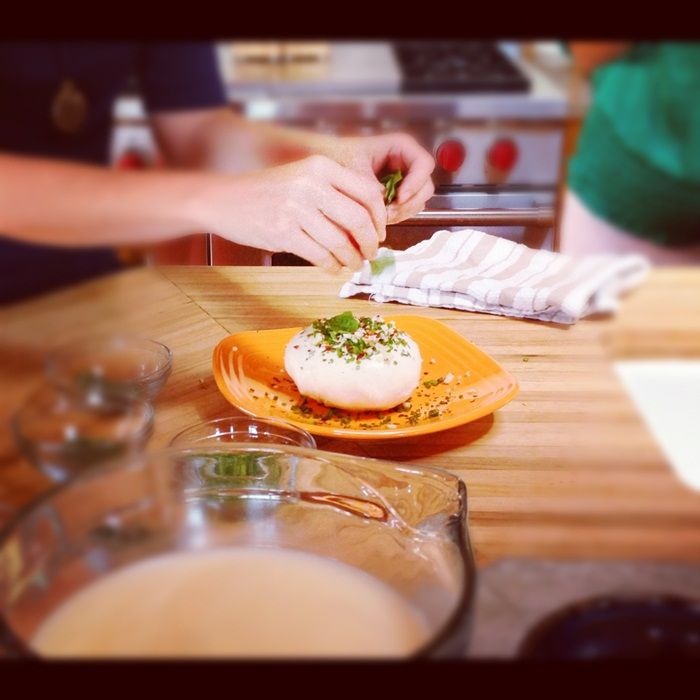
THE ranch for a cheese (bread & red pepper jam) class taught by the beautiful Rebecca of Foodie with Family.
{recipe and instructions are over at PW's}
We laughed, we cried, we squealed, we sang songs from Grease.  We wondered what our parents were thinking when they let us WATCH Grease.  We made "cheesy" puns that were "whey" bad.  Get it?

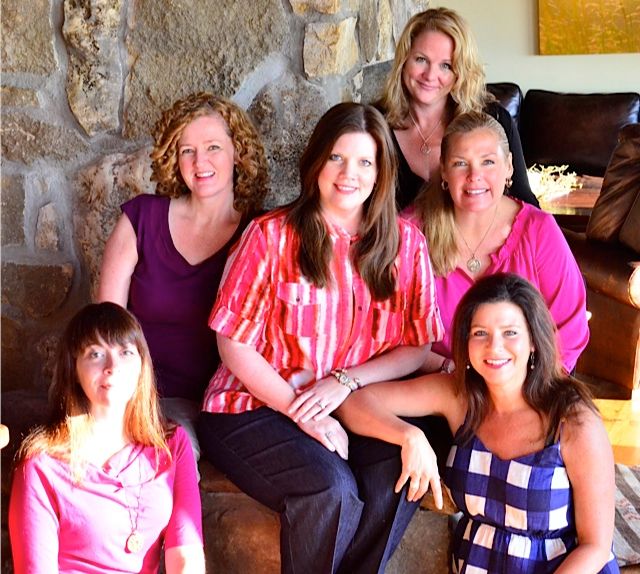
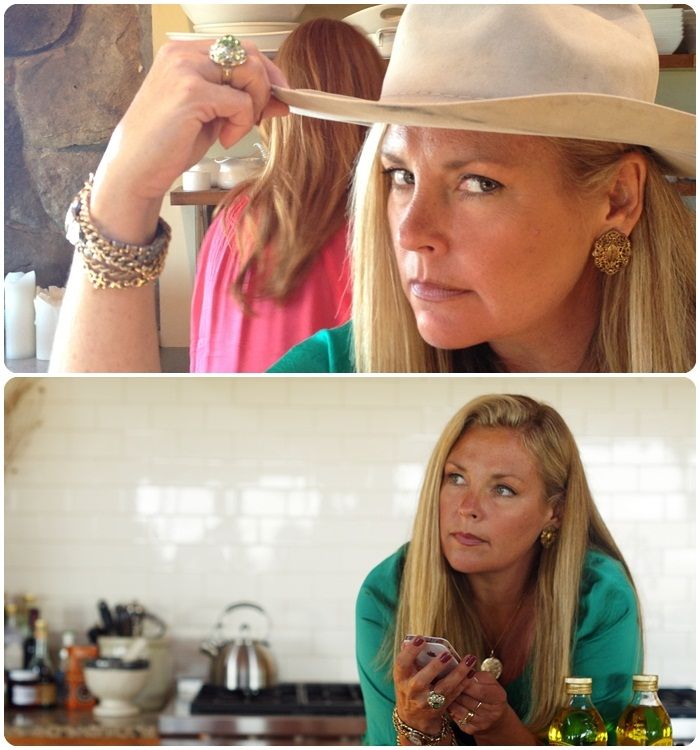
I really, really, really want you to know these girls if you don't already.
 
{Rebecca, me, Robyn, Amy, Wendy, Sandy, photo credit: Sandy}
Sandy decided this looks like a promo shot of a new TV series, "Pioneer Wives."
or maybe, Real Housewives of the Ranch. 

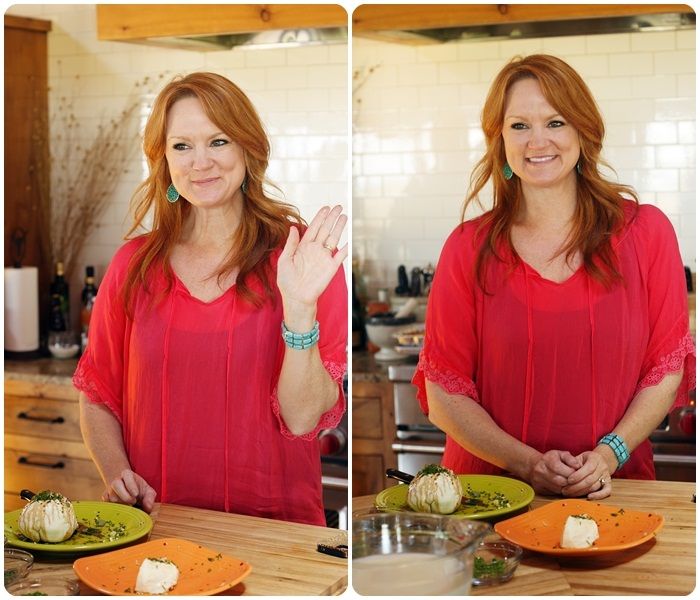
This is Ree.  Hostess with the mostess.  If you don't know Ree, please come out from under your rock now.  If you are not living under a rock, I hope you get a chance to meet Ree someday.  What you love about The Pioneer Woman blog, books, TV show, etc., you'll find tenfold in Ree herself.  Genuine, generous, FUNNY, and can rock a pair of skinny jeans.
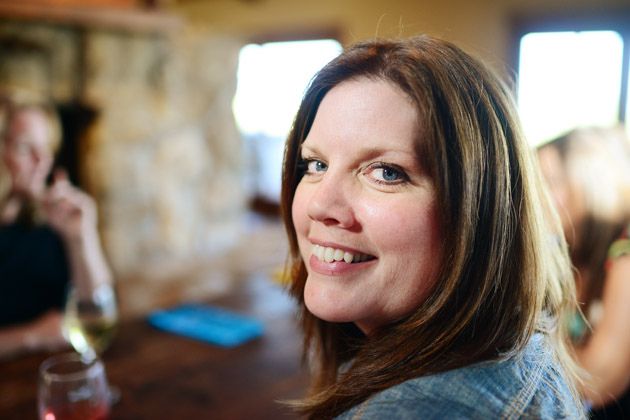
{I'm not jealous about that last bit or anything.}

Sandy.  Sandy is a-DOR-able and was my roomie for the weekend and I've decided that she needs to move her whole family to Texas from Oregon and be my next-door neighbor.  (Too much to ask?) Sandy publishes the blog Reluctant Entertainer and has a book of the same name.  Her book really spoke to me...I AM a reluctant entertainer (entertaining means I have to mop the kitchen)...and made me look at entertaining differently.

Georgia.  Miss Georgia.  You've met Georgia and her book Girl Hunter here before.  What can I say?  Georgia kinda does it all.  She's drop-dead gorgeous, hunts her own food, and is an exquisite cook.  She also elevates the plaid shirt to high fashion. 
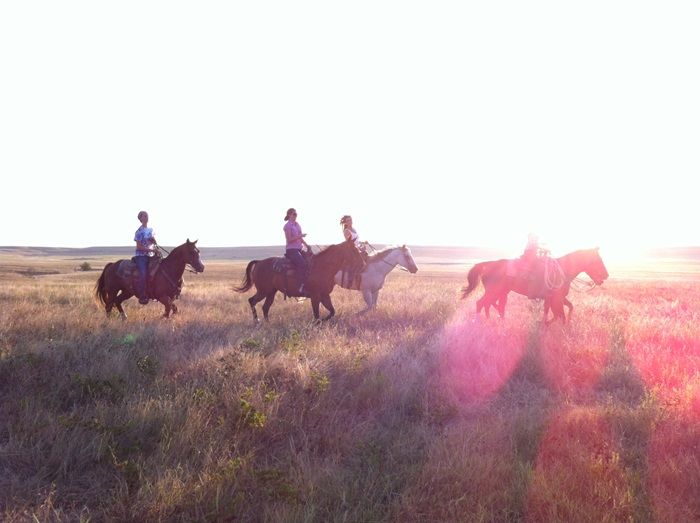
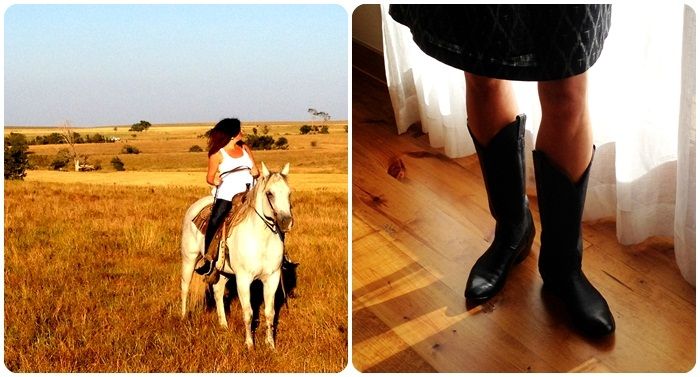
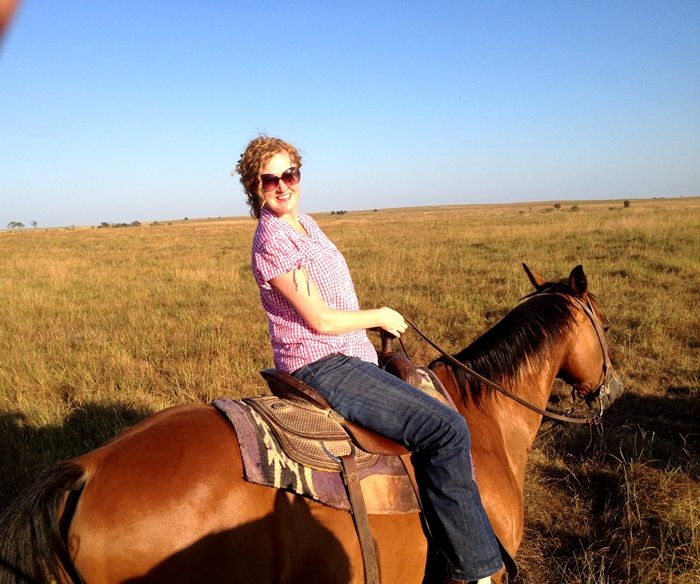
{photo credit for this and horse pic up top: Wendy}

Wendy.  Wendy, Wendy, Wendy.  Wendy's blog, Wenderly, feels like home.  Food, entertaining, decorating, finding joy in the everyday....that's Wendy.  Wendy also designs cards, like AMAZING cards.  Here, look at these.  Mr. E thinks she looks like a young, Body-Heat-era Kathleen Turner.  I think he's right.

Robyn.  Robyn is a beautiful, southern lady.  I've wanted to meet her for so long now...and really felt like I already had just through reading her posts.  Robyn's blog, Add a Pinch, is full of easy, southern recipes that you'll want to add to your grocery list right now.  I think I've pinned everything on her blog.  Have I mentioned that all of these ladies are stunning? Truly....look at those eyes. {photo from Ree}

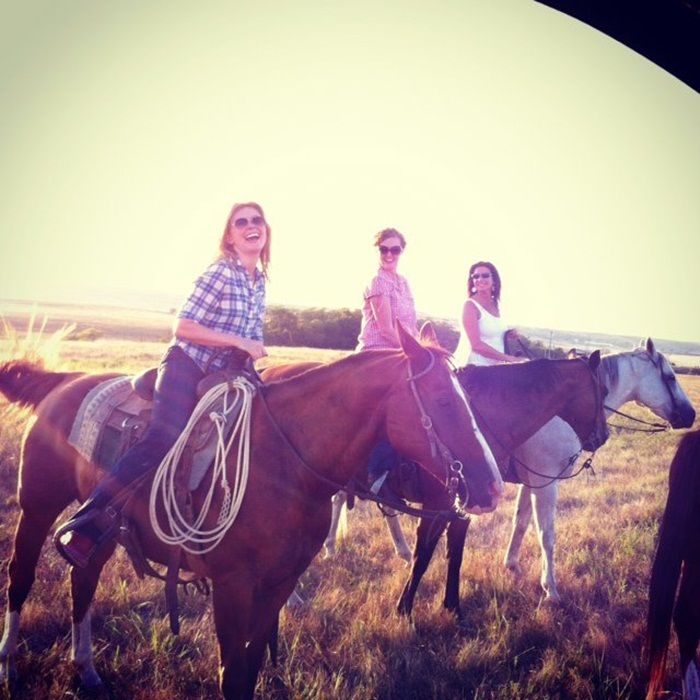
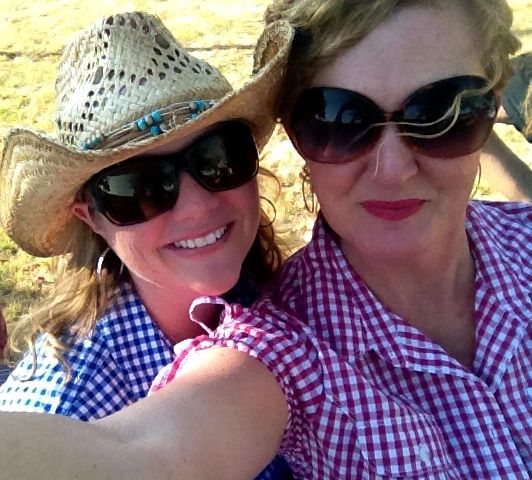
Amy.  I've had the pleasure of hanging out with Amy on two different occasions.  I remember before I met her the first time, I was so NERVOUS to meet the creator of She Wears Many Hats.  I mean, this girl takes killer photos, makes killer recipes, all while maintaining killer hair and a gorgeous smile. Somehow I managed to come home with only this picture of Amy....we were the gingham twins for horse riding.  Real cowboys wear gingham, right?

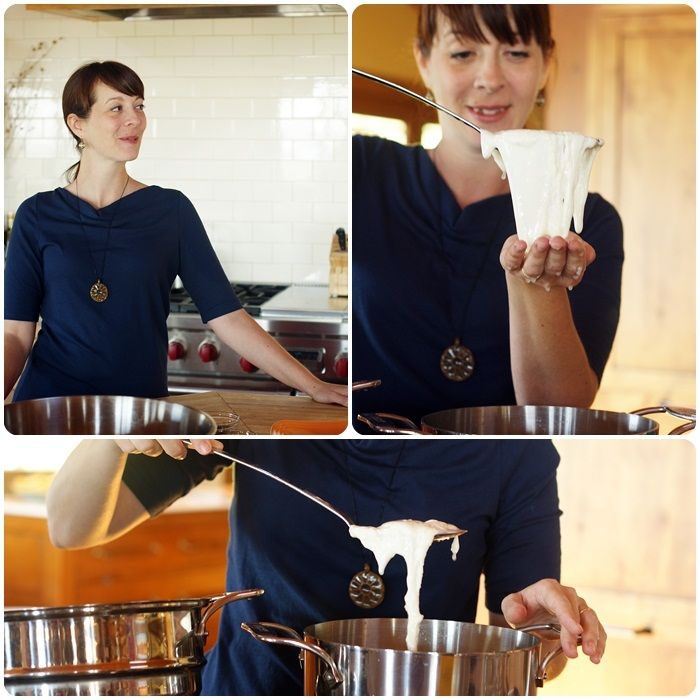
And now to Rebecca, our class leader.  Rebecca homeschools 5 boys, bakes bread every day, makes her own cheese, and raises chickens.  I think she even manages to slip in sleep every now and then. Seriously, I'm not sure how she does all that while managing to look elegant and maintaining the perfect side-swept bangs. I was so, so impressed with not only her cooking, but the way she is raising her boys.  Her blog, Foodie with Family is a treasure.  I love the way she writes! 

I don't want to forget the local girls who came in for the day.  Julie from Another Chance Ranch and Stephanie.  I had the pleasure to meet both of these ladies at the cookie decorating class and LOVED seeing them again.  They tolerate me even though I'm a Sooner. 

Shari from Really Most Sincerely and her aunt came in for the day.  Loved their aunt/niece story.  Also, Shari was wearing Burt's Bees Raisin lip balm which looked so beautiful on her, I ran out about bought it the next day.  She wears it better.

And then, there's Meseidy from The Noshery.  The girl can COOK, y'all.  She's also funny as heck.  You need to know her.

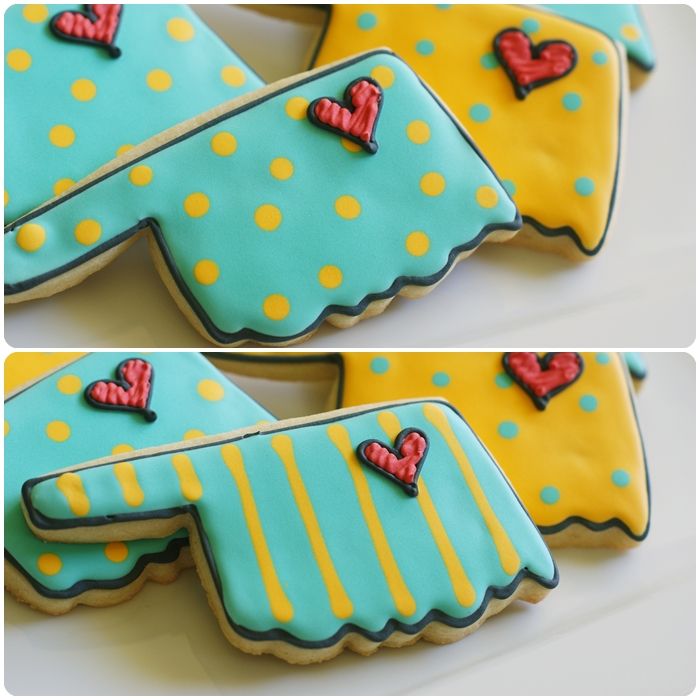
I brought cookies. And was so nervous about being there, I forgot to pass them out.  Instead I opened the box and set them on a table.  The heart is supposed to be over Pawhuska, but Pawhuska isn't *quite* that big. MM assured me I had covered Osage County. ;)

 {photo credit: Sandy}
So, that about wraps it up.  I'm still not quite sure I was really there.  But, I'm in some pictures....I guess that's proof.

Next time, I'm taking you all with me.


Tuesday, July 24, 2012

Cookie Decorators, Raise Your Work Surface...Works for Me Wednesday

Every now and then, husbands know best.


I'd been decorating cookies for a couple of years...I always decorated at night after putting kiddo to bed. It never failed, I'd crawl into bed after a few hours of decorating with an aching back and tense shoulders.

One night, Mr. E walked into the kitchen as I was decorating and said, "why don't you raise up your work surface?"
Ding, ding, ding!!!  Life. changed.

Now when I decorate, I *always* raise up my cookie sheet.
If you don't have a step stool, I *know* you have a stack of cookbooks. 

Raise 'em up.  No more hunching.  
Thank you notes from your back can be addressed to Mr. E. ;)

Thursday, July 19, 2012

Desserts in Jars: Almond-Poppyseed Cakes

My mom was one of those people who had a great group of girlfriends wherever we lived.  There were always parties and get-togethers and celebrations.  Her girlfriends from Houston are affectionately referred to as "the Ya-yas," and their children have always felt like cousins to me.

As I write this post on what would have been my mom's 67th birthday, I can't help but think of how much she would have LOVED to bring a tray of desserts in jars to one of her girlfriend get-togethers.  I can totally picture her baking up a recipe and then digging through her quilting scraps for just the right fabric to tie around the jars.

There IS something special about Desserts in Jars.
This is Shaina Olmanson's new book, Desserts in Jars: 50 Sweet Treats that Shine...and it is a treasure.  Shaina walks through the basics of using jars for all kinds of dessert making and then provides luscious recipes for everything from cakes to pies, to bread pudding, to frozen treats, to mixes.

The photography is GORGEOUS!  Last year, I had the pleasure to meet Shaina and she is just one of those people you instantly love.  Knowing that there is a gracious and sweet person behind this book makes it all the more wonderful.

I chose to make the Almond-Poppyseed Cakes.  They ARE incredible.  What I really loved is that almost every bite had some of the buttery goodness from the buttering the insides of the jar.  Extra butter.  Mmm...
You must try them.

{I was a little worried about finding jars, but right in my grocery store, there were oodles of them to choose from. OODLES!}

Here's your chance to WIN a copy of Desserts in Jars for your very own.  Use the widget below (if you are reading this post in an email, click over) to answer the question provided.
a Rafflecopter giveaway


Otherwise, if you'd just like to leave a comment without entering, please do so the usual way. :)

Entries accepted through midnight, July 27th.  Good luck!


Almond-Poppyseed Cakes in Jars
{with permission from Desserts in Jars}


Makes 12 individual almond–poppy seed cakes

Ingredients
·       3 tablespoons poppy seeds
·       2 tablespoons boiling water
·       1¾ cups all-purpose flour
·       3 tablespoons cornstarch
·       2 teaspoons baking powder
·       1 cup (2 sticks) unsalted butter, softened
·       1½ cups sugar
·       4 large egg yolks
·       4 large eggs
·       2 teaspoons almond extract
·       1 teaspoon vanilla extract
·       ¼ cups sliced almonds

Directions
1.     Place the poppy seeds in a small bowl. Pour the boiling water over them and stir to coat. Allow to sit for 1 hour, stirring halfway through.
2.     Preheat the oven to 350ºF. Grease twelve 8-ounce jars with butter. Whisk together the flour, cornstarch, and baking powder in a medium-size bowl and set aside. In a large bowl or in a stand mixer, beat the butter and sugar until creamy. In a separate bowl, lightly beat together the egg yolks and eggs. Alternate adding the flour and the eggs to the butter mixture, mixing after each addition. Stir in the almond extract, the vanilla extract, and the moistened poppy seeds.
 
3.     Fill each jar half full with batter and sprinkle with sliced almonds. Place the jars 2 inches apart on a large baking sheet and bake for 25 to 30 minutes, until the tops of the cakes spring back when tapped. Remove from the oven and allow to cool on the baking sheet. Serve warm or at room temperature.

Desserts in Jars...Shaina's book makes it a delicious art form. You'll love it.

Monday, July 16, 2012

So anyhoo...

...this is where things get a bit surreal for me.

You might remember several months ago I mentioned that I was working on a book.  A book of my best loved fitness routines and diet plans.

Well, I may had fibbed a little.  The book is about {wait for it}...


...COOKIES!!!


Published by the wonderful people at Lark Crafts, the book is titled:
Decorating Cookies: 60+ Designs for Holidays, Celebrations & Everyday

In Decorating Cookies, you'll find 160 pages of step-by-step photo tutorials for all 60+ cookie designs.  It'll be just like I'm in your kitchen holding your hand...in a totally non-creepy way.  ;)

I'll be filling you in and giving you a few sneak peeks in the months to come, but...
It is available for pre-order (!!!) on both:
Amazon
Barnes &Noble
{The official release date is October 2nd, my grandfather's birthday. ♥}

Wanna see what my kitchen looked like for months and months putting this baby together?  Yes?  OK....here ya go:
Thank you so much for sharing this cookie baking and making adventure with me!
*mwah*


Thursday, July 12, 2012

The Night Sky...and Astronomy 101

College course catalogs really should include more detail.  
For example: A description of Astronomy 101 might read like,  
"Introductory astronomy course focusing on general physical conditions under which life is thought to arise and evolve in the universe. Topics include historical astronomy, gravitation and planetary orbits, the solar system. Blah, blah..."


It should also include a sentence like this,  
"Hey, silly 17-year-old girl...we will not be discussing our "favorite constellations," or making trips to the observatory with picnics and cute boys, nor will we be discussing why you are "so a Libra."  That's astroLoGY; this is astroNoMY."

Just a suggestion, colleges. 

PS...astronomy = math.  And not fun math, either.  Unless you're into the whole physics thing.

In case you *were* wondering what my favorite constellation is, it's this guy...
...Orion.

So, let's start our own astronomy class, shall we?  Cookies, picnic at the observatory, cute boy, Linda Goodman's Sun Signs.  Sign me up.

Let's make Constellation Cookies.  You'll need:

  • sugar cookies, square or circle will work
  • royal icing divided and tinted dark blue (using AmeriColor Navy Blue mixed with Super Black) and light gold (store the gold icing in the fridge until day 2)
  • couplers and tips: #2, #1
  • disposable icing bags
  • squeeze bottle
  • toothpicks
  • constellation print-outs (printed to fit your cookie size)
  • push-pin
  • meringue powder
  • small paintbrush
  • disco dust
 
Use a #2 tip to outline the cookies in blue icing.

Thin the remaining blue icing with water, a bit at a time, stirring with a silicone spatula, until it is the consistency of a thick syrup.  You'll want to drop a "ribbon" of icing back into the bowl and have it disappear in a count of "one thousand one, one thousand two." Four is too thick, one is too thin.  Count of 2-3 is good.  Cover with a damp dishcloth and let sit for several minutes.

Stir gently with a silicone spatula to pop and large air bubbles that have formed.  Pour into squeeze bottle.

Fill in the outlines with the thinned icing. Use a toothpick to guide to edges and pop large air bubbles.

Let the cookies dry uncovered 6-8 hours, or overnight.

The next day, place the print-outs of the constellations on the cookies, and use a clean push-pin to press into the dried icing to mark where to pipe the stars.

Use a #2 tip to pipe stars over the push-pin holes in gold icing.

Switch the tip to a #1 and pipe lines to connect the stars in the constellations.

Let the cookies dry for one hour.

Mix 1/4 teaspoon meringue powder with 1/4 teaspoon water.  Brush onto the stars using a small, clean paintbrush.  Sprinkle on the disco dust. (I do this over a coffee filter to catch the excess.) Shake off excess and brush with a dry paintbrush.  (This will not remove every bit of the stray disco dust, but it looks pretty, I think.)
Let the cookies dry 30 minutes before packaging.

Do you have a favorite constellation?  Discuss.

Wednesday, July 11, 2012

Help! My cookies have streaks!!! (Works for Me Wednesday)

Has this happened to you?

You've spent hours mixing colors, outlining and flooding.  Your cookies look perfectly perfect. You decide to let them dry overnight and go to bed. You wake up the next morning to STREAKS in your royal icing.

Nooooooooooooooo! 

Those white or light colored streaks are caused by.....water.  Yep.  Water.

Let me tell you how that water probably got there:
  1. Squeeze bottles used for flooding weren't *completely* dry.  Even a small drop of water clinging to the side of the bottle can wreak havoc on a cookie.  Solution: check all bottles before filling.  If there is a drop of water, dry with a paper towel.
  2. When thinning a bowl of icing, a drop of water goes unnoticed on the side of the bowl.  When the icing is poured into the squeeze bottle, the drop of water is poured in as well.  Solution: always add water with a measuring spoon into the bowl.  Never hold the bowl under running or dripping water.
  3. The icing in the bottle is too thick for flooding, so a drop or two of water is added and not properly mixed.  Solution: to add water, pour the icing back into a bowl and stir. Do not under any circumstances SHAKE the bottle.  This will fill your icing with air bubbles (another issue for another day.)
 squeeze bottle clear water Pictures, Images and Photos
If you happen to spot a drop of water when you're filling your cookies, use a paper towel to blot out the water and add more icing if needed. 

    Have streaks ever happened to you?  Have you had other issues decorating cookies?  What are they?  Tell me, tell me!  I bet I've had them, too.

    {In the meantime, check out this post from the archives on Troubleshooting.}


    Preventing streaky cookies....works for me!