Tuesday, April 24, 2012

Chocolate Hazelnut Truffles & Amy Atlas

Do you have an idea book?

You know, a binder where you store all of the great ideas you see in magazines?  Kinda like retro Pinterest.
{Remember life before Pinterest?}

Here's ONE of my idea books.  Food & Wine did a feature on dessert tables by Amy Atlas waaaaaaay back in 2009.
{Remember 2009?}

I had never seen anything so pretty in my whole life.  A color-coordinated dessert table?!?  It went immediately into my idea book.  Well, it's 2012 now...and Amy Atlas, queen of gorgeous dessert tables, has a beautiful new book called Sweet Designs.

The book is filled with dessert tables like this one:
{Oh, how sweet!}


And this one:
{Oh, how fun!}

 In Sweet Designs, you'll find all of the instructions for baking the desserts (plus short-cut options), crafting the displays, and styling the table.

It makes you want to have a party.

Amanda from i am baker gathered several of us together celebrate and to make one of Amy's recipes...I made the Chocolate Hazelnut Truffles.

In the book, they are actually part of a Halloween table, but the beauty of the ideas is that they are so easily adaptable.  I made them for spring.

Chocolate Hazelnut Truffles

{adapted with permission from Sweet Designs by Amy Atlas}

3/4 cup hazelnuts
1 cup bittersweet chocolate chips
3/4 cup Nutella
6 TBSP unsalted butter, room temperature
sprinkles

Preheat oven to 350.  Lay hazelnuts in a single layer on a cookie sheet and bake for 15-18 minutes.  Transfer immediately to a dish towel, cover and steam for 1 minute.  Rub vigorously with the towel to loosen the skins.

Chop the hazelnuts (don't worry about an skins that are still on the nuts), and measure out 1/2 cup.  (Eat or save any excess.)

Melt the chocolate chips in a bowl over a pan of barely simmering water.
 
{Side note: I am never without these chocolate chips.  Throw a handful in a container of Fage 2% Greek yogurt.  Lunch=done.}

Remove from heat and stir in the butter and Nutella.  Stir in the chopped hazelnuts.  Refrigerate for 45 minutes to 1 hour, until scoopable.
{At this point, I contemplated grabbing a spoon and parking myself and the bowl in front of The Young & the Restless.  Be strong, my friends.}

Place the sprinkles on a rimmed plate. Scoop the chilled chocolate mixture by the tablespoon into the palm of your hand and roll into a ball. Roll the truffles in the sprinkles. (You'll probably need to wash your hands several times during this process.)

Place on a cookie sheet and chill for at least 30 minutes before serving.
Amy would love for a Bake at 350 reader to have a copy of her book!  Yay!  All you have to do to enter is, leave a comment right here on the blog.  That's it!  Any comment...well, any polite comment. ;)


{Giveaway runs through midnight, April 30th.} 
***giveaway closed! congrats to lizy b.!*** 


Aaaaand, there's more.  All of those bakers celebrating Amy today?  Well, we're ALL giving away a copy of Sweet Designs.  So, for more chances to win, go visit these lovely ladies:


The Adventure of Sweet Sugarbelle: Amy Atlas Book Giveaway  
Sweetapolita: Pink Eclairs
My Baking Addiction: Banana Whoopie Pies
Bakingdom: Mini Strawberry Trifles

{Please forgive me for 2 posts in a row with giveaways. I just didn't want you to miss out on either chance to win...} :)

Saturday, April 21, 2012

Butterfly Cake

Here's the dill, pickle.  Cake decorating is not one of my gifts.  Case in point, this R2D2 cake.

So, when I had the chance to try the Cricut Cake Mini, I jumped at it.  If you've never seen or heard of a Cricut Cake, it's a cool little machine that cuts designs, patterns, scallops, borders, letters into gum paste or fondant so that they can easily be applied to cakes, cupcakes or cookies.

Pretty darn cool.

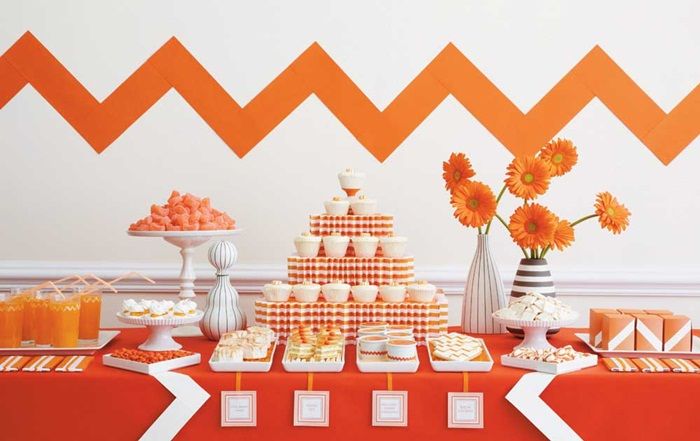
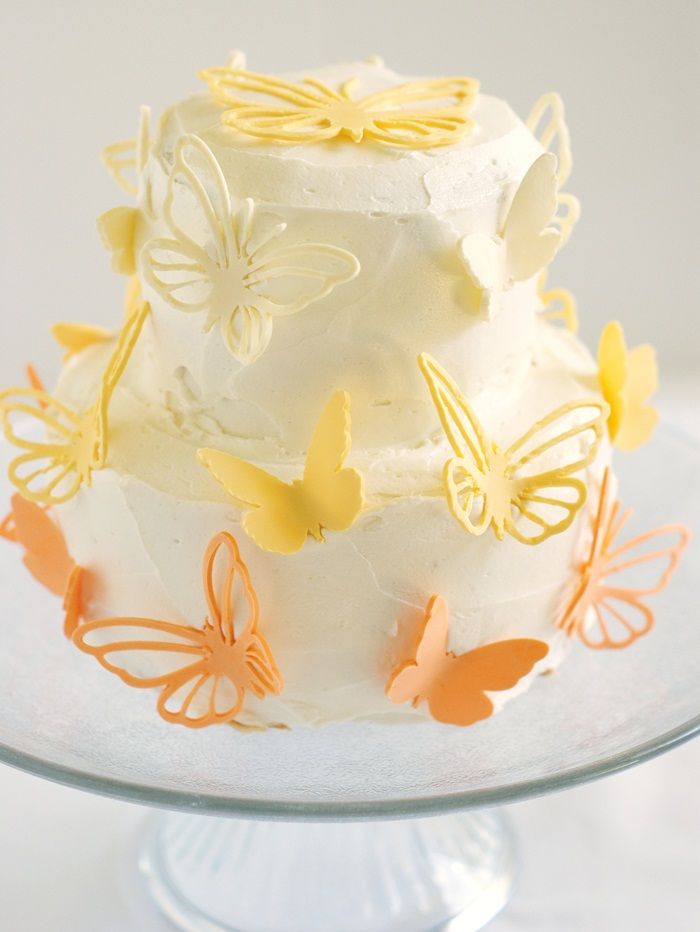
First, though, you'll need a delicious cake.  I am not above begging, so I'm going to BEG to to make this cake...with or without the ombre butterflies.  I took some really beautiful pictures of the cake with one slice missing, so that you could see the inside. Except, I took them without my memory card in my camera, so you'll have to imagine. 
The cake is a vanilla bean yellow layer cake and is SERIOUSLY one of the best cakes I've ever had.  It's moist without being Tres Leches moist.
(Does Tres Leches give anyone else the heebie jeebies?)

The layers are filled with lemon curd....you can make your own, but I used this one.
 
I love it...no preservatives and tastes tart and wonderful.  The whole thing is topped off with a lemon buttercream.  It's so good that my "I-don't-really-like-cake" husband immediately asked for a second piece.

Back to the Cricut Cake Mini...the machines take cartridges with all sorts of options for different designs.  I chose one of the Martha cartridges.  I {heart} me some Martha.

{It was about midnight when I was doing this; please excuse the pictures.}
Now, I did have a little bit of a learning curve with this.  One, I learned I was rolling my gum paste too thick.  My advice is to roll it thinner than you think you need it, then roll it thinner again.  Two, I live where it's very humid and on top of that, it was storming when I tried this.  What helped was rolling out the gum paste very thin and letting it dry at room temperature on the mat for about 10 minutes.  Once I learned those little tricks, cutting was a breeze.

After I cut out those butterflies, I propped them up in some mini muffin tins so the wings would dry "in flight."

Once the cake was assembled, I frosted it with the lemon buttercream and just pressed the butterflies right on.
Easy peasy.

{{PS...this is what my kitchen table looked like for 18 hours.}}

Would you like a Cricut Cake Mini?!?  I bet you would.  I already have a few more projects in mind for mine.

To enter, leave a comment here on the blog answering the following question:

"what is you favorite cake flavor?" 

For an extra entry, follow Cricut on Pinterest and leave a SEPARATE comment letting me know you did.

{Giveaway runs though April 28th at midnight.  Good luck!}
***giveaway closed. Congrats, Jennie P.! Have fun with your Cricut Cake!*** 

Here's the recipe (make it!)...the cake is adapted from the lovely book Cake Ladies and the frosting is adapted from the lovely Shelly of Cookies and Cups.


Lemon-Vanilla Bean Layer Cake

 ingredients:

for the cake:

Crisco for greasing pans
3 cups unbleached, all-purpose flour
2 tsp. baking powder
1/2 tsp kosher salt
2 sticks (1 cup) unsalted butter, at room temperature
2 cups sugar
4 eggs, separated and at room temperature
3/4 cup whole milk, at room temperature
1/2 cup buttermilk, at room temperature
1 TBSP vanilla bean paste

for the filling & frosting:

12 ounces lemon curd
3 sticks (1 & 1/2 cups) salted butter, at room temperature
1/2 cup shortening
2 pounds powdered sugar
1/4 - 1/2 cup milk
2 teaspoons pure lemon extract

 instructions:

Preheat oven to 350.
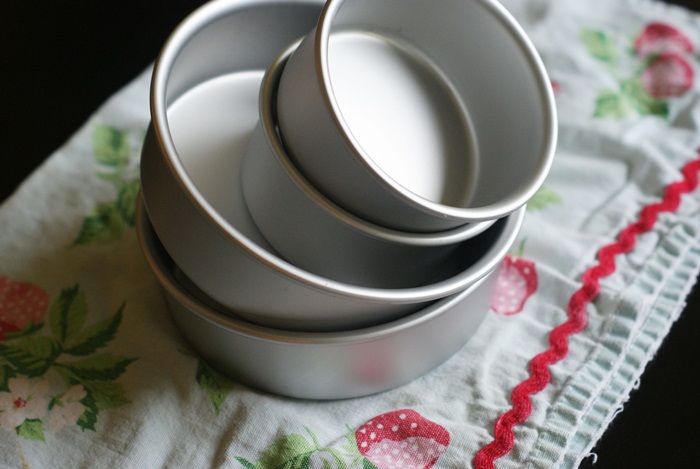
Grease the cake pans with Crisco, line the bottoms with parchment and grease the parchment. (I used 2-6" pans, and 2-4" pans, and had enough leftover for 8 cupcakes.  This will also be enough batter for 3-9" round pans.)

Sift the flour, baking powder and salt into a medium bowl and set aside.

Using the paddle attachment of a stand mixer, beat the butter and sugar together until very light and fluffy.  Scrape down the sides and bottom of bowl as needed.

Add the egg yolks, one at a time, beating until incorporated. Scrape down the sides and bottom of bowl after each addition.  Once all yolks have been added, beat for 5 minutes.

In a small bowl, stir together the milk, buttermilk and vanilla bean paste.

On low speed, add the flour and milk mixtures to the butter mixture, alternating between each beginning and ending with the flour. You'll add the flour in four additions and the milk in three.  Mix just until incorporated.

In a separate bowl, use the whisk attachment to beat the egg whites until they form a stiff peak.  In three additions, gently fold the egg whites into the batter until incorporated.

Scoop the batter into the cake pans.  If using 9" (or 8"), divide the batter evenly.  If using the smaller pans, put 2 cups batter in the 6" pans and a heaping 3/4 cup batter in the 4" pans.

Bake until a toothpick inserted in the center comes out clean.
9": 25-30 minutes
6": 22-28
4": 18-20 minutes
cupcakes: 15-18 minutes

Let the cakes cool in the pan for 10 minutes on a wire rack.  Remove from pans, wrap in plastic wrap while still warm.  Place in refrigerator to cool, up to overnight.

Make the lemon buttercream:
With the paddle attachment of a stand mixer, beat together the butter and shortening until fluffy, about 3 minutes.  Add the sifted powdered sugar in four additions, beating on low speed until combined.  Once all of the sugar has been added, beat for another 2 minutes.  Add in the milk and extract, starting with only 1/4 cup milk.  If the frosting is too stiff, add the remaining milk and beat until combined.

Assemble the cake:

Place one cooled cake layer, top down on a cake stand, spread with 1/3 cup lemon curd (for a 6" layer).  Top with the remaining 6" layer and cover with buttercream.  Place a 4" layer, top down, on the frosted 6" cake.  Spread with 1/4 cup lemon curd.  Top with the remaining 4" layer.  Cover with buttercream.

{{psst....of you'd like to learn more about Cricut, visit them on Facebook and Twitter.}}

Tuesday, April 17, 2012

Will Run for Ice Cream

You know, a funny thing happened this year.  I started running (or as I told my friend, Teresa, it might technically be "scooting").
Before this, the only time I had ever run was to be first in line for cake at a wedding.

Let me start at the start...in December, I was talking to my friend Amy from She Wears Many Hats.  She and Robyn were gearing up to run a 5K together.  Amy told me about the Couch to 5K program they were using and said, "you can do it."  I'm not sure why, but her words really stuck with me.
Fast forward through Christmas, and many, many gingerbread cookies, I decided to give it a try.  Not to be cliche, I started my Couch to 5K on December 28th, not January 1st.

I'm not going to lie....it was hard (it still is).  I've never been a "workout person"....other than a very (very) brief stint in college where I skipped class to go to aerobics.  (Sorry you had to hear that, Dad.)

I completed the 9-week Couch to 5K (in 11 weeks...I had to repeat a few), but had not signed up for a race.  I just figured, I would keep running and maybe sign up for one *someday.*
*Someday* turned out to be the day I saw a flier for the Blue Bell Fun Run.  On the flier, it mentioned "FREE ICE CREAM."  Well, that's all it took; I signed up.

Saturday was the 5K...and I have to say, it was very emotional for me.  Not the end....I was too sweaty and tired (and really had to pee, TMI?), but the beginning of the race had me teary-eyed.  The race started slightly downhill and the sight of all of those people running, being in the middle of it, the sound of all of those feet...it brought me to tears.  I got a hold of myself...no one wants to run next to a lady with tears steaming down her face and a shaky chin. (Plus, my mascara might run.  Yes, I wear makeup to exercise.  You're welcome.)

The bonus?  The longer I run, the more cookies I can eat. :)

Is this post to encourage you to start running?  Only if you want to.  This post is really to say...go do SOMETHING.  Break out of your comfort zone a bit.  It feels good.
{I found this on Pinterest and just love it.}

If you ARE interested in running, let me tell you a few things I couldn't live without:
  1. The running community is INCREDIBLY supportive.  They don't care if you're a newbie.  On twitter, we have a little #redfacedrunners Club: Amy, Kristen, Robyn, Lauren, Windy, Katrina, Dara, Lori & moi.  And my running idols: my dad (who ran a marathon when we were kids), my sister Molly, Toni & Cindy
  2. Shoes: I LOVE these shoes!!! (Plus, Kristan has them, so I feel really cool.}
  3. App love: Get Running 5K...you can listen to your own music and a very nice British lady tells you when to run and walk. 
  4. Running skirt: I've found most are a little too short for me, but I LOVE this one from Level 59.
  5. And, this post on running from Amy. 
Is there something you've been too scared to try?  
What is it?  

Thursday, April 12, 2012

Nutella-filled Banana Muffins...

 
I toyed with the idea of calling these QPTWB Muffins (Quite Possibly the World's Best Muffins), but it seemed a little braggy...and difficult to say.  I actually take no credit for these muffins being the best.muffins.ever....it's all due to Nutella.

Inspiration?
...I bought bananas.  I came home from the store to see that we already HAD bananas.

I had two choices:
1. Do what I did last time this happened and freeze them for smoothies, or
2. bake with them.

I decided to marry the bananas with Nutella.
Aww...look.  They're snuggling.

Here's the low-down:  the mashed bananas keep the muffins soft and moist, the salted butter and kosher salt give a double-shot of salty to the sweet, the nutmeg & cloves add just a bit of spice and interest, and the Nutella?  Well, it pushed the delicious factor over the top.


Want to make them?  Yes, yes you do.  Here's how...


Nutella-filled Banana Muffins


ingredients:
2 cups unbleached, all-purpose flour
1 & 1/2 tsp. baking powder
1/2 tsp. baking soda
1/2 tsp. kosher salt
1/2 tsp. freshly grated nutmeg
1/4 tsp. ground cloves
1/2 cup (1 stick) salted butter
1 cup sugar
1 egg
2 medium bananas, mashed
1/3 cup milk
2/3 cup Nutella

instructions:
Preheat oven to 350.  Line 12 regular size muffin tins with liners and lightly spray with cooking spray (this will keep the muffins from pulling away with the liners).  Set aside.

In a medium bowl, whisk together the flour, baking powder, baking soda, salt, and spices. Set aside.

{Don't you love freshly grated nutmeg?  If you never tried it, do.  you don't even need a fancy-schmancy microplane....the small holes on your grater will do.}

With an electric mixer, cream the butter and sugar together until smooth.  Beat in the egg, mashed banana, and milk.  Scrape down the sides and bottom of bowl as needed.

With a silicone spatula, gently stir the dry ingredients into the wet.  Divide the batter into the 12 muffins tins.  Bake 20 minutes, or until a toothpick comes out clean.

Place on a wire rack and let cool for 10 minutes.  After 10 minutes, remove from the tin to cool completely.

Meanwhile, spoon the Nutella into a pastry bag fitted with a large tip. (I used a Wilton 4B.) Once the muffins are cooled, poke the tip into the center of each muffin.  Fill until you see the muffin expand a bit and, while squeezing, pull the tip up and out of the muffin.

DEVOUR.

Oh!  And if you still have banana muffins on the brain, check out this deliciousness from Jessica at How Sweet It Is.  Can you say, "swoon?"

Tuesday, April 10, 2012

Works for Me Wednesday e-book (!)

Have you ever looked through the tips on Works for Me Wednesday and thought, "man, I wish I had a book of those?"

Well, guess what?  Now you can!
My beautiful neighbor, Kristen (host of Works for Me Wednesday, and blogger at We are THAT Family, and author, and humanitarian, and all-around supermom) and her friend Jennifer DeGroot have put together an e-book called That Works for Me!

The book contains over 800 WFMW tips, organized into 24 different categories and including 300 contributing bloggers.

{A few of the bloggers: Jen from My Kitchen Addiction, Myra from A Blessed Life, and the gals from How Does She?}

Here's a little peek at the categories, as well as a few sample tip summaries:

One thing I LOVE about the e-book is that after reading a synopsis of the tip, one click takes you directly to the original post.  It's a win-win for readers and for bloggers.  (Kristen is so smart.)  Oh, and it's also available on Kindle!

You can purchase a copy here.
{psst...here's $1 off coupon code: SAVE1}

You can submit a tip to enter to win $150 worth of housecleaning here.
{No one enter....I *need* that.}

You can follow along with That Works for Me:

And, you can win a copy here!  
{yep, right here!}

To enter, just leave a comment with either your favorite WFMW tip (here are a few from moi), or share one of your own tips.

Contest runs through midnight, April 15th.  Good luck!

That Works for Me e-book?  It works for me! ;)