Saturday, December 31, 2011

I would be a Girl Scout if...

 
...if merit badges were given for watching What Not to Wear.

...if my fellow scouts were these ladies from the Girl Hunter weekend.
{Center: Eric, best guide ever. Left to Right: Kristan, Me (hi!),  Shelly, Wendy, Angie, Cheryl, Georgia, Marla Top: Amy, Erica, Dara, Elana,Carrie, Lori}

...if s'mores had a more grown-up option, like these.

Just in case you're not the champagne type, you might want to make these S'mores Milkshakes for New Year's Eve. 

They are super easy and you'll only need a few ingredients:

1. Chocolate Ice Cream

2. Godiva Liqueur

3. Fluffed Marshmallow Vodka (yes, there is such a thing.)


S'mores Milkshakes {for grown-ups only}
serves 2

3 cups chocolate ice cream
2 ounces Godiva chocolate liqueur
2 ounces Fluffed Marshmallow vodka
crushed graham crackers
mini Hershey cars

Chill one large, or 2 small glasses in the freezer.

Combine the ice cream, liqueur and vodka in a blender.  Pulse until blended, pushing the ice cream down as needed.

Pour into the chilled glasses (if using a large glass, use 2 straws for sharing).  Top with crushed graham crackers and a Hershey bar.

And this is...

PS: do NOT try to drink all of this by yourself, or else you'll be wearing "milkshake goggles," like this:

Happy New Year!!!  
I hope 2012 brings you all peace, love, laughter...and lots of sugar. ♥

Tuesday, December 27, 2011

Promise me?

 
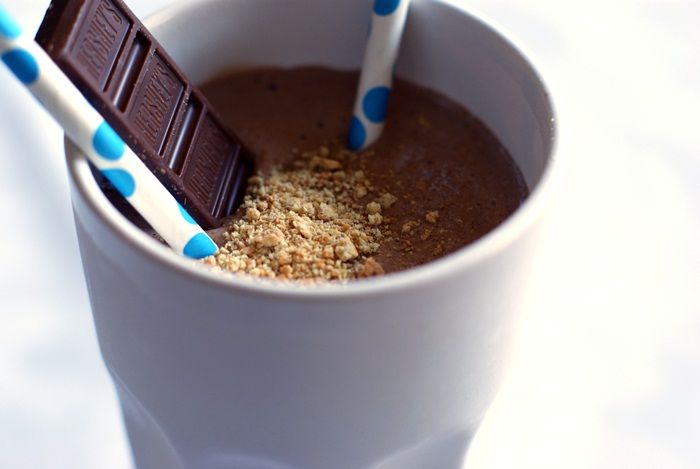
Promise me you'll make this?  Like tomorrow?  Or maybe for New Year's Eve?  Just promise, ok?  If you don't do alcohol, you are excused, but the REST of you...you must make it.

I had an inkling this would be good.  But, I wasn't sure it would be audible-sigh-with-every-bite-good.
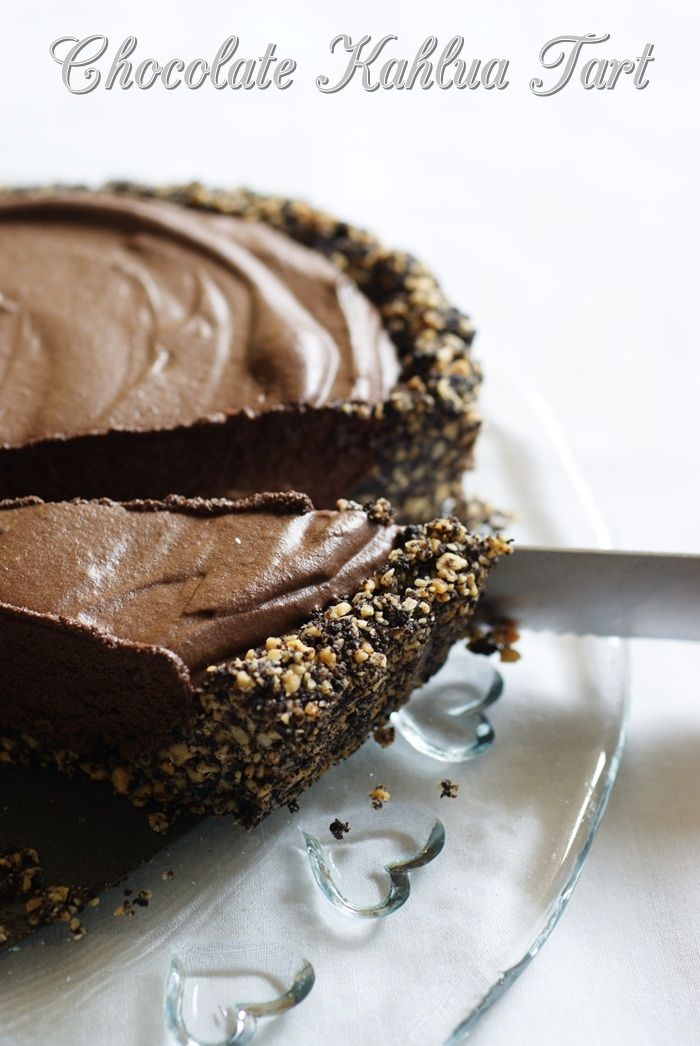
It is.
This is the Don Draper of tarts, my friends.  Cool, smooth, rich, decadent, you-know-it's-not-good-for-you-but-you-want-it-anyway tart. 


Chocolate Kahlua Tart
{adapted from Martha Stewart Living}

for the crust:
2 cups whole blanched almonds
10 TBSP unsalted butter
Oreos (about half of a package)
1/2 teaspoon instant espresso powder
1/4 teaspoon kosher salt

for the filling:
1/2 cup Kahlua
1/2 cup dutch-process cocoa (I use Hershey's Special Dark)
2 large eggs, separated
1 teaspoon instant espresso powder
pinch kosher salt
4 ounces bittersweet chocolate, chopped
4 TBSP unsalted butter, cubed
1 cup heavy cream
6 TBSP sugar

Line a cookie sheet with parchment paper.  Preheat oven to 375.

Place the almonds on a single layer on the sheet and bake for 10 minutes, tossing occasionally, until lightly browned.
Remove from the sheet and cool completely.

In the microwave, or on the stove over low heat, melt the 10 tablespoons of butter.  Set aside to cool.

Meanwhile, you'll need to scrape some Oreos.  The original recipe calls for chocolate wafer cookies, but I couldn't find them.  And, you know, I think Oreos are pretty darn tasty.
Twist the Oreos and scrape out the insides.  You only need the cookie part.  What you do with the insides is between you and your kitchen.  You'll need about half the package.

In a food processor, process the cookies until finely ground.  You'll need 1 and 1/3 cups of cookie crumbs.  Place in a large bowl and wipe the food processor bowl clean.

Process the almonds in the food processor...it's loud, you might want hearing protection...until finely ground.

Add the almonds to the cookie crumbs along with the espresso powder, salt and butter.  Stir to combine.
{This is what espresso powder looks like.  You'll find it on the coffee aisle next to the Sanka.}

Press the crust into and up the sides of a 10-11" tart pan with removable bottom.
{I used a heart-shaped pan and had some extra crust leftover.  Mr. E suggested using it as ice cream or yogurt topping.  Did I marry well, or what?}

Place on a cookie sheet and refrigerate for 30 minutes.

Reduce oven temp to 325.  Bake the crust on the cookie sheet for 20 minutes.  Set on a wire rack to cool completely.

Whisk together the Kahlua, cocoa, egg yolks (reserve the whites), espresso powder, and salt in a medium bowl.  Melt the chocolate and butter in a heatproof bowl over a pan of simmering water.  Once melted, whisk in the Kahlua mixture.  Continue whisking and heating over the pan of simmering water until the mixture has thickened and reaches 160 degrees.  Set aside to cool completely.

Beat the cream until stiff peaks form; set aside.

Whisk the reserved egg whites and sugar in a heatproof bowl of a mixer over a pan of simmering water.  Whisk and heat until the sugar has dissolved and the mixture reached 140 degrees.

Remove from heat and transfer the bowl to the mixer.  Beat with the whisk attachment, starting on medium speed and gradually increasing to high, until the mixture is shiny and cooled.

Use a rubber spatula to fold the cooled chocolate mixture into the beaten egg whites.  Then fold in the whipped cream.
 
Spread into the baked and cooled tart shell.

{You might have some left over.  Grab a spoon and dig in...but please sit down first as fainting may occur.}

Chill the tart for at least 1 hour.


Devour.

Remember at the beginning of the post?  You promised.  You must make it now.  Your life will be all the better for it...you have my word.

Friday, December 23, 2011

A Tribute to A Charlie Brown Christmas...in cookies.

Kids these days have it so easy...back in the olden days, if you missed a Christmas special (that aired ONCE all season), you had to wait until the next year to see it.

I vividly remember the year my mom took us to confession (CONFESSION!!!) and when we got home, I realized we had missed The Grinch.  I was in my early teens and, I hate to admit, I needed to go right back to confession after that realization.  I probably did not honor my mom in that moment.

ANYWAY...A Charlie Brown Christmas was one we watched EVERY year.  And, as I get older, the more I appreciate it.  How can you not love a TV special that combines jazz music, religion, and a sad little tree.

I always love Lucy:
{Notice how I put Lucy next to Schroeder? She would like that. }

Lucy Van Pelt: I know how you feel about all this Christmas business, getting depressed and all that. It happens to me every year. I never get what I really want. I always get a lot of stupid toys or a bicycle or clothes or something like that.
Charlie Brown: What is it you want?
Lucy Van Pelt: Real estate. 


But, for us girls with curls, there was Frieda.  Remember Frieda?

Lucy Van Pelt: You're the innkeeper's wife.
Frieda: Do innkeeper's wives have naturally curly hair?  


 I'll let you in on a little secret...there was an incident with Sally's cookie...
...I *knew* I flooded it just a bit too much, but it looked like it would be ok.   Thirty minutes later, it had run off the side.  Mr. E thinks it looks a little Salvador Dali-esque.  

PS...if you love Charlie Brown & the Peanuts, you must click over to Kristan's Peanuts Thanksgiving cupcakes...they are so cute! 

Who is your favorite Peanuts character? Or what is your favorite moment from A Charlie Brown Christmas?

{psst...Merry Christmas!!!}

Wednesday, December 21, 2011

Aww, Nuts.

Are you putting together little baskets of goodies for friends and neighbors this holiday?  Let me show you 2 easy pecan recipes that can easily be made, bagged and ready for giving in no time at all.
{OR, keep them around your house for snacking and unexpected guests!}

Both of these recipes call for pecans.  I have a soft spot in my heart for pecans.  Years ago, we lived in a little old house in the suburbs of Dallas.  I think every tree on our street had at least 1 big, beautiful pecan tree.  We had two in our front yard.

Our first fall in the house, I noticed a few pecans on the ground, but most were still up in the tree...and I wasn't sure what to do about that.  So, I grabbed our big stepladder and a broom...and started beating the branches of the tree.  {Yes. I did.} 

After about 10 minutes, the retired gentleman who lived next-door came outside and said, "Honey, they'll come down when they're ready."

And that's my pecan story.
On to the recipes....we have one sweet and one savory.  The sweet are cinnamon-y, sugary, and addictive...pretty much your diet's worst nightmare.  The savory are spicy and smoky with just a hint of sweet....they're best munched on while enjoying a beer. ;)

Sugar & Spice Pecans
{adapted from this little paper pecan cookbook out of Amarillo}

1 cup sugar
2 & 1/4 teaspoons cinnamon
5 TBSP water
3 cups pecan halves
1 teaspoon vanilla bean paste (or vanilla extract)

In a medium saucepan, combine the sugar, cinnamon and water.  Cook, stirring, over medium-low heat until the sugar is dissolved.

Continue cooking until the syrup reached 230 degrees on a candy thermometer...or until it makes a heavy thread.

Stir in the pecans and vanilla.  Remove from heat.  Continue stirring until the mixture turns from syrup to sugar.

Spread onto a cookie sheet lined with parchment to cool.


Lone Star Pecans
{from The New Texas Cuisine, Stephan Pyles}

2 TBSP unsalted butter
3 cups pecan halves
1/2 cup light brown sugar
1 teaspoon paprika
2 teaspoons chile powder***
1 TBSP cumin
1/4 cup cider vinegar
coarse salt

***look for a "pure" chile powder, most regular powders contain onion & garlic powder...we don't want that.

Preheat the oven to 350.  Line a cookie sheet with parchment; set aside.

In a large skillet, melt the butter over medium heat.  Add the pecans and cook about 3 minutes.  Add the brown sugar, stir and cook until lightly caramelized.  Stir in the paprika, chile powder and cumin.  Add the vinegar and cook, stirring, until the liquid has evaporated.  Season with coarse salt.
Spread the pecans on the prepared cookie sheet.  Bake until crisp, about 5 minutes.  Cool completely before bagging.

Are you putting together baskets or boxes of Christmas goodies this year?  I want to know what's in them! 
{'Cause I'm nosy like that.}

Tuesday, December 20, 2011

How'd You Like to Spend Christmas on Bainbridge Island?

You can!  Well, kinda.
It's a Pink & Red  Cookie Christmas over at Blooming on Bainbridge today!

You all have to come over to my friend Teresa's fun, joyful, happy blog!!!  She's a southern belle living life to it's fullest in the NorthWest.  I'm guest posting today with a full step-by-step tutorial of these cookies!  Come visit!  We have cookies.....

Sunday, December 18, 2011

Mini Cherry Bread Puddings... and a Little Something for YOU!

I have crushes on a lot of things.  Mr. E.  Nesting bowls.  Measuring spoons.  Cherries.  Vintage tablecloths.  Bill Murray.  Ruffles.  Scalloped edges.  Lipstick.  Chocolate.  Anything involving cake batter.  Kitties.  Hearts.  Vintage cake toppers.  Hankies.  Silicone spatulas.  Mentos.  Don Draper.  Goat Cheese. 

If you share my crushes...or even just a handful of them, I have a little treat for you.  It will arrive after Christmas, when things have settled down and you could use a little treat.


  • white nesting bowls
  • scalloped edge cake stand
  • magnetic measuring spoons
  • magnetic measuring cups
  • French wire whisk
  • {all of the above from Crate & Barrel}
  • Chavrie goat cheese cookbook
  • Chavrie goat cheese coupons!
Oh yeah, babe.  Somebody's going to win it.

OK...let's talk about goat cheese for a minute.  I love it.  I would eat it on a train.  I would eat it in the rain. I would eat it with a fox.  I would eat in in a box.

But I never thought about using it in dessert.  Until now.  Goat cheese is the secret ingredient to these creamy, tangy mini cherry bread puddings.

Cherry Bread Pudding
{directions modified from Chavrie, serves 4}
butter for the dishes
1 egg
1/4 cup sugar
1/4 cup plain goat cheese
1/2 cup half and half
1 tsp vanilla
2 sweet King's Hawaiian dinner rolls
1/4 cup dried tart cherries

Butter two oven-proof ramekins, 8-10 oz. capacity each. Place on a baking sheet and set aside.
Preheat oven to 325. 


Whisk together the egg, sugar, goat cheese, half and half and vanilla in medium bowl until smooth.
 

Tear the rolls into 1" pieces. Add the pieces and dried cherries to the egg mixture and stir until well coated.  Let stand 5 minutes.


Spoon evenly into dishes. Place the baking sheet with the ramekins in the oven and bake 25 to 35 minutes or until the center is set.


{They are really poofy directly from the oven.  Once they sit for a few minutes, they will deflate.  That's normal.} 

Cool 15 minutes. Each ramekin serves 2.  Share with someone you love. ♥

To enter the giveaway for the Holiday Sweet Treats: 

leave one comment naming 3 of your crushes. 

For an extra entry, answer the following: 

"if you win the Holiday Sweet Treats from Chavrie giveaway, which dessert recipe would you like to try?"

Entries will be accepted through midnight CST on Wednesday, December 21st.  Good luck! :)   

{This giveaway was brought to you by the nice folks at Chavrie.  I was not paid to profess my love for goat cheese; I do that for free.  I did receive one of the price packages described above.  I promise, you will love it!}
 

Thursday, December 15, 2011

It's 10 o'clock...do you know where your Elf on the Shelf is?

*I* know where he is!  At MY house!!!
I didn't hear about Elf on the Shelf until kiddo was about 10, but I've had the MOST fun watching all of YOUR elves and their antics on instagram, Pinterest and blogs!

{My nephews have an elf...my sister reminded me this week that the oldest one named him Pedro...and that just gives me the giggles.  Pedro is such an elf-y name.}

So, what do you know...I found a bunch of COOKIE elves all around my kitchen!

First, I found one in the chocolate chips...
{This is an elf after my own heart.}

Then, a bunch tried to mix things up in the KitchenAid...

Now, this one jumped into a bowl of food colors...

I'm a little concerned with this one.  He's trying to roll over his fellow elf and he sure seems to have an evil glint in his eye.

Then, I found them all...gathered around checking out pictures of cute cookie makers on instagram.

Want to make some Elf on the Shelf cookies of your very own?  Here's how:
You'll need a template.  I found a picture online, and followed these instructions for making a template.  I also traced the major outlines onto the template and referred back to is as I was decorating.

Supplies:
  • cut-out cookies made with the template
  • royal icing, tinted with AmeriColor Bright White, Chocolate Brown, Copper, and Super Red
  • disposable icing bags
  • couplers and #2 tips
  • squeeze bottles
  • toothpicks
  • food coloring pens (black, pink, red and blue)
Use a #2 tip to outline the hat trim in white.

Use a #2 tip to outline the hair in brown.
{This is where I stared getting nervous...it really doesn't look like it's going to work, does it?}

Use a #2 tip to outline the face in copper.


Go back to the white and add a collar. (Reserve some of this white piping consistency icing for later.)

Use a #2 tip to outline the hat and shirt in red.

Thin the all of the icings with water, a bit at a time, until it is the consistency of thick syrup.  Cover with a damp dish towel and let sit several minutes.

Stir gently with a rubber spatula and transfer icings to squeeze bottles.

Fill in the sections of the elves with the thinned icings.  Use a toothpick to spread to edges and pop large air bubbles.

Let sit at least one hour.

With a #2 tip, pipe eyes on the faces in white. {Kiddo calls these "zombie elves."}

Use the same #2 tip to go over the white outline on the hat and collar for some definition.  (Totally optional, but I think it looks nice.)

Let your zombie elves dry uncovered overnight.

The next day, use food coloring pens to add the eye detail, eyelashes, smile and rosy cheeks. 
(I used a picture of Elf on the Shelf as a guide.)

Now, really....do you know where your Elf on the Shelf is?!?