Friday, September 30, 2011

Breakfast Banana Splits . . . you want one.


My favorite story about banana splits involves my dad and Uncle Mike .  It seems years and years and YEARS ago, they decided to have an eating contest.  They consumed massive amounts of pizza and then went for banana splits.  My dad finished his, but my Uncle Mike saved his favorite part of the banana split for last, and was too full to eat it.  Somehow, this made a very big impression on me when I was a kid.

Moral of the Story: Finish your banana split whether you're too full or not. 

I found this idea through Pinterest...which led me to The Kitchn (love).  Their breakfast banana splits may be a *tad* bit healthier, topped with jam, but hey...you have to get your daily intake of Nutella somewhere!


Breakfast Banana Splits

1 banana
Greek yogurt (I like Fage)
sliced strawberries
Nutella
chopped nuts, toasted


Slice the banana lengthwise and place in a bowl.  Add 2 scoop of yogurt...I used an ice cream scooper for this.  Greek yogurt is so thick that it keeps it's shape.


Add the sliced strawberries.


Heat some Nutella in the microwave for about 10 seconds.  Drizzle over the sundae.


Add toasted, chopped nuts. (I used almonds here, but pecans might be my favorite.)


Ta-da!  Breakfast Banana Splits!  

Make them soon.  I won't tell if you eat all of the Nutella off the top first.  You know, just in case you're too full to eat the rest. ;)

Tuesday, September 27, 2011

DIY Vanilla Extract . . . Works for Me Wednesday

 
Christmas is less than 3 months away.  Honest.  I counted it out on my fingers twice just to be sure.

I really like making homemade gifts for friends and neighbors at Christmastime...and I like to mix it up a bit and not give only decorated cookies.

Last year, I tried vanilla extract.


The cool thing is....you can start NOW!  Make up several jars and start checking off that Christmas list.

To make Homemade Vanilla Extract, you're going to need:


vanilla beans (I bought mine from Beanilla)


...and vodka.


Split the vanilla beans, leaving one end intact. (I had to cut mine in half to fit.) Place in bottles.  These are from The Container Store....aren't they cute?


Top with vodka.  A good ratio is 1 vanilla bean per 1/3 cup of vodka.

Store in a cool, dark place for at least 6 weeks before using.  The longer it sits, the darker the extract will become.
 
This is what it looks like after being tucked away for 2-3 months.

Refill with vodka and fresh vanilla beans as needed.


It's that easy!  Really! And it works for me

{psst....you can find the bottles here...I used the 3.3 ounce.}

Friday, September 23, 2011

Hey There, Cupcake

 
You know what's weird?  I was shopping at Crate & Barrel recently and these cookie cutters popped in my shopping basket.  Strange how things like that happen.

I can already tell that this is going to be one of those cookie cutters that I use over and over again.  They'd look cute in any color and would be darling for a birthday party or just as an "everyday" cookie.

This version is so, so simple.  Two colors (I used brown and a light pink), some sprinkles and a few red sixlets.  (I'm starting to love sixlets...remember those cherry cookies?)


For the cupcake cookies, you will need:
  • cupcake sugar cookies
  • royal icing, tinted with AmeriColor Chocolate Brown and Soft Pink
  • disposable icing bag
  • coupler and tips (#3 & #1)
  • squeeze bottles
  • toothpicks
  • chocolate jimmies
  • red sixlets (or a bit of red icing)


Using a #3 tip, outline the cookie in brown. (I like a larger tip here so the outline stands out.)  Reserve some of this piping consistency for later.

Thin the brown and pink icings with water, a little at a time, until it is the consistency of thick syrup.  Cover with a damp dishtowel and let sit several minutes.

Stir gently with a rubber spatula to pop any large air bubbles that have formed. Transfer to squeeze bottles.


Fill in the bottoms of the cupcakes in brown.  Use a toothpick to guide to edges or pop and large air bubbles.


Flood the tops of the cupcakes with the pink icing, working about 6 at a time.


Leave the bottoms solid, or come back over the wet icing with a squiggle of pink icing going across.


After flooding, sprinkle chocolate jimmies on the tops....don't worry, the icing won't dry before you get back to it.


Add a bit of piping consistency royal icing to the top of the cookie to attach the sixlet.  (If you don't have sixlets, just add a dot of red icing.)

Switch the tip on the brown icing to a #1 or #2 and pipe lines on the "wrappers" that don't have the pink squiggle.

Let dry 6-8 hours, or overnight.

That's it!  Easy as pie cupcake!

Tuesday, September 20, 2011

Cheater's Creme Anglaise . . . Works for Me Wednesday

Have you ever come across a recipe that called for a dessert to be topped with, not whipped cream, but creme anglaise?

Creme Anglaise is described as a thick, pourable custard and is made with eggs, milk, sugar and vanilla bean.

Well, I came across a recipe not long ago that called for cream anglaise to be served with the cake, but I was feeling lazy.  Then, I heard a voice in my head telling me to use melted ice cream.  I'm pretty sure the voice was Alton Brown's from a very, very old episode of Good Eats.  It sounded like him anyway. ;)

So, that's exactly what I did.  And it was heavenly.

I highly recommend this Haagen-Dazs Five Vanilla Bean Ice Cream.  I'm not a vanilla ice cream girl, but I could eat this entire container in one sitting (melted OR frozen). 

Let it melt in the fridge....it will still be nice and thick and perfect to spoon over that dessert.

The cake it was meant to top wasn't my favorite.  
But the Cheater's Cream Anglaise?  It works for me!

Friday, September 16, 2011

Chocolate Amaretto Pie (& Home Made cookbook giveaway)

Cookbooks: I read them like novels.  I even get teary.  I love reading how recipes came about and the family stories that go along with them.

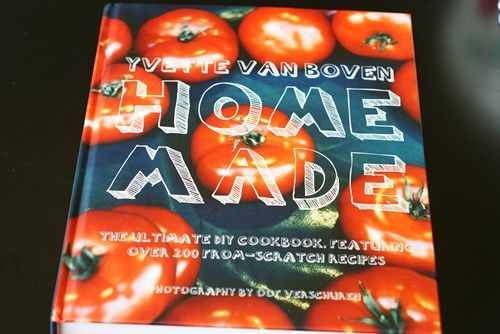
I want to introduce you to a beautiful cookbook called Home Made by Yvette Von Boven.  Yvette runs a restaurant and catering business in Amsterdam, along with being a food stylist and recipe developer.

How glamorous is this....she splits her time between Amsterdam and Paris.
{I split my time between the suburbs of Houston and the other suburbs of Houston.}


Home Made is a substantial book, weighing 4 & 1/2 pounds...that's heavier than kiddo when he was born.  The book has everything...cocktails, main courses, desserts, pasta, soups...you name it.  Yvette walks you through making bread, making ice cream (without an ice cream maker), building a simple outdoor grill, making cheese, making chocolates, and more!


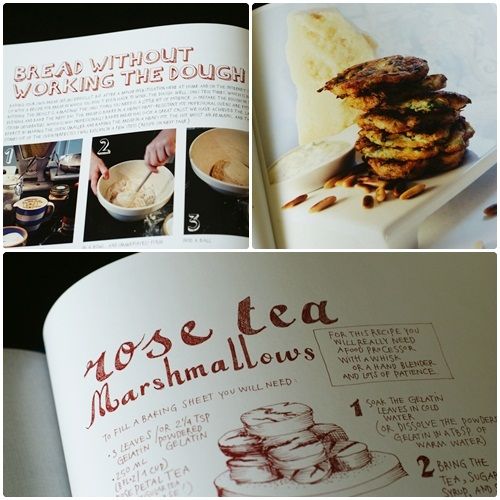
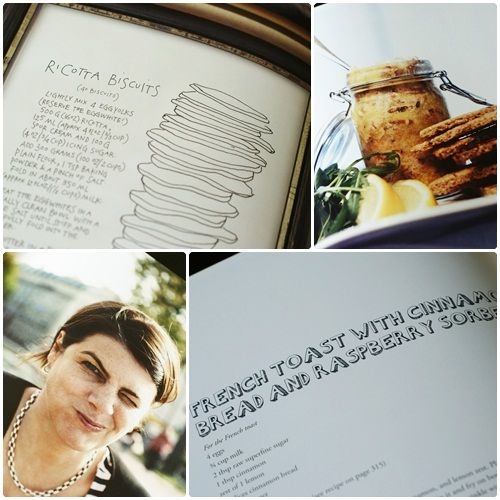
And, the book is beautiful.


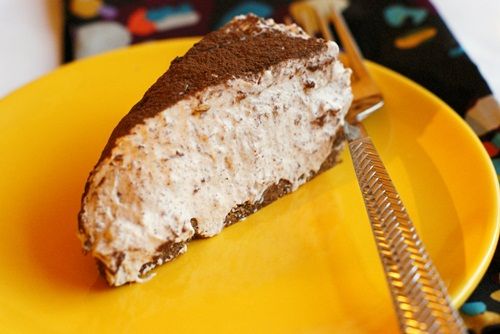
I tried a recipe called "Chocolate Fondant Cake" which I renamed pie. To me, fondant means the roll out icing that goes over a cake.  Whatever you call it, the cake/pie is sinfully creamy and delicious!

It starts with a cookie crust.  Crust supposed to be made with Amaretti cookies.  I love these little Italian cookies.  In my grocery store, they're not found with the cookies, but over in the "Italian section."  I knew I had a bag in my pantry.


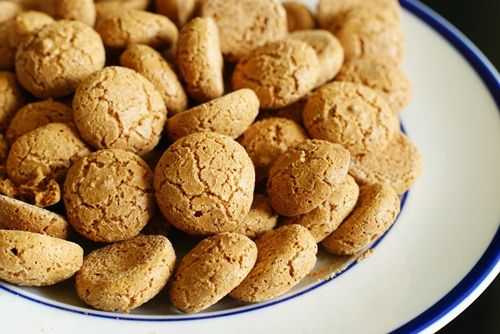
I opened the bag and ate one, you know, for quality control.  Good thing I did, because, oh, they were NOT good. Turns out, they expired over a year ago. I.Let.Cookies.Expire. (hangs head in shame)

Okaaaay....

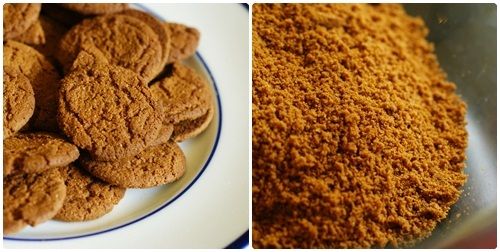
Gingersnaps to the rescue!


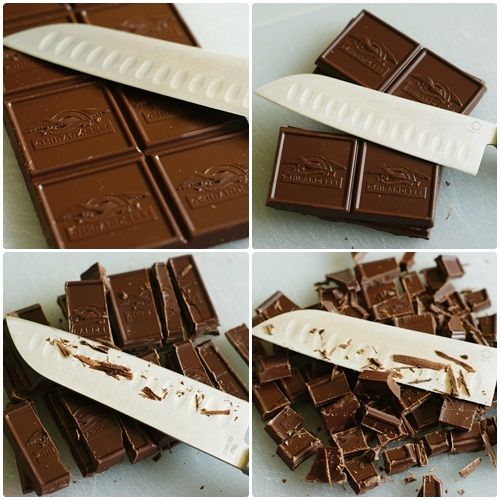
Melt some chocolate,


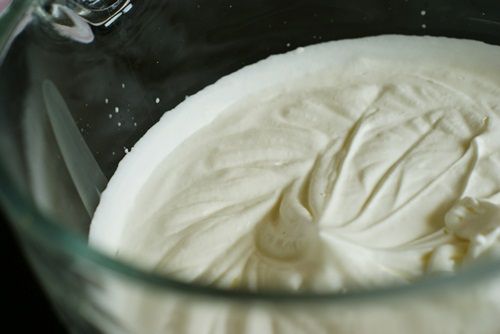
whip up some cream, add amaretto...chill (you and the pie)...and you have yourself a glorious dessert.


{...aka Chocolate Fondant Cake, adapted from Home Made, serves 12}

1 & 1/4 sticks butter
8 oz amaretti cookies (or gingersnaps)
4 oz semisweet chocolate, chopped
2 & 1/2 c. heavy cream
2 TBSP sugar
1/3 c. Amaretto (or Frangelico)
cocoa powder

Line an 8 or 9" cake pan with plastic wrap, allowing excess to hang over the sides.

Melt the butter.  Process cookies in a food processor until evenly ground.  Stir the butter and crumbs together; press into the bottom of the pan.

Melt the chocolate in the microwave or in a bowl over a pan of simmering water.  Let cool slightly.

Beat the cream and sugar until stiff peaks form.  Gently stir in the melted chocolate.  Add the Amaretto and stir.

Fill the pan with the mixture and smooth with an offset spatula. Cover with the excess plastic wrap and refrigerate at least 4 hours. (I put mine in the freezer for 30 mins - one hour before serving to set it up a bit more.)


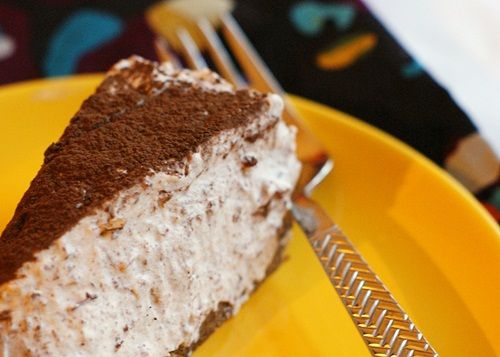
Before serving, lift the pie out of the pan , remove the plastic wrap and sift cocoa powder over the top.  Serve small wedges...it's rich!

Want a copy of Home Made for your very own?
Just leave a comment answering this question...

"What is something you've always wanted to make or bake at home, but have never tried?"


Giveaway closed...Jane is the lucky winner! Yay, Jane!

Random winner will be chosen on September 19th at 9pm CST.  Good luck! :)

{Disclaimer: I was provided a copy of this book at no charge...my opinions and weight I have gained from this recipe are my own.}

Wednesday, September 14, 2011

Guilty.

I am one of *those* people.  My emails are littered with :) and ;).  (Not to mention all of the ... and !!!.)

Those little faces are called Emoticons. And I'm addicted to them.  I can't help myself.  {And, yes, I recall going through a stage of dotting my i's with little hearts.}


So, when I saw this card at Target a few weeks ago, I knew those little emoticons needed to be made into cookies.
(Except, I made the cookies in white.  I might overuse my emoticons, but I don't mess with the background color.  So there.)


These are probably the easiest cookies you will ever make.  

First, I cut out the cookies with my square cutter, then divided it into smaller squares with a bench scraper...just like I did here for the Scrabble cookies.

The baked and cooled cookies were then outlined and filled in royal icing tinted with AmeriColor Bright White.


{Oops, I put that heart <3 in there backwards.}

The "smileys," as I like to call them, were added using a 1.5 tip from PME, but you could use any #1 or #2 tip. (Black icing was tinted with AmeriColor Super Black.)

So, fess up.  Are you a lover of emoticons as well?  
What's your favorite? ;)