Monday, February 28, 2011

Peanut Butter Blossoms . . . one of our favorite cookie recipes

Do you have a go-to cookie recipe?  A recipe you can always depend on when you need to bring cookies to a party, to a school function, or to a friend? 

Here's mine.  Peanut Butter Blossoms.  PB Blossoms are little sugar-dipped peanut butter cookies with a Hershey's Kiss perched perfectly on top.

You've probably eaten them...and you might just have the recipe in your arsenal.  If you don't, you need it.  These babies get scarfed up by kids and grown-ups alike.

{PS....I have written in my cookbook (do you write in your cookbooks?) that the 1st time I made these was when kiddo was 7.  He said these were the "most fun" recipe he's ever helped make.}


Peanut Butter Blossoms
{ever so slightly adapted from The King Arthur Flour Cookie Companion}

1/2 c. butter
3/4 c. creamy peanut butter (I use Skippy Natural)
1/3 c. sugar (plus more for rolling)
1/3 c. light brown sugar
1 egg
1 tsp baking soda
1/2 tsp coarse salt
1 tsp vanilla
1 & 1/2 c. unbleached, all-purpose flour
Hershey's Kisses (7 ounces)

Line cookie sheets with parchment paper.  Preheat oven to 375.

Using the paddle attachment, beat the butter and peanut butter until blended.  Add both sugars and beat until light and fluffy.  Add in the egg through vanilla and mix until thoroughly combined.  Add in the flour in 3 additions. Scrape the bottom and side of bowl as needed.

Place extra granulated sugar on a plate. Shape the dough into 1-inch balls and roll in the sugar.

Place coated dough balls on the parchment-lined sheets.  Bake cookies until the are a very light golden color, about 10 minutes.  (Meanwhile, unwrap the kisses.)

Remove the cookies from the oven and it's go time!  Immediately place a kiss on top of each hot cookie, pressing down slightly.

{Kids LOVE to help with this part!}

Transfer cookies to a cooling rack to cool completely.
 
My favorite part? How the heat from the warm cookie makes the kisses soft and melty.  You want one now, don't you?  Oh, and here's how I eat them....I eat all around the perimeter of the cookie, saving the Hershey's Kiss with a bit of cookie on the bottom for the *perfect* last bite.

Are you sold yet?  Wanna try a Peanut Butter Blossom?
Wednesday, February 23, 2011

An Ode to Bread . . .

There was a young girl from Dallas,
...wait, that's a limerick, not an ode.....

I'm not quite sure how to write an ode, but I will tell you, bread is special to me.

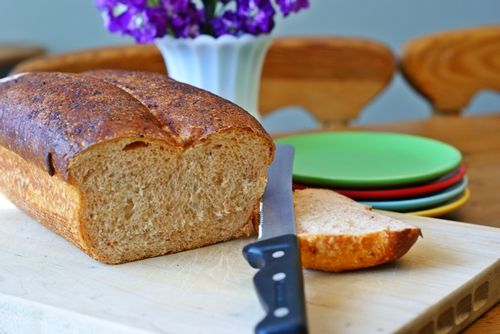
{This is Panera's Tomato Basil bread.}

I grew up smelling bread dough rise for my mom's famous cinnamon rolls.  There was beer bread, warm from the oven and slathered in butter.  Bread was always a part of our lives.

My Bread Story:  Well, I was dating this guy.  And one day (15 years ago today, to be exact, right about this time of day...it's 4:30pm here), he called and asked if I wanted to go to Happy Hour.  Of course, I said!

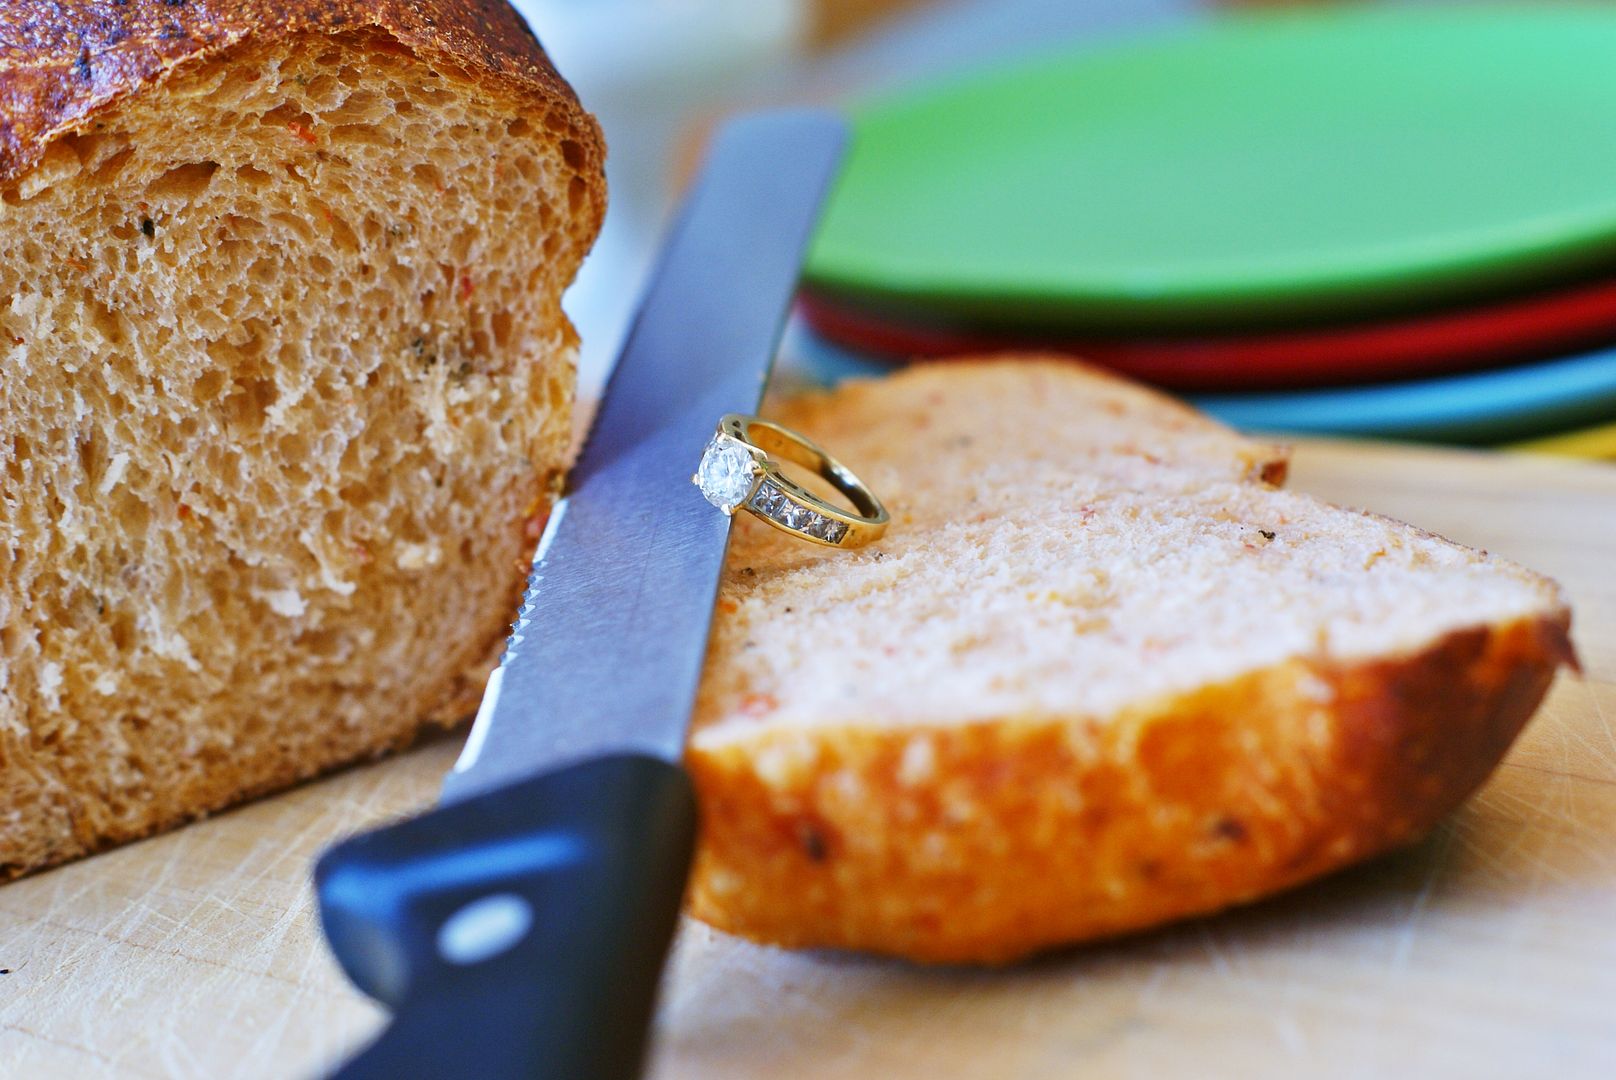
He picked me up, and drove not to a restaurant, or to a bar, but to a park.  A beautiful park.  From the back seat, he produced a loaf of bread and a bottle of champagne.  We sat on a wooden park bench, sipped champange and tore off chunks of bread.

And then, I SCREAMED!  There was something big and BLACK in the bread.  He was calm, removed the black "thing" from the bread...it was a box.  He knelt down on one knee and proposed.

{When you're dating someone with an engineering degree, I guess it shouldn't come as a shock that he carves out the perfect size cubbyhole in a loaf of bread for a ring box. And then puts the whole thing back together perfectly.}

So, the rest is history.  It may explain why, as I watched this Panera "Ode to Bread" video, I got teary-eyed.  Watch it and tell me, does it make you teary, too?
Just ONE of the reasons I LOVE Panera, is that their freshly made, always delicious loaves of bread are ready and waiting for me in the store when I don't have the time....or am feeling too lazy....to make my own.

Treat yourself to one.....or better yet, have your honey pick a loaf for you.  You never know what might be hiding in there! ;)

{Do YOU have a bread story?}
I'd love to for you to share it here...or with Panera on their Facebook page.

(This is a sponsored post by Panera Bread, but my opinions, words and proposal story are all my own.)

Tuesday, February 22, 2011

What to do when good icing goes bad . . . Works for Me Wednesday

OK....let's say you're decorating cookies.  You are planning to put a pretty piped border along the edge like this:

{These are Uncle Mike's cookies, in case you missed 'em.}

But, hypothetically, your hubby wants to take the family out for lunch and pick up the piano you bought for $99 that is still sitting at Goodwill.  And let's say, you get to Goodwill and the piano is too big to fit in the SUV, so you have to run to Home Depot and rent a truck.  Hypothetically.

By the time you get back home and are ready to get piping (I kinda love that expression "get piping"), the icing you stashed in the fridge is a little less that stiff.

As a matter of fact, it looks like this....

What to do?

1st: First, stir in sifted powdered sugar.  I always have a little powdered sugar shaker in my kitchen for dusting on pancakes, etc.  Start there.  Keep adding until it feels stiff again.

2nd: Try piping on a a plate or a paper towel.  (I was using a #16 star tip here.)  Does the pretty little "shell" pattern stay, or does it get runny?

3rd: If the icing still not stiff enough, pop in back in your mixer bowl, add some more powdered sugar and with the paddle attachment, beat it on medium until stiff peaks form again.

Voila!

works for me wednesday at we are that family

Sunday, February 20, 2011

Modern Bird Studios (very cool giveaway!)

It may come as a shock, but occasionally I think of things other that food.  (Usually, these thoughts come while I'm snacking.)
Anyway....I ran across Modern Bird Studios over at Today's Creative Blog one day and was just blown away.

This husband and wife team take a photograph and TRANSFORM it into the coolest art piece using wood and paint.

{Not only do they produce these incredible works of art, but Gregg & Megan are just some of the funniest people around.  They even interviewed me for their blog....ever wondered who would win a cage match between powdered sugar and granulated sugar?  We discuss.}

To say that I love our piece from Modern Bird is an understatement.  Seeing it in person, my husband & I were just amazed by how cool it turned out.

We used this picture of kiddo:


And here is the finished product from Modern Bird:


Wow, right?  It's in our office and it makes me so happy every time I see it. 

SO.  Modern Bird Studios is offering one winner a $250 gift certificate!!!  Wow!


To enter (required):
Want extra entries?  Yes, you do. (Leave a separate comment for each.):
{Open to US and Canada. Previous winners not eligible. Winner will be chosen Thursday, February 24th, 8pm CST.}

Want to make a purchase now?  Enter code BAKEAT350 for a 15% discount.

Thursday, February 17, 2011

Babies, Bread & Beautiful Bloggers. . .

Babies:
My *little* sister just had her 3rd baby last month.  Her 3rd boy.  A beautiful, healthy, chunky little boy named Leo. ♥

{So, she now has a 4 year-old, a one-year-old, a newborn and a good case of sleep-deprivation. ;)}

Bread:
It's always been my philosophy that new mothers need a little sugar high to make it through the day.....or at least until naptime. 

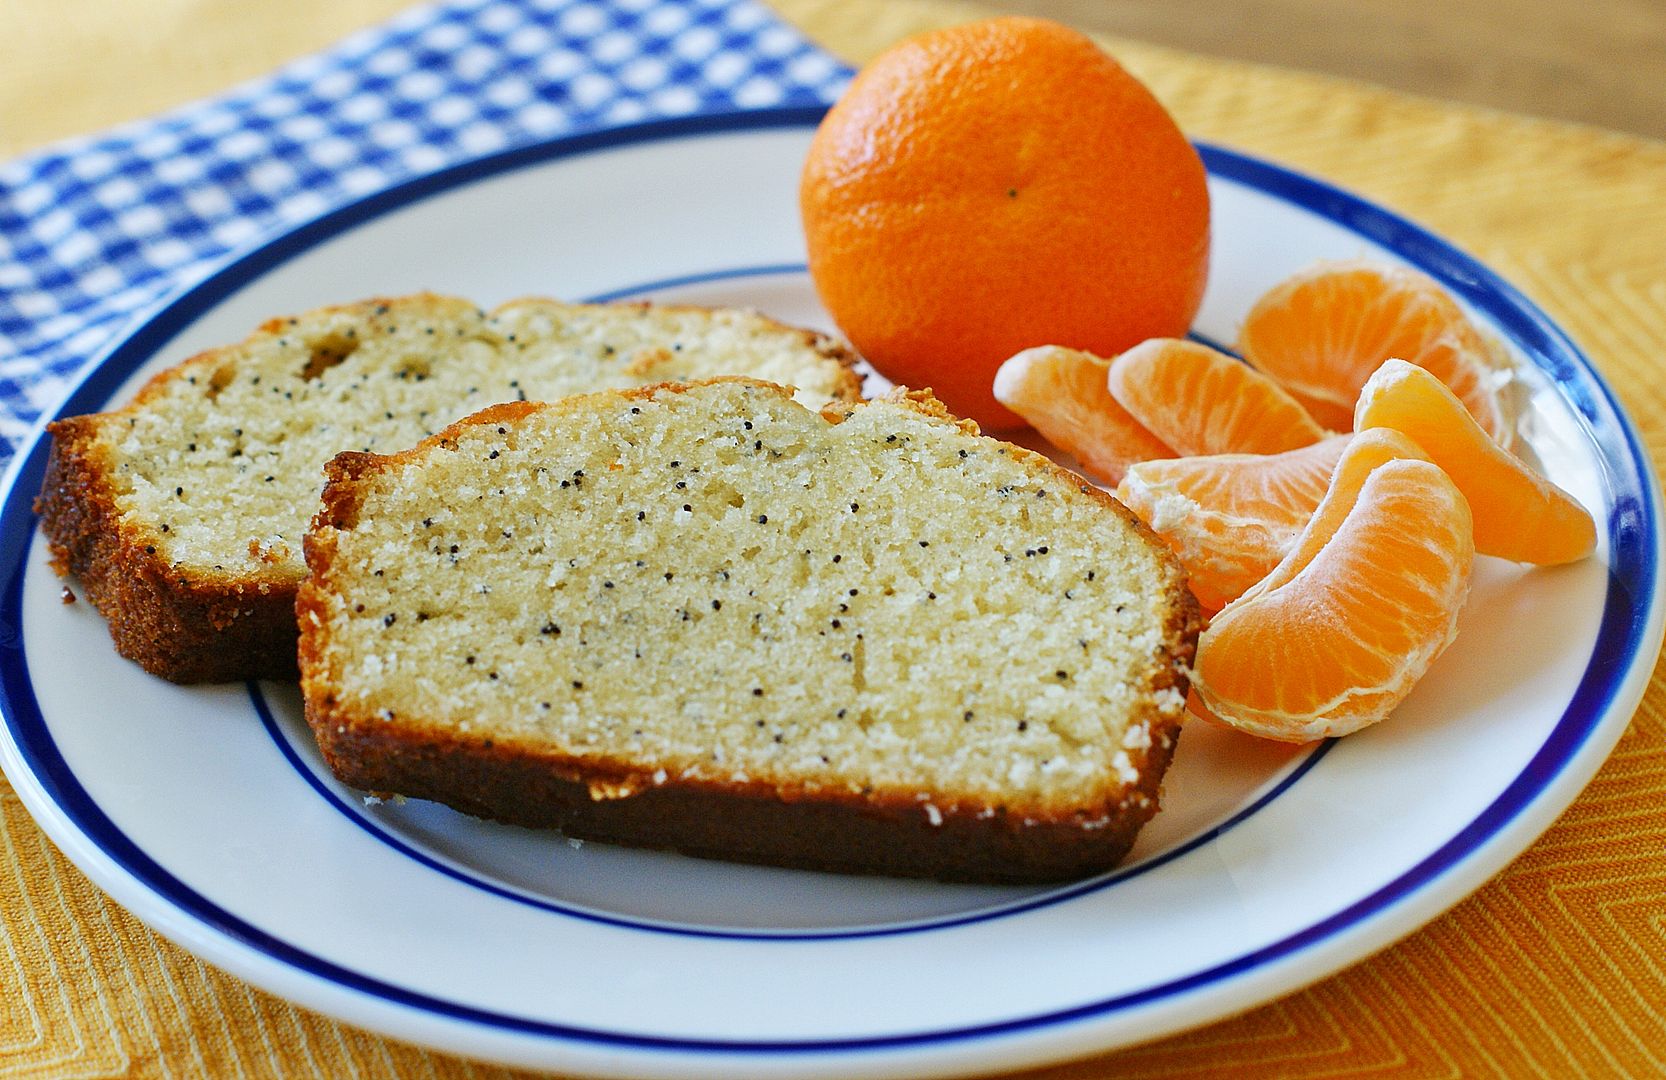
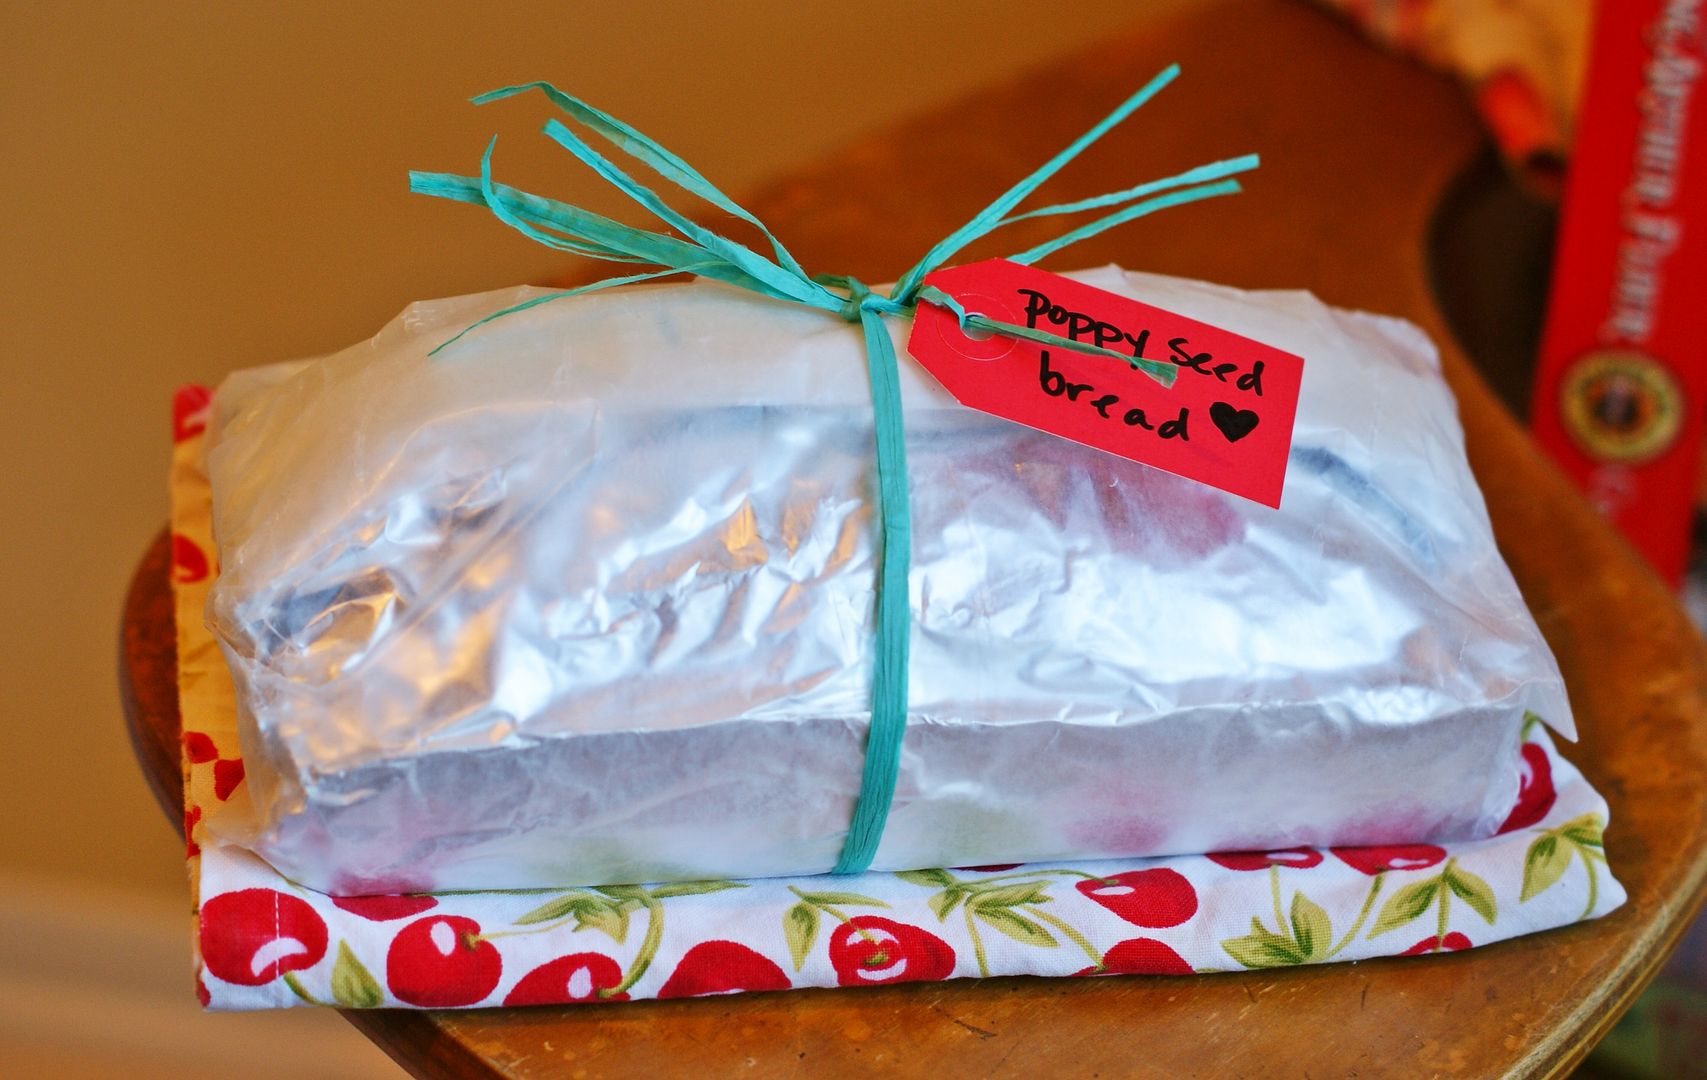
Enter Poppy Seed Bread that makes TWO loaves and is perfect to freeze and drop off to a new mommy.

The bread is oh-so-moist....I'm no expert, but it might have something to do with the 1+ cups of oil in the recipe.
 
It is SO good just sliced and served plain for breakfast, or a snack, or for dessert.  It's a multi-tasker.

Beautiful Bloggers:
You may know that we lost my mom to cancer over 10 years ago.  Kiddo was 1 and I feel so lucky that he had her in his life, even if it was only for a year.

Mom made the quilt for kiddo's bed....and she started a small quilt for him to have to carry around.  But she got too sick to finish it.

I'm not good with a needle and thread.  So, this little quilt was in a bag that I've carried from house to house to house.  And a couple months before baby Leo was born, I found it!

Here's what it looked like (the top was put together, batting and back attached with pins and bits of thread.):

On a whim, I tweeted something like, "Anyone interested in finishing a baby quilt in exchange for cookies.....or cash?"  

I'm not kidding, 5 seconds later, sweet Robyn from Earthbound Chronicles offered to finish it.....FOR THE COOKIES!!!  I think I offered her a few chances to back out....or to take the cash instead.  She wouldn't even let me pay her for shipping.

Here's how the quilt looks now:
 
Absolutely gorgeous!!!  And take a gander at this adorable, darling, perfect trim that Robyn added...

 
{Oh, I love it!}

So, now baby Leo has a little piece of something his Gigi made.....with a BIG dash of love from a sweet blogger we've never even met.

{Y'all....I never expected blogging to bring me to tears, but it does. What I love the most about blogging & tweeting is what I never expected.....meeting the most amazing, creative, generous souls on earth.}

Thank you SO MUCH, Robyn.  {I still think you should have taken the cash.} ;)

Poppy Seed Bread
{adapted from Mary Engelbreit's Fan Fare}

1 & 1/2 cups milk
3 eggs
1 & 1/2 tsp. pure vanilla extract
1 & 1/2 tsp. pure almond extract
1 cup + 2 TBSP vegetable oil
2 & 1/2 cup sugar
3 cups unbleached, all-purpose flour
1 & 1/2 tsp. baking powder
1 & 1/2 tsp. coarse salt
1 & 1/2 TBSP poppy seeds

Preheat oven to 350.  Grease sides and bottoms of two 9x5" loaf pans.

In a large bowl on low speed, beat together the milk, eggs, vanilla, extracts and oil.

Add in the sugar, flour, baking powder and salt.  Beat for 2 minutes.  Stir in the poppy seeds.

Divide the batter between the two loaf pans and bake 50-60 minutes until a toothpick comes out clean.

Cool in wire racks in the pans 10 minutes, then remove from pans and let cool completely.

To freeze, wrap cooled loaf in heavy-duty foil.  Thaw at room temperature several hours or overnight.

Monday, February 14, 2011

Because I love you. . .

...and it's Valentine's Day....I saw this adorable little heart-shaped whisk and measuring spoon set on Saturday, and I bought one for me and one for YOU!!!

 {Naughty cat not included.}

Seriously, I think this ♥ whisk makes me more giddy than anything from Tiffany's could.
{But Mr. E, you are welcome to try.}

Through tomorrow at midnight, leave a comment here about something you LOVE and you'll be entered to win! giveaway closed. ♥

Spike says, "Happy Valentine's Day!"

Saturday, February 12, 2011

Mr. E & me sitting in a tree. . .

{.....K-I-S-S-I-N-G.....}

These cookies are inspired by my sister and her hubby who carve their initials in a tree wherever they live. {Insert "aww..." here.}

 
If you are ever on an Army base in Hawaii, and see a tree with a M + M carved on it, that's them. ;)

Even if you don't make the trees, the little initial hearts are about the easiest Valentine cookies EVER!  Just outline, flood and, the next day, use a food coloring pen to write on initials.  Easy Peasy.
 
The make the trees you'll need:
 
Cut out cookies using a circle cutter and with a knife, cut a thin rectangle.  Smoosh (technical term) together before baking to make a tree shape.


Once the cookies have cooled, outline the top of the tree and the trunk of the tree using #2 tips.  Pipe a heart in the center of the trunk. (The red icing won't be used until the next day, cover with plastic wrap, pressing onto the icing, and store in the fridge.)

Reserve some piping consistency green icing. Thin the brown and remaining green icing with water, a teaspoon at a time, stirring until it reaches the consistency of thick syrup.  Cover with a damp dish towel and set aside.

After several minutes, stir the icings gently with a rubber spatula to pop and air bubbles that have risen to the surface.  Transfer to squeeze bottles.

 
Flood the tree top with the thinned green icing and the tree trunk in brown.  Use a toothpick to guide into edges and pop air bubbles.

 
Wait at least one hour, then with the #2 tip, pipe grass on the bottom of the trunk.  Let dry overnight.


With a fan brush and Chocolate Brown food coloring thinned with water, add the wood grain.  To make the wood grain, I used a technique I learned from Renee. You can see her wood grain on cookies video on University of Cookie (she's so good).


Thin the red icing with water, as described above and fill in the heart.

Let dry overnight.

The next day, use the food coloring pens to write on initials.

Have you ever carved your initials in a tree?  I'm thinking Mr. E & I need to.

Wednesday, February 9, 2011

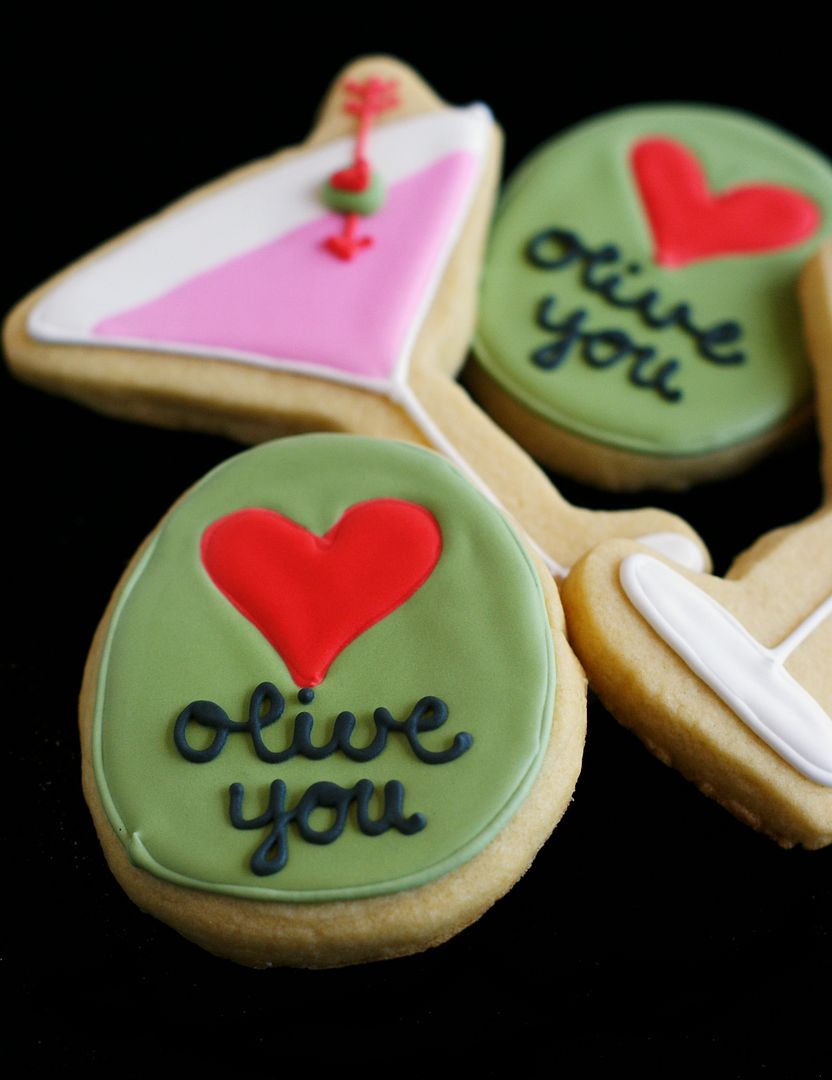
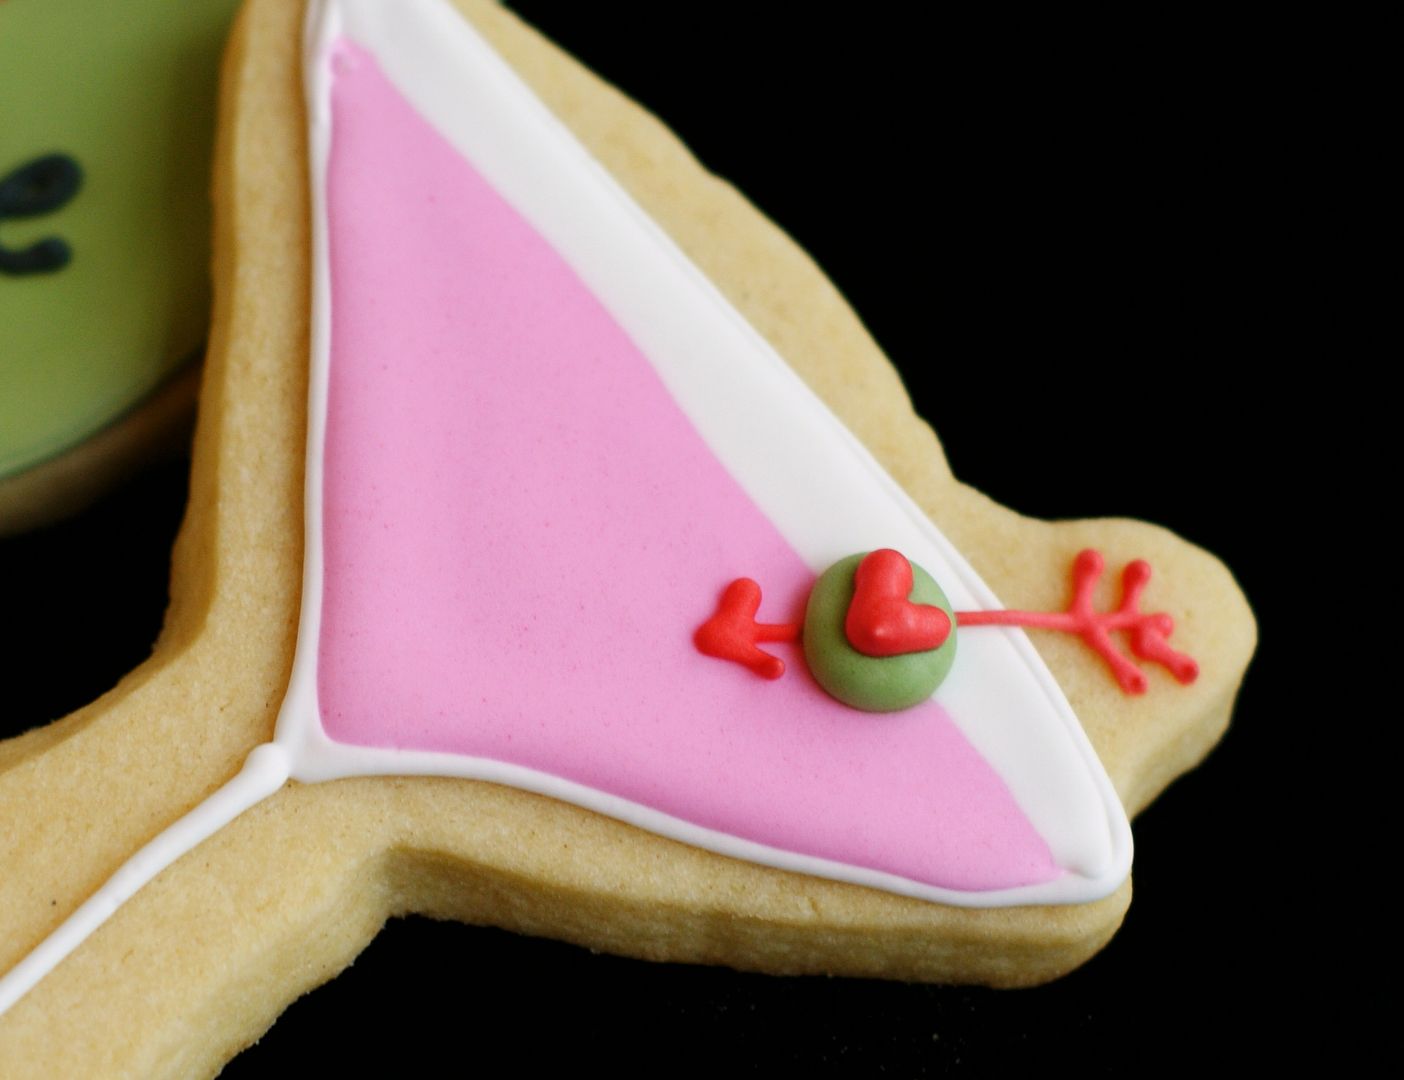
Olive You! (Martini & Olive Valentine Cookies)

Olive you!

I've made these martini cookies before, but they needed an update (and new pictures).  And they needed giant olives....with heart-shaped pimientos. 
{Because nothing says "Valentine" like a heart-shaped pimiento.}

The idea came from a Valentine card that I gave Mr. E a few years ago.
{Sure sign cookies have taken over your life?  Everything you see becomes a cookie.}

To make the martinis, you'll need:
 
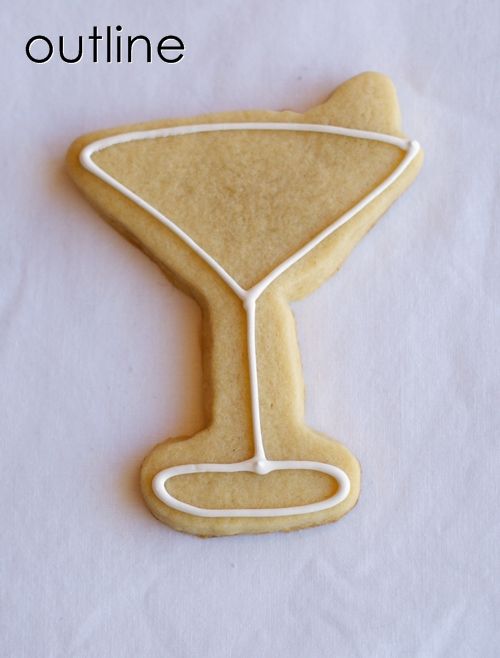
With a #2 tip, outline the cookies in white.

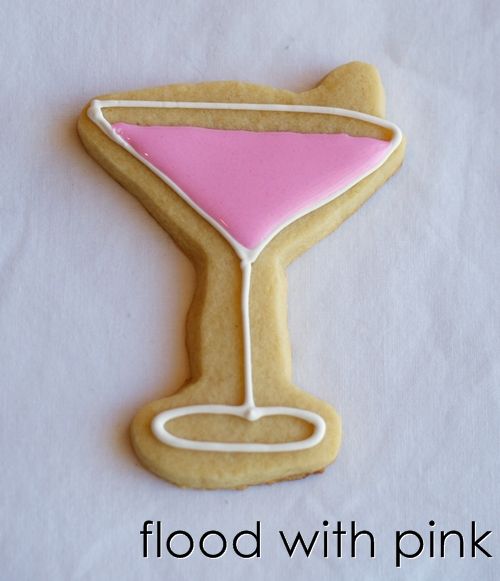
Reserve some piping consistency red icing.  Thin the pink and remaining red icing with water, a teaspoon at a time, stirring until it reaches the consistency of thick syrup.  Cover with a damp dish towel and set aside.

After several minutes, stir the icings gently with a rubber spatula to pop and air bubbles that have risen to the surface.  Transfer to squeeze bottles.
Flood most of the martini glass with the thinned pink icing, leaving a little room at the top.

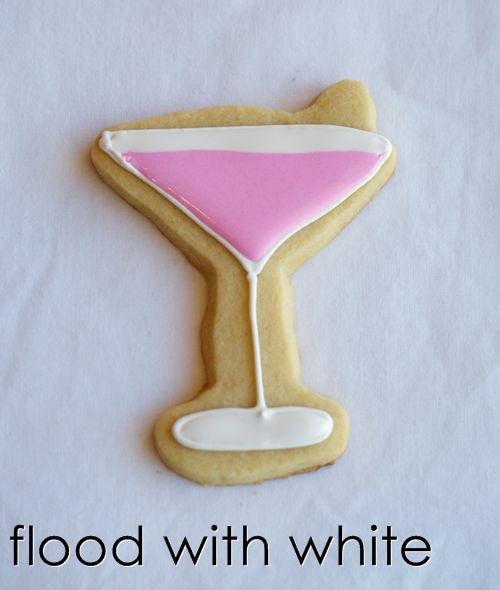
Flood the top of the glass and the bottom of the stem in white.  Use a toothpick to guide to the edges.

Let sit 1 hour.
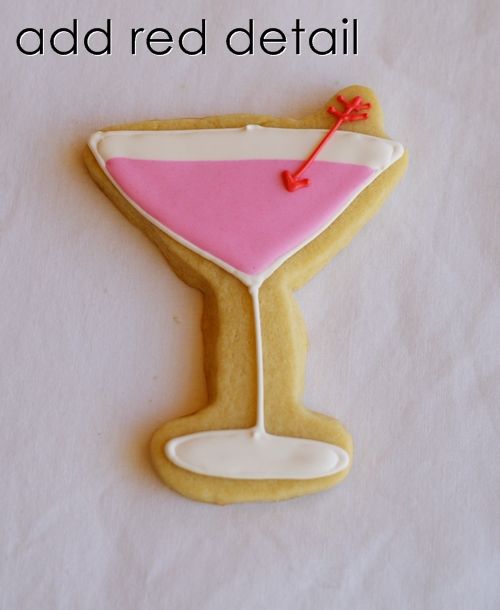
Using a #1 tip, pipe the arrow swizzle stick.

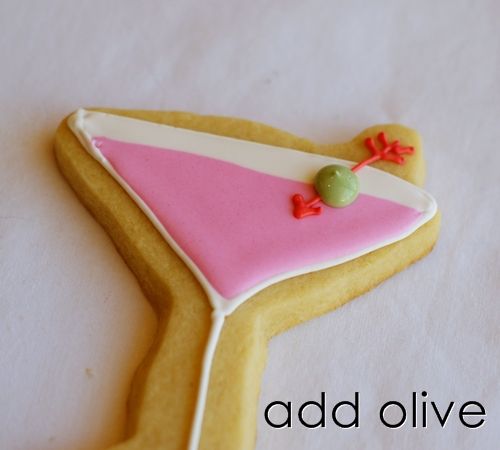
With the #12 tip, pipe the olive with avocado icing.

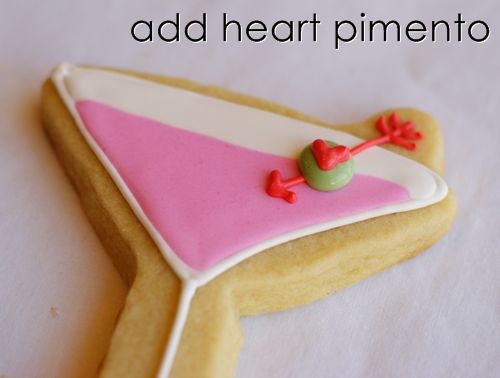
Directly on top of the olive, pipe a heart with the red icing.

Let dry overnight before packaging.

♥Cheers, you guys!  Happy Valentine's WEEK! ♥