Tuesday, November 15, 2011

Pie Crust Primer...Works for Me Wednesday

Why is it four ingredients (one of them being ICE WATER) can cause baking anxiety?   Flour, salt, fat and water…you know what I'm talking about: pie crust.

Don't get me wrong, I have used Pillsbury refrigerated crusts many a time...and it's really pretty yummy.  But, maybe Thanksgiving has you feeling brave.  Maybe you want to feel like a domestic goddess (pie crust from scratch will do that for ya).  Maybe, just maybe, your mother-in-law is coming for dinner and you want her to know that you can make pie crust, too.


Here were my fears about pie crust...
  • Am I working the dough too much?
  • What fat should I use?
  • Will it get soggy?
  • Will it be flaky and not taste good?
  • Will it be tasty and not flake?
  • Will I send my husband to the store for a box of the refrigerated stuff?

 
Fear no more!  Let me share my favorite, no-fail recipe along with a few tips for a perfectly flaky, delicious pie crust!


For a double-piecrust:
(modified from The King Arthur Flour Baker’s Companion)

2 & 1/2 c. unbleached, all-purpose flour
1 tsp kosher salt
1/2 c. cold shortening (Crisco)
1 stick unsalted butter
1/4 to 1/2 c. ice water


Reserve a few tablespoons of flour, set aside. Whisk together remaining flour and salt. Cut in the shortening until it is crumbly.

Place the reserved flour on work surface and coat butter in it. Use a rolling pin or your hand to flatten the butter until it is about 1/2 inch thick. Break the flour-coated butter into 1 inch pieces and mix into the dough until it is evenly distributed.

Sprinkle water over the dough while tossing with a fork just until it is easily squeezed into a ball. Flatten into 2 disks, wrap in plastic wrap and refrigerate 30 minutes.

On a floured surface, roll each disk into a 12 x 9″ rectangle (approx). Fold into thirds, like a letter, then fold again in thirds to form a square. Wrap both pieces again and refrigerate 30 more minutes.

After 30 minutes, let rest at room temperature for 5 minutes, then roll out to the size needed for the bottom crust.  Use the second piece for a lattice or decorative top.

Now, here are a few pie crust secrets:
  1. For a perfectly baked bottom crust, use a glass pie pan and bake the pie on the bottom rack of your oven.
  2. To prevent a soggy bottom crust on a fruit pie, brush on a thin layer of lightly beaten egg white before adding the fruit.

Psst....Cheryl over at TidyMom is having a Pie PARTY on the 16th.  Go check out the pies and link up your own! 

Never fail pie crust....works for me! :)


{Portions of this post first appeared as a guest post on Muthering Heights.}

Sunday, November 13, 2011

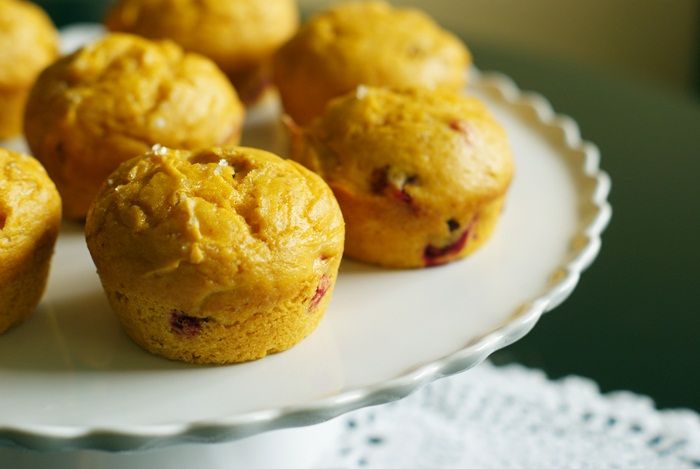
Four-Ingredient Cranberry Pumpkin Muffins

Baking from scratch, I love it; I do.  But sometimes, a cake mix comes to the rescue.  Like sometimes in the mornings...when I tend to feel lazy...and the last thing I want to do is create an entire sinkful of dishes before 6:30 am.
I present to you...a lazy mom's (that's me) muffins.
{I am not referring to my muffin TOP here. I mean *actual* muffins.}

They're a snap to put together, a hit with the kids and adults alike, and oh, they're low-fat.  If you're into that sort of thing.

4-Ingredient Cranberry Pumpkin Muffins
{technically 5 if you count the water, but let's not.}
yield: 15-18 muffins

1 box French Vanilla Cake Mix
1 (15 oz) can pumpkin
2 egg whites, beaten with a fork until frothy
heaping 1/2 c. cranberries, fresh or frozen (if frozen, UNthawed)

Preheat oven to 325.  Spray or grease 15-18 cups of a muffin tin.

Stir together the cake mix and pumpkin.  I usually add 2-3 TBSP water here to loosen things up a bit.

Gently stir in the egg whites and cranberries until incorporated.  Spoon into the prepared muffin tins.

Bake for 22-25 minutes, until the centers pop back when lightly pressed.

Cool in the pan for 5 minutes, then remove to a cooling rack to cool completely.

{Sometimes when you take pictures of food, visitors pop by to see what you are up to.}


Voila! Warm from the oven muffins that you can make even before getting caffeinated.

Thursday, November 10, 2011

Biscoff Cut-out Cookies

Remember Biscoffs?  Those little "airline cookies?"  We talked about them here.
Well, I wondered if maybe, just maybe, I could use the Biscoff Spread and make some cut-out cookies for decorating.

The answer?  Yes.

If you love those crunchy little Biscoff cookies, but would love a softer, more sugar-cookie-ish version, you might want to try this. 

{And, you don't even have to decorate them....just eat them plain.  Or, one other option that I'll show you in a minute.}

Biscoff Cut-out Cookies

2 tsp. baking powder
1/4 tsp. kosher salt
3 c. unbleached, all-purpose flour
1 stick salted butter, cut into chunks
1/2 c. Biscoff Spread
1/2 c. sugar
1/2 c. light brown sugar
1 egg
1/4 c. heavy cream

In a medium bowl, whisk together the baking powder, salt and flour.  Set aside.

In a large bowl of a stand mixer, beat together the butter, Biscoff Spread, and sugars using a paddle attachment until light and fluffy.
Mmm....fluffy.

Add the egg and beat well.  Beat in the cream.

In three additions, beat in the flour on low until combined. Divide the dough in half, shape into discs, wrap in plastic wrap and refrigerate at least 30 minutes before rolling.

Preheat oven to 350.  Line cookie sheets with parchment paper.

On a floured surface, roll the dough with a floured rolling pin to about 1/4th inch thick.  Place shapes on the prepared cookie sheet and chill in the freezer 5-10 minutes.

Remove from freezer and bake 8-12 minutes, depending on cookie size.  Cool on sheet 2 minutes, then remove to cooling rack to cool completely.

Decorate, eat plain, OR...
...sandwich together with a little Biscoff Spread.  Go ahead, try it!

Tuesday, November 8, 2011

Dinner...Works for Me Wednesday

Yes, we eat a lot of cookies around here.  But we also eat dinner...lunch & breakfast, too!!!
The new page Bake at 350 Goes Savory is now open and there are a few recipes there for your perusal.  Do not worry...these posts will not show up in your reader...I know you are here for the sugar.

Pop on over if you're looking for something new for lunch or dinner. (There's a link right at the top of the blog in the yellow navigation bar.)

Now, if I can only get Mr. E to come home from work at 4:30, so I still have good light for taking pictures. ;)

Dinner....it works for me!

Saturday, November 5, 2011

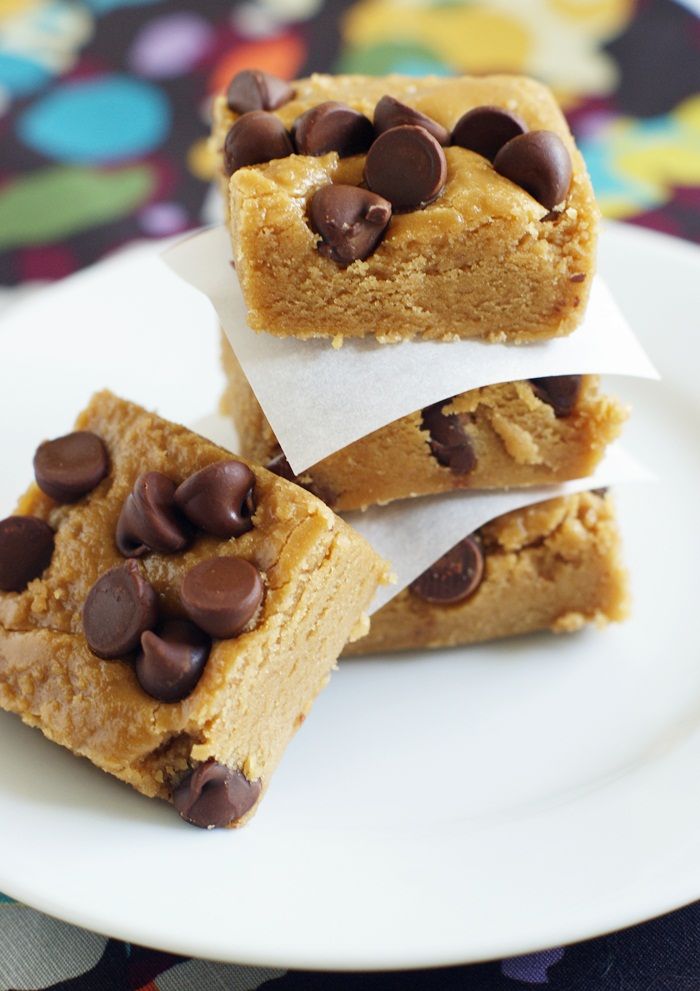
Chocolate Chip Cookie Dough Fudge (seriously.)

My dad is a pretty good cook.  He's master of the grill and he was always known around our neighborhood for his smoked turkeys.  His other claim to fame is Christmas fudge.  Chocolate fudge...and you can typically find him enjoying the first piece with a cold beer.

{My dad is awesome.}

So, when I received a copy of Nina Wanat's beautiful book, Sweet Confections, the fudge caught my eye immediately.  This is not my dad's fudge....this is chocolate chip cookie dough fudge.  No, you're not dreaming.
Let me tell you about it.  It's delicious.  Mine turned out a bit darker than the picture in the book, but it's still delectable.  I'm assuming it's because I was stopping the process to take pictures...don't do that.

Thursday, November 3, 2011

Hooray for Fall!!!

 
Fall just happens to be my favorite season.  I'm pretty sure it has to do with moving away from shorts (not that I wear them) and sleeveless tops to sweaters and boots.  And tomorrow, the high will only reach 66 degrees.  {That's downright chilly for south Texas.}

I wanted to ship some cookies to friends, friends I've never met, actually...namely a certain book editor and team. 

So, I went with a fall theme.  Original, right?

{PS...I really like photos of cookies from the side.  Bear with me; it's a weird little obsession I have.}

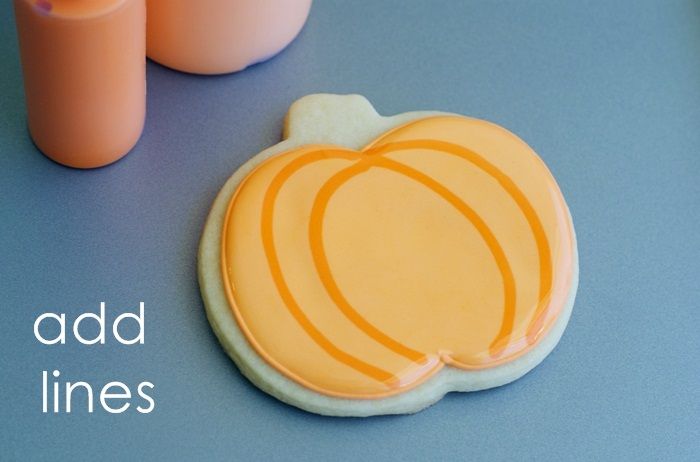
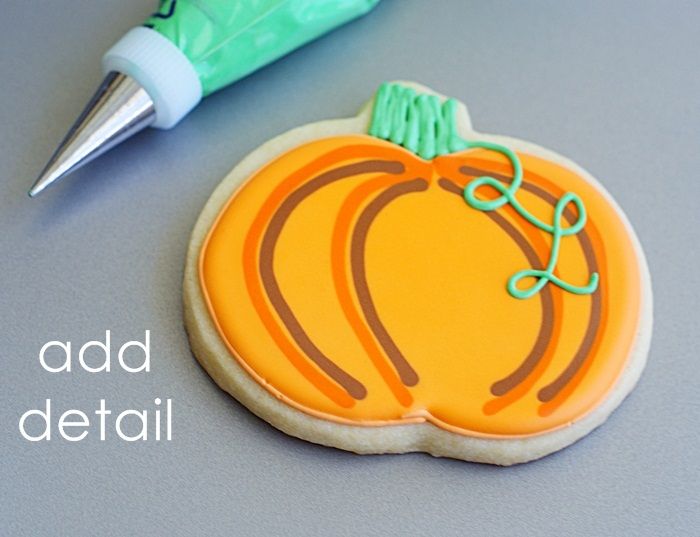
Both the pumpkins and the acorns are so easy to make...I'll show you the pumpkin how-to here.

To make the pumpkins, you'll need:

  • pumpkin-shaped sugar cookies
  • royal icing, tinted with AmeriColor orange, a darker orange (I used electric orange mixed with super red), chocolate brown and green
  • disposable icing bags
  • tips: #2 (and/or #1)
  • squeeze bottles
  • toothpicks
Use a #2 tip to outline the pumpkin shape in orange.

Thin the orange, darker orange and brown icings with water, a little at a time, until it is the consistency of thick syrup.  Cover with a damp dishtowel and let sit several minutes.

Stir gently with a rubber spatula to pop any large air bubbles that have formed. Transfer to squeeze bottles.

Working about 6 cookies at a time, fill (flood) the pumpkin with the thinned orange icing.  Use a toothpick to guide to edges and pop and large air bubbles that have formed.

Starting with the first cookie flooded, drop lines of the thinned darker orange icing on top of the wet orange icing to make the pumpkin "ridges."

Repeat the process with the thinned brown icing.

Let the cookies sit for at least 1 hour.

Use a #1 or #2 tip (I used a PME #1.5...right in the middle) to pipe on a stem and vine.  I like the stem piped rather than flooded to give it some texture.

Let dry 6-8 hours, or overnight. (Keep in mind that the colors will deepen as they dry.)

Package and mail to friends you've never met...
but hope to one day.

Wednesday, November 2, 2011

I got a little facelift...

Well, the blog did, not me personally. 

{Although with each passing year, I find myself more and more entranced by those Lifestyle Lift infomercials.}

The wonderfully creative Sharon from Redbud Designs is the master behind the new look.  I just love the blogs and cards she designs...and she is an absolute pleasure to work with!

One small addition you might notice in the header is the "savory" link in the navigation bar up top.  This is mainly for my benefit as I make things for dinner (no, we usually don't eat cookies for every meal) and then cannot remember where the recipe came from or how exactly I made it.  FEAR NOT, I know you are here for the sugar...so am I...those posts will not show up in your reader. Maybe if you're looking for something for lunch or dinner, you might click on over. (It's a work in progress right now, but a few yummy recipes are there.)

The main blog post area is BIGGER, which means BIGGER pictures...yay!  For right now, those older post pictures will look a little small...in between baking cookies, I'll be trying to update those.  

If you're reading this post in a reader or an email, click on over and take a peek at the new look!  I hope you love it as much as I do! ♥