Tuesday, August 3, 2010

Half Birthdays . . . Works for Me Wednesday

works for me wednesday at we are that family

Half-birthdays.  Do you celebrate them?

I don't know where my mom got the idea, but we always celebrated half-birthdays growing up. There weren't presents, but there was always cake. Half of a cake. Half of a Bundt cake.

{Once we were older and had moved out of the house, my parents always sent us HALF a birthday card.  That's right....chopped right in half!}

My half birthday fell during the school year, so I always felt so special bringing in that half cake.  Even though my mom baked, our half-birthday cake was always from the grocery store. (Or at least *mine* was. Molly, yours, too?) Remember the grocery store used to sell half Bundt cakes?

Kiddo's half-birthday was last week and even though I don't usually make Bundt cakes for his, I decided to go traditional this year.

Almond-Crusted Butter Cake
{recipe adapted from Lou Seibert Pappas}

1/2 c. slivered almonds
3 sticks unsalted butter, room temp. (plus more for pan)
1 lb. powdered sugar
6 eggs, room temp.
2 tsp. vanilla bean paste (or extract)
1/2 tsp. almond extract
1/2 tsp. coarse salt
2 and 3/4 c. cake flour
Preheat oven to 300.  Butter a Bundt pan and then evenly coat the sides with the almonds. 

In a large bowl, cream the butter until fluffy and light.  Gradually add the sugar, scraping the sides of the bowl as needed.  Beat until fluffy.

Add the eggs, one at a time, until incorporated. Scrape down the sides and bottom of bowl as needed.  Beat in the extracts and salt.

Add in the flour in 3 additions, beating until smooth. Spread evenly into prepared pan.

Bake for 1 hour and 15 minutes, or until a toothpick comes out clean.  Let the cake cool in the pan on a cooling rack for 15 minutes.  Invert the pan and remove the cake, right side up, and continue to cool completely on the cooling rack.

Serving suggestions:
  • with a scoop of chocolate ice cream
  • with fresh strawberries
  • alongside a cappuccino for breakfast! (my favorite)

Half-birthdays work for our family.  What's your "unique" family tradition?


Oh, I almost forgot!  If you are reading this through a reader, you may want to click on over.  There is a snazzy updated header and in the naviagation bar, you'll now be able to link to a "cookie index."  {The cookie index is a work in progress, but the link is there.}

And, once you click over, look up in the address bar.  See that, to the left of the www? It's my very own FAVICON!  That little thing  makes me feel so cool! {And it's very rare that I feel cool!}  Thank you, Jessica, of The Frilly Coconut for your design help and expertise!  You are a doll!

Friday, July 30, 2010

Frosted (JUMBO) Animal Cookies

{image from Mother's cookies}
When my friend, Teresa, from Blooming on Bainbridge mentioned that she loves Frosted Animal Cookies, a little light bulb went off in my head. 
{PS...if you've never visited Teresa's blog, go now...they say Disney World is the happiest place on earth; they're wrong.  It's Teresa's blog.}

Why not make my own *larger* version of them?

See, I love Mother's Frosted Animal Cookies.  When kiddo was a toddler, I lived on a diet of Mother's Frosted Animal Cookies and Vanilla Coke.  Then I weaned myself off of them and started my current diet of Starbucks Pumpkin Bread and Iced Decaf Vanilla Lattes.  Much healthier.

I didn't have all of the correct shapes for the cookies; I did have an elephant cutter, but the rest, well...I improvised.
We have frosted animal bunnies, ducks, giraffes....

....and the all-important frosted animal stegosaurus.

For the flavor, I wanted to be authentic. So, I checked a bag of Mother's Cookies to see what flavor they used to make them so delicious.  Vanilla? Almond? Lemon? Butter?  Turns out, what makes them so delicious is just plain ol' sugar. I couldn't find any flavoring in the ingredients whatsoever.
Or maybe it's the sprinkles.

So here is my not-so-authentic version:


Lemon Cut-Out Cookies
3 c. unbleached flour
2 tsp. baking powder
1 c. sugar
2 sticks salted butter
1 egg
1/2 tsp. vanilla
1/2 tsp. fresh lemon juice
3/4 tsp. grated lemon zest

Preheat oven to 350.

In a medium bowl, whisk together the flour and baking powder.  Set aside.

With the paddle attachment of an electric mixer, beat together the sugar and cold butter until fluffy.  Add in the egg, vanilla, lemon juice and zest.  Beat until combined.

On low speed, add in the flour mixture in 3 additions.  Scrape the bottom of the bowl as necessary.  Knead together the dough as needed by hand as it will be very stiff.

Roll out on a floured surface and cut into shapes about 3/8 to 1/4" thick.  Place on parchment lined sheets.  Freeze 5-10 minutes on the sheets before placing in the oven (this will help prevent cookies from spreading).

Bake 9-12 minutes, depending on cookie cutter size.  Transfer cookies to a cooling rack and let cool completely.

Lemon Royal Icing

4 TBSP meringue powder
scant 1/2 c. water
1 lb. powdered sugar
1/2 tsp light corn syrup
1 tsp. fresh lemon juice

Combine the meringue powder and water. With the paddle attachment of an electric mixer, beat until combined and foamy.

Sift in the powdered sugar and beat on low to combine.

Add in the corn syrup and lemon juice

Increase speed to med-high and beat for about 5-10 minutes, just until the icing is glossy and stiff peaks form. (You should be able to remove the beater from the mixer and hold up and jiggle without the peak falling.) Do not overbeat.
 
Cover with plastic wrap touching the icing or divide and color using gel paste food colorings. (I used AmeriColor Gel Paste Food Color in Bright White and Deep Pink.)

Remember last week when I visited my friend Cheryl from TidyMom? She wrote a great post about our visit.  Even though it was our first time to meet, I felt like I had known her for AGES!  We talked from the second I stepped off the plane until the second she dropped me back off at the airport.

Cheryl is just what she is on her blog....fun, funny, creative, smart, beautiful...I'm so  thrilled to be her friend.  She also has an adorable husband and 2 beautiful girls! (AND, her cupcakes are delicious!)
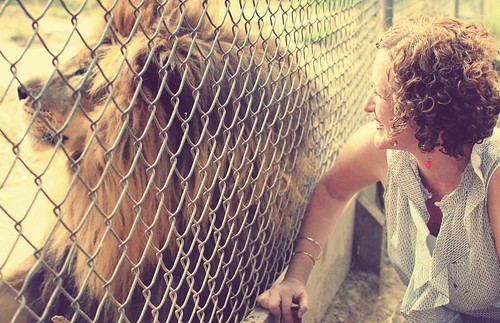
Oh yeah, I also bottle fed a 750-pound lion.

If you have a bloggy friend, I highly recommend making the effort to get together in REAL LIFE!

Wednesday, July 28, 2010

How to Package Cookies for Shipping . . . Works for Me Wednesday

works for me wednesday at we are that family


Have you ever wondered about the best way to package and ship decorated cookies?  In this VLOG post, I'll show you how.  

{And come see the World's Largest Bag of Packing Peanuts while you're there!}

Friday, July 23, 2010

Cookies for TidyMom, DIY Custom Sanding Sugar and How to Market Your Business without Really Trying

Longest.Post.Title.Ever.

I'm in Saint Louis!!!  You've heard me mention Cheryl of TidyMom here numerous times.  She's just the BEST....baking, crafting, photographing, TIDYING....she does it all.

I think Mr. E was wondering if she actually existed, so he gave me a ticket to actually meet her in REAL LIFE!

Here we are yesterday.  (Yes, I do have eyes, they just don't want to show themselves in this picture.)  I'm having the best time getting to visit with Cheryl and meet her adorable family.  If you have a bloggy friend, I highly recommend getting together in person!!! I am LOVING this visit!

So, the cookies.  I'm going to admit I'm not thrilled with them.  Cheryl is working on a blog redesign and wait until you see it.  It's fresh and bright and modern...and I wanted to make her cookies that captured that look.

I'm not sure I succeeded.

The inspiration for these comes from Decadent Cookie Favours which were featured on Sweetopia last week. (They do them much better.)

One reason, I can't pipe straight diagonal lines.  When will I learn my lesson?

BUT....I did try something new that worked!  Making custom sanding sugar!!!  Here's how easy it is...

Mix plain sanding sugar with a bit of AmeriColor Gel Paste Food Color . Shake and stir until blended.  Voila!

Now, How to Market Your Business Without Really Trying....

I was on the airplane to St. Louis and, for the first time ever, I actually had a laptop to use.  I was feeling pretty darn cool.  Had the row to myself, got out my computer and started editing the pictures of these cookies...
....that I almost didn't bring because they didn't turn out like I wanted. 

As we're taxing to the gate, the man diagonally behind me said, "Excuse me....those cookie pictures you had on your computer....do you make those? Do you have a card?"

Then the lady across the aisle said she wanted one, too.  The the guy BEHIND me asked for one!!!

Lesson learned...you can be shy and market your business...just have your computer open to your pictures.

Lesson learned 2...NEVER look at anything personal on your laptop on an airplane.  Apparently, EVERYONE is watching!

Tuesday, July 20, 2010

Easy Peanut Butter-Banana Scones and a Giveaway . . . Works for Me Wednesday

works for me wednesday at we are that family
Giveaways work for for me. Baking from pantry items works for me, too.  So today, we have both!  Yay!

First, let's start with the scones.  I love these because I typically have all of the ingredients on hand.  I think they're best at room temperature, so they are perfect to pop in a lunch box or for an afternoon snack. Or, for breaking off a piece as you walk by them in the kitchen. ;)

Peanut Butter-Banana Scones
{adapted from Maureen Cole and Family Fun Magazine}

3 c. unbleached, all-purpose flour
1/2 c. packed brown sugar
2 tsp. baking powder
3/4 tsp coarse salt
3/4 c. peanut butter
2 eggs
1 tsp. vanilla
3/4 c. evaporated milk, plus more for brushing the tops
1 c. (about 2 ) chopped bananas

Line a baking sheet with parchment paper.  Preheat oven to 375.

Whisk together the flour, sugar, baking powder and salt until thoroughly combined.

In a large bowl, beat together peanut butter, eggs, vanilla, and evaporated milk until evenly blended.

Add the flour mixture and stir just until combined.  Stir in the bananas.

Turn the dough out onto a floured surface and knead it twice.  Pat it into a 1-inch thick disc.

Using a 2 and 1/2 inch cutter, cut into rounds.  Pat scraps together and re-roll.  (Makes about 12.)  Transfer to prepared baking sheet.

Brush the tops with evaporated milk.  Bake 20 minutes.  Transfer to a cooling rack and let cool completely.
 
{Sometimes the mess looks pretty to me...that's weird, right?}

Serve with strawberry jelly for a peanut butter and jelly scone OR marshmallow creme (fluff) for a fluffer nutter scone. (Oh, it's so good!)

{It occurred to me AFTER we ate all of them that these would be really good with a peanut butter glaze. Someone want to try it?}

Now to the giveaway....

You may have noticed Sweet Cuppin Cakes over in the sidebar.  They are a sweet little sweet shop that ships WORLDWIDE!  Worldwide, people!  This is so exciting! They've also been featured in Parent & Kraft magazines.
One thing love about this shop is that the owner has a real heart and heads up Bake up Awareness for Autism.  As a matter of fact, you can help by hosting a bake sale on October 15 2010....all proceeds will go to Bake Up Awareness Autism Foundation to be donated for research in the immune testing of those with Autism.
{If anyone is hosting one in Houston, please let me know.}

Sweet Cuppin Cakes is giving away one of these adorable Cakewich cake pans!!!  How FUN are these?!?  I'm thinking a peanut butter pound cake filled with peanut butter buttercream and strawberry filling.  What about you?

To enter...
  • visit Sweet Cuppin Cakes and leave a comment here with what else from the shop you'd love to try,
  • for an extra entry, tweet about the giveaway using @bakeat350tweets and leave a separate comment.
Giveaway open until 8pm CST, Sunday (July 25th).  Good luck!

Monday, July 19, 2010

Christmas in July


I love giving homemade gifts for the holidays.  Here's the problem...I typically think of it, oh, around December 15th. 

The gals at A Southern Fairytale, According to Kelly and Skip to my Lou are hosting a Holiday Bake Craft and Sew Along.  Starting today, click over to each blog for handmade and homemade Christmas and holiday ideas.

A Southern Fairytale will be hosting the baking section (you'll find me there today)!
According to Kelly has the crafting ideas,
and Skip to my Lou will have sewing gifts!

I can't and am so happy to be a part of this! I'm making my list of homemade gifts.  How about you?

Friday, July 16, 2010

Electrolux #splits : Dastardly Mash Banana Splits

I'm so pleased to be joining Eletrolux and FoodBuzz again in support of the Ovarian Cancer Research Fund!  Remember when you could vote for or make a cake in Kelly's Cakery and Electrolux would donate $1 to the OCRF?

Well, they're at it again...this time with banana splits!  For every banana split you create, Electrolux will donate $1 to the OCRF.


FoodBuzz has joined in as well.  For every FoodBuzz featured publisher who posts about banana splits, FoodBuzz will donate $50 to the OCRF!!!

Now, let me tell you about our banana splits!  Since my dad is visiting, I decided to make his favorite ice cream from Ben & Jerry...Dastardly Mash.  Although it's a discontinued flavor, it lives on in the "Flavor Graveyard" (love that!) and Ben & Jerry's Homemade Ice Cream & Dessert Book!

Before you look at the recipe and say "Ew....raisins!" like I did every time my dad ate it, can I tell you a secret? It's AWESOME!  I am not a raisin-lover, but the combo here is delicious.  You really don't taste raisins so much as they add a little "chewy" texture.  Trust me?

Dastardly Mash
{adapted from Ben & Jerry's Homemade Ice Cream & Dessert Book}

1/2 c. raisins
1 c. water
1/2 c. pecan halves
1/2 c. whole, roasted, salted almonds
1/2 c. chocolate chips, semisweet
2 oz. unsweetened chocolate, chopped
1/3 c. dutch-process cocoa (or natural)
1 and 1/2 c. milk
1 c. sugar
2 eggs (pasteurized if you're a worrier)
1 c. heavy cream
1 tsp. vanilla

Soak the raisins in the water in the refrigerator.  (This can also be done the night before.)

Combine the pecans, almonds and chocolate chips. Place in the refrigerator.

Melt the unsweetened chocolate in a bowl over simmering (not boiling) water.  Whisk in the cocoa.  This may lump up in your whisk.  It's ok. Whisk on the milk, a little at a time...this will dissolve the cocoa....heat until blended.  Remove from heat and let cool.

In a large bowl, whisk the eggs until light and fluffy, 1-2 minutes.  Gradually whisk in the sugar, then  whisk 1 minute more.  Whisk in the cream and vanilla.  Add in and whisk the chocolate mixture.

Cover and refrigerate 1-3 hours. 

Transfer the mixture to an ice cream maker and freeze following the maker's instructions.

Meanwhile, drain the raisins and add them to the nut mixture.

Two minutes before the freezing cycle is over, add the raisin/nut/chip mixture.  Once completed, transfer to a freezer-safe container, press plastic wrap on top, cover and freeze to harder ice cream.


For the banana splits

Whip cream with a little sugar.  Slice bananas.  Scoop ice cream into dishes.  Surround with banana slices. Top with a dollop of whipped cream and a maraschino cherry.  Ta-da!

Now....go make your OWN banana split and help Electrolux raise money for the Ovarian Cancer Research Fund.  Do it for your mom, your nana, aunt, sister, daughter...yourself.  Don't make me get bossy! ;)


I love Electrolux's commitment to the OCRF, I love being a part of Foodbuzz and I love ice cream.  Yep, I'm linking this up at TidyMom's I'm Lovin' It party!