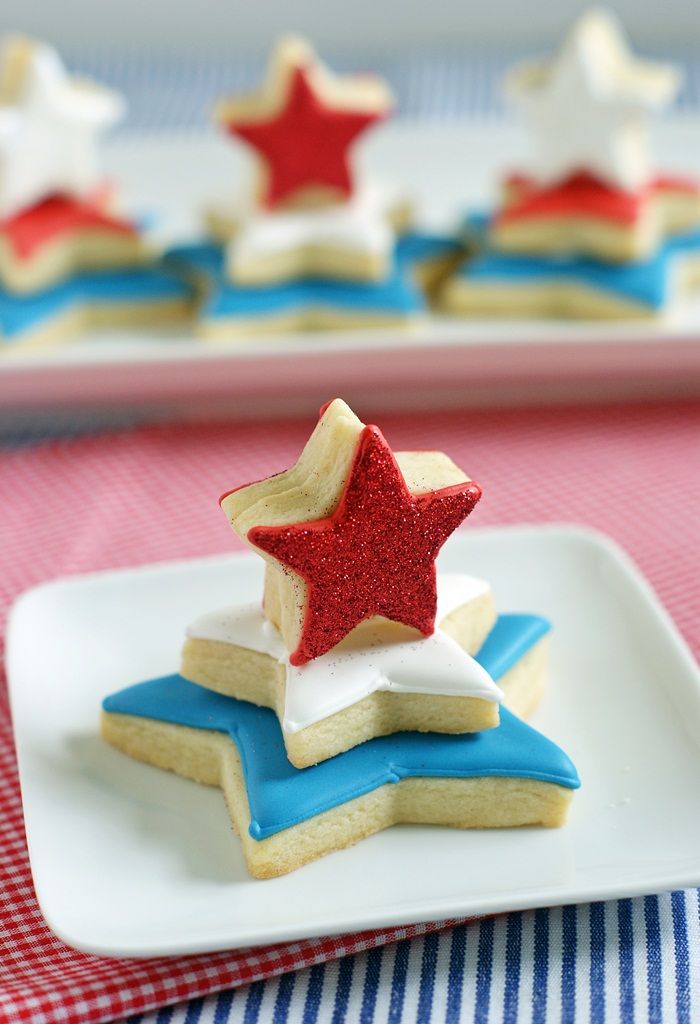
When cookie wizard Callye of The Sweet Adventures of Sugar Belle challenged a group of us to come up with a project using a simple star cutter, my mind went, well, two places. ONE, to the set of graduated star cutters I had on hand, and TWO, to beautiful cookie "cakes," like these from Sweetopia.

Let's get started. You'll need:
- star-shaped cookies, in 3 sizes
- royal icing, tinted with AmeriColor Royal Blue (or Navy Blue...I mixed mine together), Super Red and Bright White
- couplers and tips (#2 or 3)
- disposable icing bags
- squeeze bottles
- toothpicks
- meringue powder
- small paintbrush
- disco dust, red or rainbow (white)
Use a #2 or #3 tip to outline the cookies. Reserve some white piping consistency icing and store in the refrigerator until the next day.

Stir gently with a silicone spatula to pop and large air bubbles that have formed. Pour into squeeze bottles.
Fill in the outlines with the thinned icing. Use a toothpick to guide to edges and pop large air bubbles.
Let the cookies dry uncovered 6-8 hours, or overnight.

{I apply this dry. I find it easier to work with a dry cookie than one with wet icing sliding all around. Feel free to do what works best for you.}
Apply royal icing to the back of the medium-sized cookie. Press this onto the top of the larger cookie and let set 30 minutes.

Apply a bit of royal icing to the bottom tips of the small star sets. Press onto the cookie towers. Let the cookies dry 30 minutes.

There you have it...cookie towers! Easy, right?

Now. Go you must (thought I'd throw in a little Yoda for no reason) to the other girls getting their STAR on today...

- Strawberry Shortcake on a Stick, The Decorated Cookie
- Patriotic Lace Cookies , My Little Bakery
- Independence Day Parade Cookies, Jill FCS
- Old Fashioned 4th of July, Vicki’s Sweet Treats
- Light up the Fourth Cookies, The Partiologist
- Declaration of Independence Cookie, Vanilla Bean Baker
- Badge of Liberty Cookies, Lila Loa
- Red, White & Blue Star Cookie Towers, Bake at 350 (you're here!)
- 4th of July Firecracker Cookies, Klickitat Street
- Star Cut-out Cookies, Glorious Treats
- Cookie "Pledge", Lizy B Bakes
- Star-Shaped Krispie Treats, Cookies and Cups
- Easy Star Cupcake Toppers, Confessions of a Cookbook Queen
- Rustic 4th of July Galletes, Haniela's
- Patriotic Cookie Wreath, Sweetopia
- Patriotic River Rafter, Ali-Bee's Bake Shop
- Funny Fox Cookies, The Bearfoot Baker
- Quilted Cookie Stars, Cookie Crazie
- Gimme Your John Hancock Stars, Life's a Batch
- Patriotic Cookie Stir Sticks, The Cookie Artisan
- Patriotic Floral Stars, SweetSugarBelle
No comments:
Post a Comment